Nessus Installation
Nessus is known as one of the world's most popular vulnerability scanners. More than 75,000 organizations worldwide use it. It provides complete computer vulnerability scanning services and continuously updates its vulnerability database.
The following methods correspond to different system scenarios.
Software packages referenced in this article:
https://www.123pan.com/s/LPX9-xYC5v.html

Extraction code: frmo
Method 1: One-Command Docker Setup
Recommended for server environments.
Project Address
https://github.com/elliot-bia/nessus
Usage
The most recent update was four days ago, which makes this a pretty good community project.
docker run -itd --name=ramisec_nessus -p 8834:8834 ramisec/nessus (only 497 MB) is all it takes. However, the next command is needed to update plugins. If you want to keep data, create the ~/nessus_data directory first.
Update
docker exec -it ramisec_nessus /bin/bash /nessus/update.shThis step requires patience. In a server environment, everything should go smoothly.
That is it. Visit https://127.0.0.1:8834/ again. Two commands solve the setup.
The author says the username and password are an Easter egg and should not be published, so here is an alternative method.

Enter the Docker container command line:
docker exec -it ramisec_nessus bashRun the following commands in order:
# Enter this directory
cd  /opt/nessus/sbin
# List login users
nessuscli  lsuser
# Change the password for a specified user, using admin as the example
nessuscli  chpasswd admin
This method is suitable for server environments and is quick and convenient.
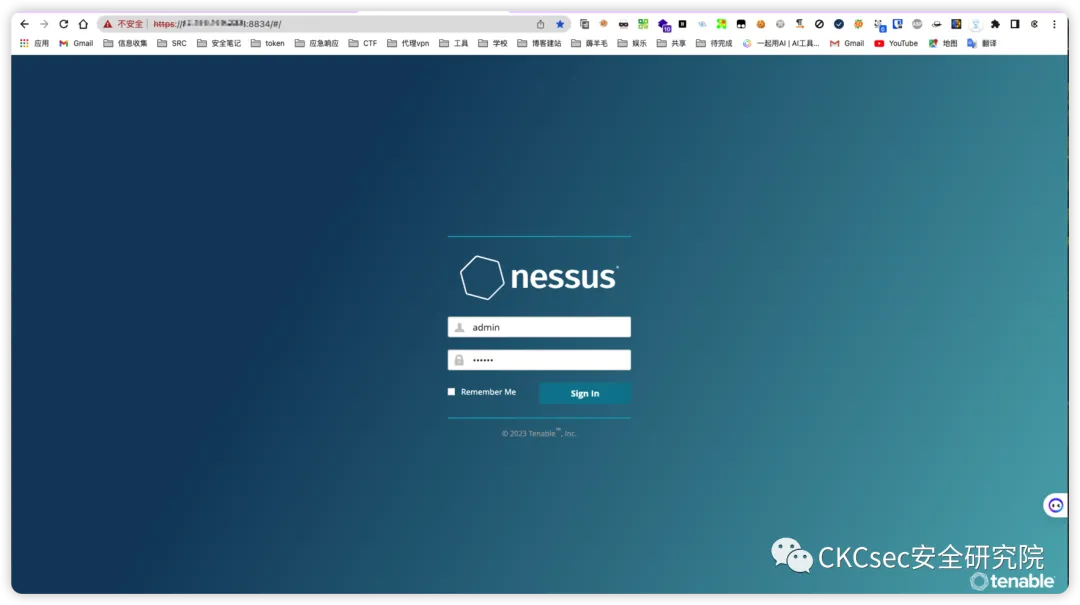
On the M1 architecture, this Docker image cannot start normally because of architecture issues.
Method 2: One-Click Installer
Tested as usable with the 20221007 plugins.
Windows
On Windows 10, it succeeded on the first try. On Windows 11, scanning worked normally after loading three times. Other versions were not tested.
Run Nessus-10.3.1-x64.msi.
After installation, the browser opens automatically.
In the browser, select Managed Scanner > tenable.sc, then enter the account and password to register.
Run _crack.bat as administrator. After the terminal opens, press Enter to confirm; do not keep waiting.
Then visit https://localhost:11123/.
Wait patiently for plugin compilation to complete. After compilation finishes, the backend can be accessed.
Linux
Ubuntu is recommended on Linux. However, the currently stable activation is only version 8.15.6. Version 10.x is less stable and can have various unpredictable issues.
Run the script to automatically complete package download, plugin package download, activation, and related steps.
bash Nessus_install_LINUX.shThe following steps are almost the same as on Windows.
Visit:
https://localhost:11127/
In the browser, select Managed Scanner > tenable.sc, then enter the account and password to register.
Then wait for plugin compilation, which also takes a long time. After logging in, it is ready to use.
Method 3: M1 Local Deployment Script
Double-click the DMG package to install normally, then visit https://127.0.0.1:8834/ and complete the related settings. Details are not repeated here.
The related settings are lengthy and have been packaged into the archive. The download link is provided at the beginning of the article.
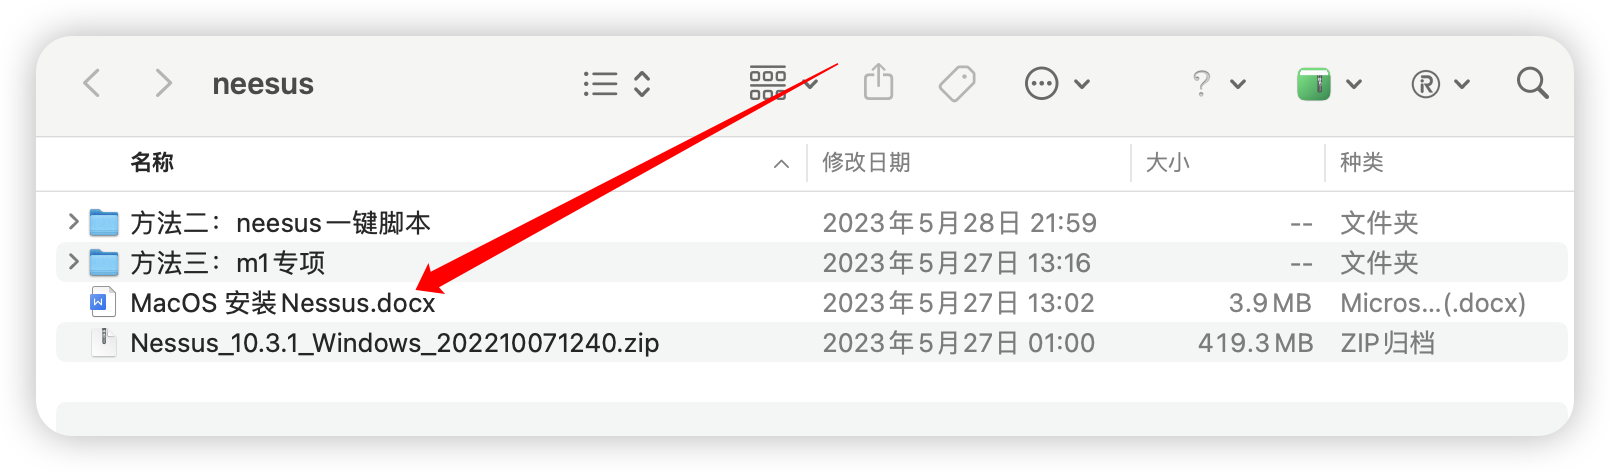
After the settings are complete, start enabling the scanning module.
# Grant permissions
chmod 755 ./install_mac1.sh
chmod 755 ./install_mac2.sh
chmod 755 ./install_mac3.sh
# Download plugin package
./install_mac1.sh
# Generate signature database files and shortcut
./install_mac2.sh
After copying and replacing the signature database file inside the shortcut, run the third script.
# Start compiling the signature database
./install_mac3.sh
Automatic Chinese Report Generation
Because Nessus is a foreign vulnerability scanner, the generated vulnerability scan report is only available in English.
For delivery reports, it needs to be converted into Chinese before delivery.
The related scripts and usage instructions are packaged together.
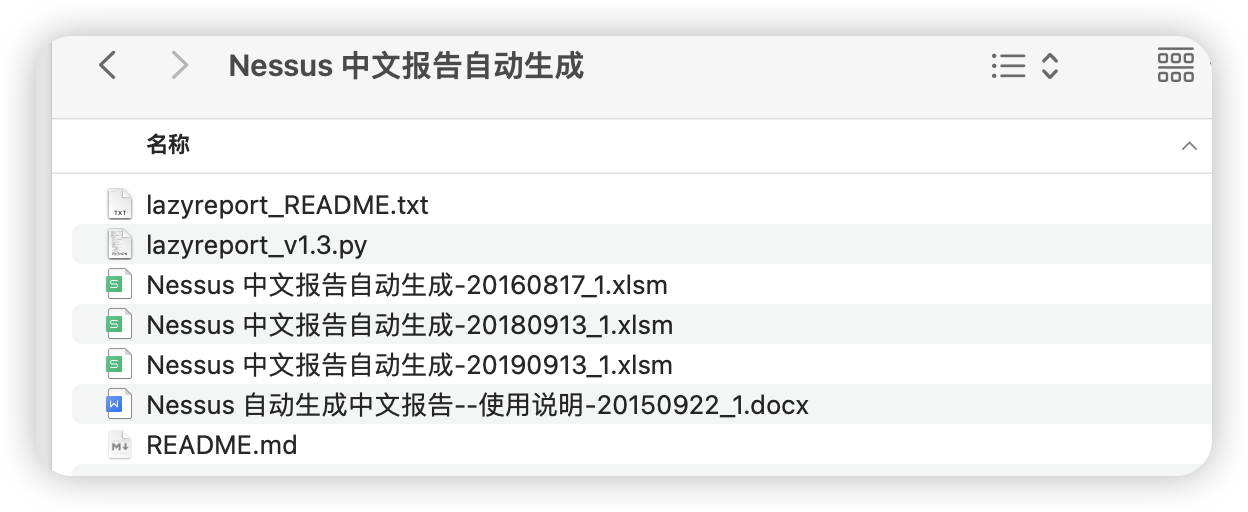
https://www.123pan.com/s/LPX9-2tD5v.html

Extraction code: 3wuN
A script is needed to implement automatic conversion.
python3 lazyreport_v1.3.py --autoThe script source code is as follows.
# encoding:utf-8
import hashlib, hmac, json, os, sys,re,time,requests,xlwt,zipfile,shutil,getopt
from datetime import datetime
from lxml import etree
# 漏洞信息
vuldata=[]# 漏洞信息缓存
auroranames=[] #极光自动化文件名缓存
nessusnames=[] #nessus自动话文件名缓存

# config 配置项
# 腾讯翻译api配置
tencent_secret_id = "AKID1pNfhTbDRP7YicNjw96mBKDqCHNv4CwP"
tencent_secret_key = "0jCPM3KQzIK5brrgOTSPF1jHZaR7iCdt"
# 百度翻译api配置
baidu_appid="201911060003536350"
baidu_key="efCw9wQrNbV6nGvvWGBy"


def md5(str): #md5 散列
    m = hashlib.md5()
    m.update(str.encode("utf8"))
    return m.hexdigest()

def tencent_translation(englishtext):  #英翻汉翻译 腾讯每月500w免费翻译额度
    # translateurl='https://tmt.tencentcloudapi.com/'#文本翻译url请求地址

    payload={
        "ProjectId":0,
        "Source":'en',
        "SourceText":'', #需要翻译的文本
        "Target":'zh',
    }
    payload['SourceText']=englishtext # 传入查询文本
    service = "tmt" #文本翻译url服务
    host = "tmt.tencentcloudapi.com" #文本翻译url请求地址
    endpoint = "https://" + host
    region = "ap-chongqing"
    action = "TextTranslate"
    version = "2018-03-21"
    algorithm = "TC3-HMAC-SHA256"
    timestamp = int(time.time())
    date = datetime.utcfromtimestamp(timestamp).strftime("%Y-%m-%d")
    # ************* 步骤 1:拼接规范请求串 *************
    http_request_method = "POST"
    canonical_uri = "/"
    canonical_querystring = ""
    ct = "application/json; charset=utf-8"
    payload = json.dumps(payload)
    canonical_headers = "content-type:%s\nhost:%s\n" % (ct, host)
    signed_headers = "content-type;host"
    hashed_request_payload = hashlib.sha256(payload.encode("utf-8")).hexdigest()
    canonical_request = (http_request_method + "\n" +
                        canonical_uri + "\n" +
                        canonical_querystring + "\n" +
                        canonical_headers + "\n" +
                        signed_headers + "\n" +
                        hashed_request_payload)
    # ************* 步骤 2:拼接待签名字符串 *************
    credential_scope = date + "/" + service + "/" + "tc3_request"
    hashed_canonical_request = hashlib.sha256(canonical_request.encode("utf-8")).hexdigest()
    string_to_sign = (algorithm + "\n" +
                    str(timestamp) + "\n" +
                    credential_scope + "\n" +
                    hashed_canonical_request)
    # ************* 步骤 3:计算签名 *************
    # 计算签名摘要函数
    def sign(key, msg):
        return hmac.new(key, msg.encode("utf-8"), hashlib.sha256).digest()
    secret_date = sign(("TC3" + tencent_secret_key).encode("utf-8"), date)
    secret_service = sign(secret_date, service)
    secret_signing = sign(secret_service, "tc3_request")
    signature = hmac.new(secret_signing, string_to_sign.encode("utf-8"), hashlib.sha256).hexdigest()
    # ************* 步骤 4:拼接 Authorization *************
    authorization = (algorithm + " " +
                    "Credential=" + tencent_secret_id + "/" + credential_scope + ", " +
                    "SignedHeaders=" + signed_headers + ", " +
                    "Signature=" + signature)
    headers={
        "Authorization":authorization,
        "Content-Type": "application/json; charset=utf-8",
        "Host":host,
        "X-TC-Action":action,
        "X-TC-Timestamp":str(timestamp),
        "X-TC-Version":version,
        "X-TC-Region":region
    }
    try:
        html=requests.post(url=endpoint,data=payload,headers=headers)
        time.sleep(0.3)
        return html.json()['Response']['TargetText']
    except:
        return False

def baidu_translation(englishtext): #英翻汉翻译 百度每月200w免费翻译额度
    translateurl='http://api.fanyi.baidu.com/api/trans/vip/translate' #通用翻译url请求地址
    payload={
        "q":'',
        "key":baidu_key,
        "from":'en',
        "to":'zh',
        "appid":baidu_appid,
        "salt":'135798642',
        "sign":''
    }
    payload['q']=englishtext #查询译文
    payload['sign']=md5(payload['appid']+payload['q']+payload['salt']+payload['key'])# md5(appid+q+salt+密钥)

    try:
        html=requests.get(url=translateurl,params=payload)
        time.sleep(1) # 接口限制 ,一秒钟只能访问一次
        return html.json()['trans_result'][0]['dst']
    except:
        return False

def auto_translation(englishtext): #自动选择翻译api
    chinesetext=tencent_translation(englishtext)
    if chinesetext!=False:
        return chinesetext
    chinesetext=baidu_translation(englishtext)
    if chinesetext!=False:
        return chinesetext
    return englishtext

def getnessus(initname): #得到nessus html扫描报告 模板数据
    htmltext=open(initname,'r',encoding='utf-8').read()
    html=etree.HTML(htmltext)
    vultype=html.xpath('//*[@id="report"]/div[3]/ul/li/a/text()')[0]
    if 'Vulnerabilities by Plugin' not in vultype:
        print('Nessus 报告模板非plugin模板,请检查文件模板')
        return
    vulscolor=['#d43f3','#ee9336','#fdc431'] #严重 高危,中危
    valid=['SSL Certificate Cannot Be Trusted','SSL Self-Signed Certificate']
    tempvuls=html.xpath('//*[@id="report"]/div[3]/ul/li/ul/li/@style')
    linkvuls=html.xpath('//*[@id="report"]/div[3]/ul/li/ul/li/a/@href')
    vulnames=[]
    levels=[]
    descripts=[]
    solves=[]
    ips=[]
    ports=[]
    for i in range(len(tempvuls)):
        if valid[0] in html.xpath('//*[@id="'+str(linkvuls[i][1:])+'"]/text()')[0]:
            continue
        if valid[1] in html.xpath('//*[@id="'+str(linkvuls[i][1:])+'"]/text()')[0]:
            continue
        if vulscolor[0] in tempvuls[i]:#严重
            vulnames.append(auto_translation(html.xpath('//*[@id="'+str(linkvuls[i][1:])+'"]/text()')[0]))
            levels.append('严重')
        if vulscolor[1] in tempvuls[i]:#高危
            vulnames.append(auto_translation(html.xpath('//*[@id="'+str(linkvuls[i][1:])+'"]/text()')[0]))
            levels.append('高危')
        if vulscolor[2] in tempvuls[i]:#中危
            vulnames.append(auto_translation(html.xpath('//*[@id="'+str(linkvuls[i][1:])+'"]/text()')[0]))
            levels.append('中危')
        if vulscolor[0] in tempvuls[i] or vulscolor[1] in tempvuls[i] or vulscolor[2] in tempvuls[i]:
            print('收集漏洞信息:'+html.xpath('//*[@id="'+str(linkvuls[i][1:])+'"]/text()')[0])
            tempdescripts=''
            descript=html.xpath('//*[@id="'+str(linkvuls[i][1:])+'-container"]/div[4]/text()')
            tempdescripts=auto_translation(tempdescripts.join(descript))
            descripts.append(tempdescripts)

            tempsolves=''
            sol_i = 5
            while (sol_i < 10):
                solve_tmp = html.xpath('//*[@id="' + str(linkvuls[i][1:]) + '-container"]/div[{0}]/text()'.format(sol_i))
                sol_i += 1
                if solve_tmp[0].lower() == 'solution':
                    break
            solve=html.xpath('//*[@id="'+str(linkvuls[i][1:])+'-container"]/div[{0}]/text()'.format(sol_i))
            tempsolves=auto_translation(tempsolves.join(solve))
            solves.append(tempsolves)

            tempips='\n'
            tempport='\n'
            ip=html.xpath('//*[@id="'+str(linkvuls[i][1:])+'-container"]//h2/text()')
            port=[re.findall(r'(?:/)\d+',tip)[0][1:] for tip in ip]
            tempport=tempport.join(list(set(port)))
            ports.append(tempport)

            ip=[re.findall( r'[0-9]+(?:\.[0-9]+){3}',tip)[0] for tip in ip]
            tempips=tempips.join(list(set(ip)))
            ips.append(tempips)

    for i in range(len(vulnames)):
        vuldata.append([levels[i],vulnames[i],ips[i],ports[i],descripts[i].replace('\n','').replace('\t',';'),solves[i].replace('\n','').replace('\t',';')])

def getaurora(initname): # 综述模板、主机模板均要勾选 得到绿盟极光 RASA html扫描报告 模板数据
    htmlname=initname+'/index.html'
    htmltext=open(htmlname,'r',encoding='utf-8').read()
    html=etree.HTML(htmltext)
    # 判断中危,高危共多少条
    levels=html.xpath('//*[@id="vuln_distribution"]/tbody/tr/@class') #漏洞等级
    levels=[x for x in levels if x=='even vuln_high' or x=='odd vuln_high' or x=='even vuln_middle' or x=='odd vuln_middle']
    vulnames=html.xpath('//*[@id="vuln_distribution"]/tbody/tr/td[2]/span/text()')#漏洞名
    descripts=html.xpath('//*[@id="vuln_distribution"]/tbody/tr/td[1]/table/tr[2]/td/text()') #描述
    solves=html.xpath('//*[@id="vuln_distribution"]/tbody/tr/td[1]/table/tr[3]/td/text()') #解决

    weakpwd=html.xpath('//*[@id="content"]/div[12]/div[2]/table/tr')
    if(len(weakpwd)!=0):
        print('存在脆弱账号信息!')
        for i in range(2,len(weakpwd)+1):
            td1=html.xpath('//*[@id="content"]/div[12]/div[2]/table/tr['+str(i)+']/td[1]/a/text()')[0]
            td2=html.xpath('//*[@id="content"]/div[12]/div[2]/table/tr['+str(i)+']/td[2]/text()')[0]
            td3=html.xpath('//*[@id="content"]/div[12]/div[2]/table/tr['+str(i)+']/td[3]/text()')[0].strip()
            td4=html.xpath('//*[@id="content"]/div[12]/div[2]/table/tr['+str(i)+']/td[4]/text()')[0]
            vuldata.append(["高危",td4+"服务存在脆弱账号",td1,"00000","账号密码:"+td2+'/'+td3,"建议修改为符合强密码策略的密码,若非必要则禁用该账户!"])

    for i in range(len(levels)):
        print('收集漏洞信息:'+vulnames[i])
        serials=i+1
        level='高危'
        if levels[i]=='even vuln_high' or levels[i]=='odd vuln_high':
            level='高危'
        else:
            level='中危'
        tempips=html.xpath('//*[@id="vuln_distribution"]/tbody/tr['+str(2*serials)+']/td[1]/table/tr[1]/td/a/text()') #ip
        tempips.pop()
        ips=''
        tempports=''
        for ip in tempips:
            ips=ips+'\n'+ip
            with open(initname+'/host/'+ip+'.html','r',encoding='utf-8') as f:
                hosthtml=etree.HTML(f.read())
                portcount=len(hosthtml.xpath('//*[@id="vuln_list"]/tbody/tr')) #影响主机端口总数量
                for j in range(portcount):
                    vuls=hosthtml.xpath('//*[@id="vuln_list"]/tbody/tr['+str(j+1)+']/td[4]/ul/li/div/span/text()')
                    if vulnames[i] in vuls:
                        tempport=hosthtml.xpath('//*[@id="vuln_list"]/tbody/tr['+str(j+1)+']/td[1]/text()')[0]
                        tempports=tempports+','+tempport
        ips=ips[1:]
        tempports=list(set(tempports[1:].split(',')))
        ports=''
        for port in tempports:
            ports=ports+'\n'+port
        ports=ports[1:]
        vuldata.append([level,vulnames[i],ips,ports,descripts[i].replace('\n','').replace('\t',';'),solves[i].replace('\n','').replace('\t',';')])

def excelreport(outfilename): #生成excel模板
    wb=xlwt.Workbook()
    ws=wb.add_sheet('漏洞信息')
    # title设置
    titlestyle = xlwt.XFStyle()
    # 设置字体
    titlefont = xlwt.Font()
    titlefont.name='SimSun'
    titlefont.height=20*11
    titlestyle.font = titlefont
    # 标题单元格对齐方式
    titlealignment = xlwt.Alignment()
    # 水平对齐方式和垂直对齐方式
    titlealignment.horz = xlwt.Alignment.HORZ_CENTER
    titlealignment.vert = xlwt.Alignment.VERT_CENTER
    # 自动换行
    titlealignment.wrap = 1
    titlestyle.alignment = titlealignment
    # 单元格背景设置
    titlepattern = xlwt.Pattern()
    titlepattern.pattern = xlwt.Pattern.SOLID_PATTERN
    titlepattern.pattern_fore_colour = xlwt.Style.colour_map['sky_blue'] # 设置单元格背景颜色为蓝
    titlestyle.pattern = titlepattern
    # 单元格边框
    titileborders = xlwt.Borders()
    titileborders.left = 1
    titileborders.right = 1
    titileborders.top = 1
    titileborders.bottom = 1
    titileborders.left_colour = 0x40
    titlestyle.borders=titileborders
    # 设置标题
    ws.write(0, 0, '序号',titlestyle)
    ws.write(0, 1, '危险程度',titlestyle)
    ws.write(0, 2, '漏洞名称',titlestyle)
    ws.write(0, 3, '影响IP',titlestyle)
    ws.write(0, 4, '端口',titlestyle)
    ws.write(0, 5, '漏洞描述',titlestyle)
    ws.write(0, 6, '整改建议',titlestyle)
    # 设置列高度
    ws.row(0).height_mismatch = True
    ws.row(0).height= int(20 * 40 )
    # 设置列宽度
    ws.col(0).width = int(256 * 8)
    ws.col(1).width = int(256 * 10)
    ws.col(2).width = int(256 * 46)
    ws.col(3).width = int(256 * 17)
    ws.col(4).width = int(256 * 9)
    ws.col(5).width = int(256 * 61)
    ws.col(6).width = int(256 * 76)


    contentstyle=xlwt.XFStyle()
    contentalignment = xlwt.Alignment()
    contentalignment.wrap = 1
    # 水平对齐方式和垂直对齐方式
    contentalignment.horz = xlwt.Alignment.HORZ_CENTER
    contentalignment.vert = xlwt.Alignment.VERT_CENTER
    contentstyle.alignment=contentalignment

    # 写入数据
    for i in range(len(vuldata)):
        serials=i+1
        ws.write(serials, 0, str(serials),contentstyle)
        ws.write(serials, 1, vuldata[i][0],contentstyle)
        ws.write(serials, 2, vuldata[i][1],contentstyle)
        ws.write(serials, 3, vuldata[i][2],contentstyle)
        ws.write(serials, 4, vuldata[i][3],contentstyle)
        ws.write(serials, 5, vuldata[i][4],contentstyle)
        ws.write(serials, 6, vuldata[i][5],contentstyle)
    # 保存excel文件
    wb.save('./'+outfilename+'-漏洞扫描信息汇总.xls')
    pass

def unzip(filename): #解压zip文件,并检查时候是目标文件夹,如果是则返回文件名,否则不返回
    zfile=zipfile.ZipFile(filename,'r')
    for afile in zfile.namelist():
        zfile.extract(afile,filename[:-4])
    files=os.listdir(filename[:-4])
    # 检查主机报表部分
    if 'host' not in files:
        shutil.rmtree(filename[:-4])
        return False
    # 检查综述报表部分
    if 'index.html' not in files:
        shutil.rmtree(filename[:-4])
        return False
    zfile.close()
    return filename[:-4]

def checkfile():#检查当前目录下所有文件
    print('检查目录文件')
    files=os.listdir('.')
    for afile in files:
        ext=afile.split('.')[-1]
        # 判定 aurora 报告内容
        if(ext=='zip'):
            aurora=unzip(afile)#解压文件到当前目录
            if aurora is not False:
                auroranames.append(aurora)
        # 判定 nessus 报告内容
        if(ext=='html'):
            htmltext=open(afile,'r',encoding='utf-8').read()
            html=etree.HTML(htmltext)
            vultype=html.xpath('//*[@id="report"]/div[3]/ul/li/a/text()')[0]
            if 'Vulnerabilities by Plugin' in vultype:
                nessusnames.append(afile)

def showlogo():#展示logo,说明参数
    reportlogo="\n\n\n"
    reportlogo+=("\t    __                           ____                                  __ \n")
    reportlogo+=("\t   / /   ____ _ ____   __  __   / __ \  ___     ____   ____    _____  / /_\n")
    reportlogo+=("\t  / /   / __ `//_  /  / / / /  / /_/ / / _ \   / __ \ / __ \  / ___/ / __/\n")
    reportlogo+=("\t / /___/ /_/ /  / /_ / /_/ /  / _, _/ /  __/  / /_/ // /_/ / / /    / /_  \n")
    reportlogo+=("\t/_____/\__,_/  /___/ \__, /  /_/ |_|  \___/  / .___/ \____/ /_/     \__/  \n")
    reportlogo+=("\t                    /____/                  /_/                           \n")
    reporthelp="\n\n\tlazyreport help:\n\t-a --afile\t绿盟极光导出zip文件名\n\t-n --nfile\tnessus扫描文件plugin导出文件名\n\t-h\t\t帮助\n\t   --auto\t自动化检查当前目录所有文件及压缩包并生成报告\n\n"

    return reportlogo + reporthelp

def manual(argv):
    aurorafile = ''
    nessusfile = ''
    try:
        opts, args = getopt.getopt(argv,"ha:n:",["afile=","nfile="])
    except getopt.GetoptError:
        print('lazyreport.py -a <aurorafile> -n <nessusfile>')
        sys.exit(2)
    for opt, arg in opts:
        if opt == '-h':
            print('lazyreport.py -a <aurorafile> -n <nessusfile>')
            sys.exit()
        elif opt in ("-a", "--afile"):
            aurorafile = arg
        elif opt in ("-n", "--nfile"):
            nessusfile = arg
    aurora=''
    if aurorafile!='':
        aurora=unzip(aurorafile)#解压文件到当前目录
        if aurora is False:
            print(aurorafile+':文件不是极光扫描报告标准导出文件')
            shutil.rmtree(aurorafile[:-4]) # 移除相关文件目录
        else:
            print(aurora)
            getaurora(aurora)
            shutil.rmtree(aurorafile[:-4]) # 移除相关文件目录
    if nessusfile!='':
        htmltext=open(nessusfile,'r',encoding='utf-8').read()
        html=etree.HTML(htmltext)
        vultype=html.xpath('//*[@id="report"]/div[3]/ul/li/a/text()')[0]
        if 'Vulnerabilities by Plugin' not in vultype:
            print(aurorafile+':文件不是nessus报告标准导出文件')
        else:
            getnessus(nessusfile)
            if len(vuldata)==0:
                print('\n\n=========================恭喜!本次扫描结果无漏洞信息=========================')
    excelreport(aurorafile[5:-15])
    if aurorafile!='' and nessusfile!='':
        print('\n\n=========================漏洞收集完成=========================')

def auto():# 自动化目录生成报告
    print('自动化生成报告中...')
    checkfile()
    for name in auroranames:
        getaurora(name)
        shutil.rmtree(name) # 移除相关文件目录
    for name in nessusnames:
        getnessus(name)
    # 生成报告内容
    try:
        excelreport(auroranames[0][5:-15])
    except:
        excelreport(nessusnames[0])
    if len(auroranames)==0 and len(nessusnames)==0:
        print('\n\n=========================没有发现漏洞文件=========================')
    else:
        print('\n\n=========================漏洞收集完成=========================')
        if len(vuldata)==0:
            print('\n\n=========================恭喜!本次扫描结果无漏洞信息=========================')

# 序号	    危险程度	 漏洞名称	  影响IP	 端口	    漏洞描述        解决
# serials    levels      vulnames     ips        ports     descripts      solves

# 接受两个参数 sysargv 绿盟报告文件夹,nessus报告plugin文件
if __name__ == "__main__":
    print(showlogo())
    if '--auto' in sys.argv:
        auto()
    else:
        manual(sys.argv[1:])